***
title: SIP integration with Telnyx
slug: sip-with-telnyx
---------------------
For clean Markdown of any page, append .md to the page URL. For a complete documentation index, see https://docs.synthflow.ai/llms.txt. For full documentation content, see https://docs.synthflow.ai/llms-full.txt.
**Note**: SIP trunking is only available on the Synthflow Enterprise Plan.
***
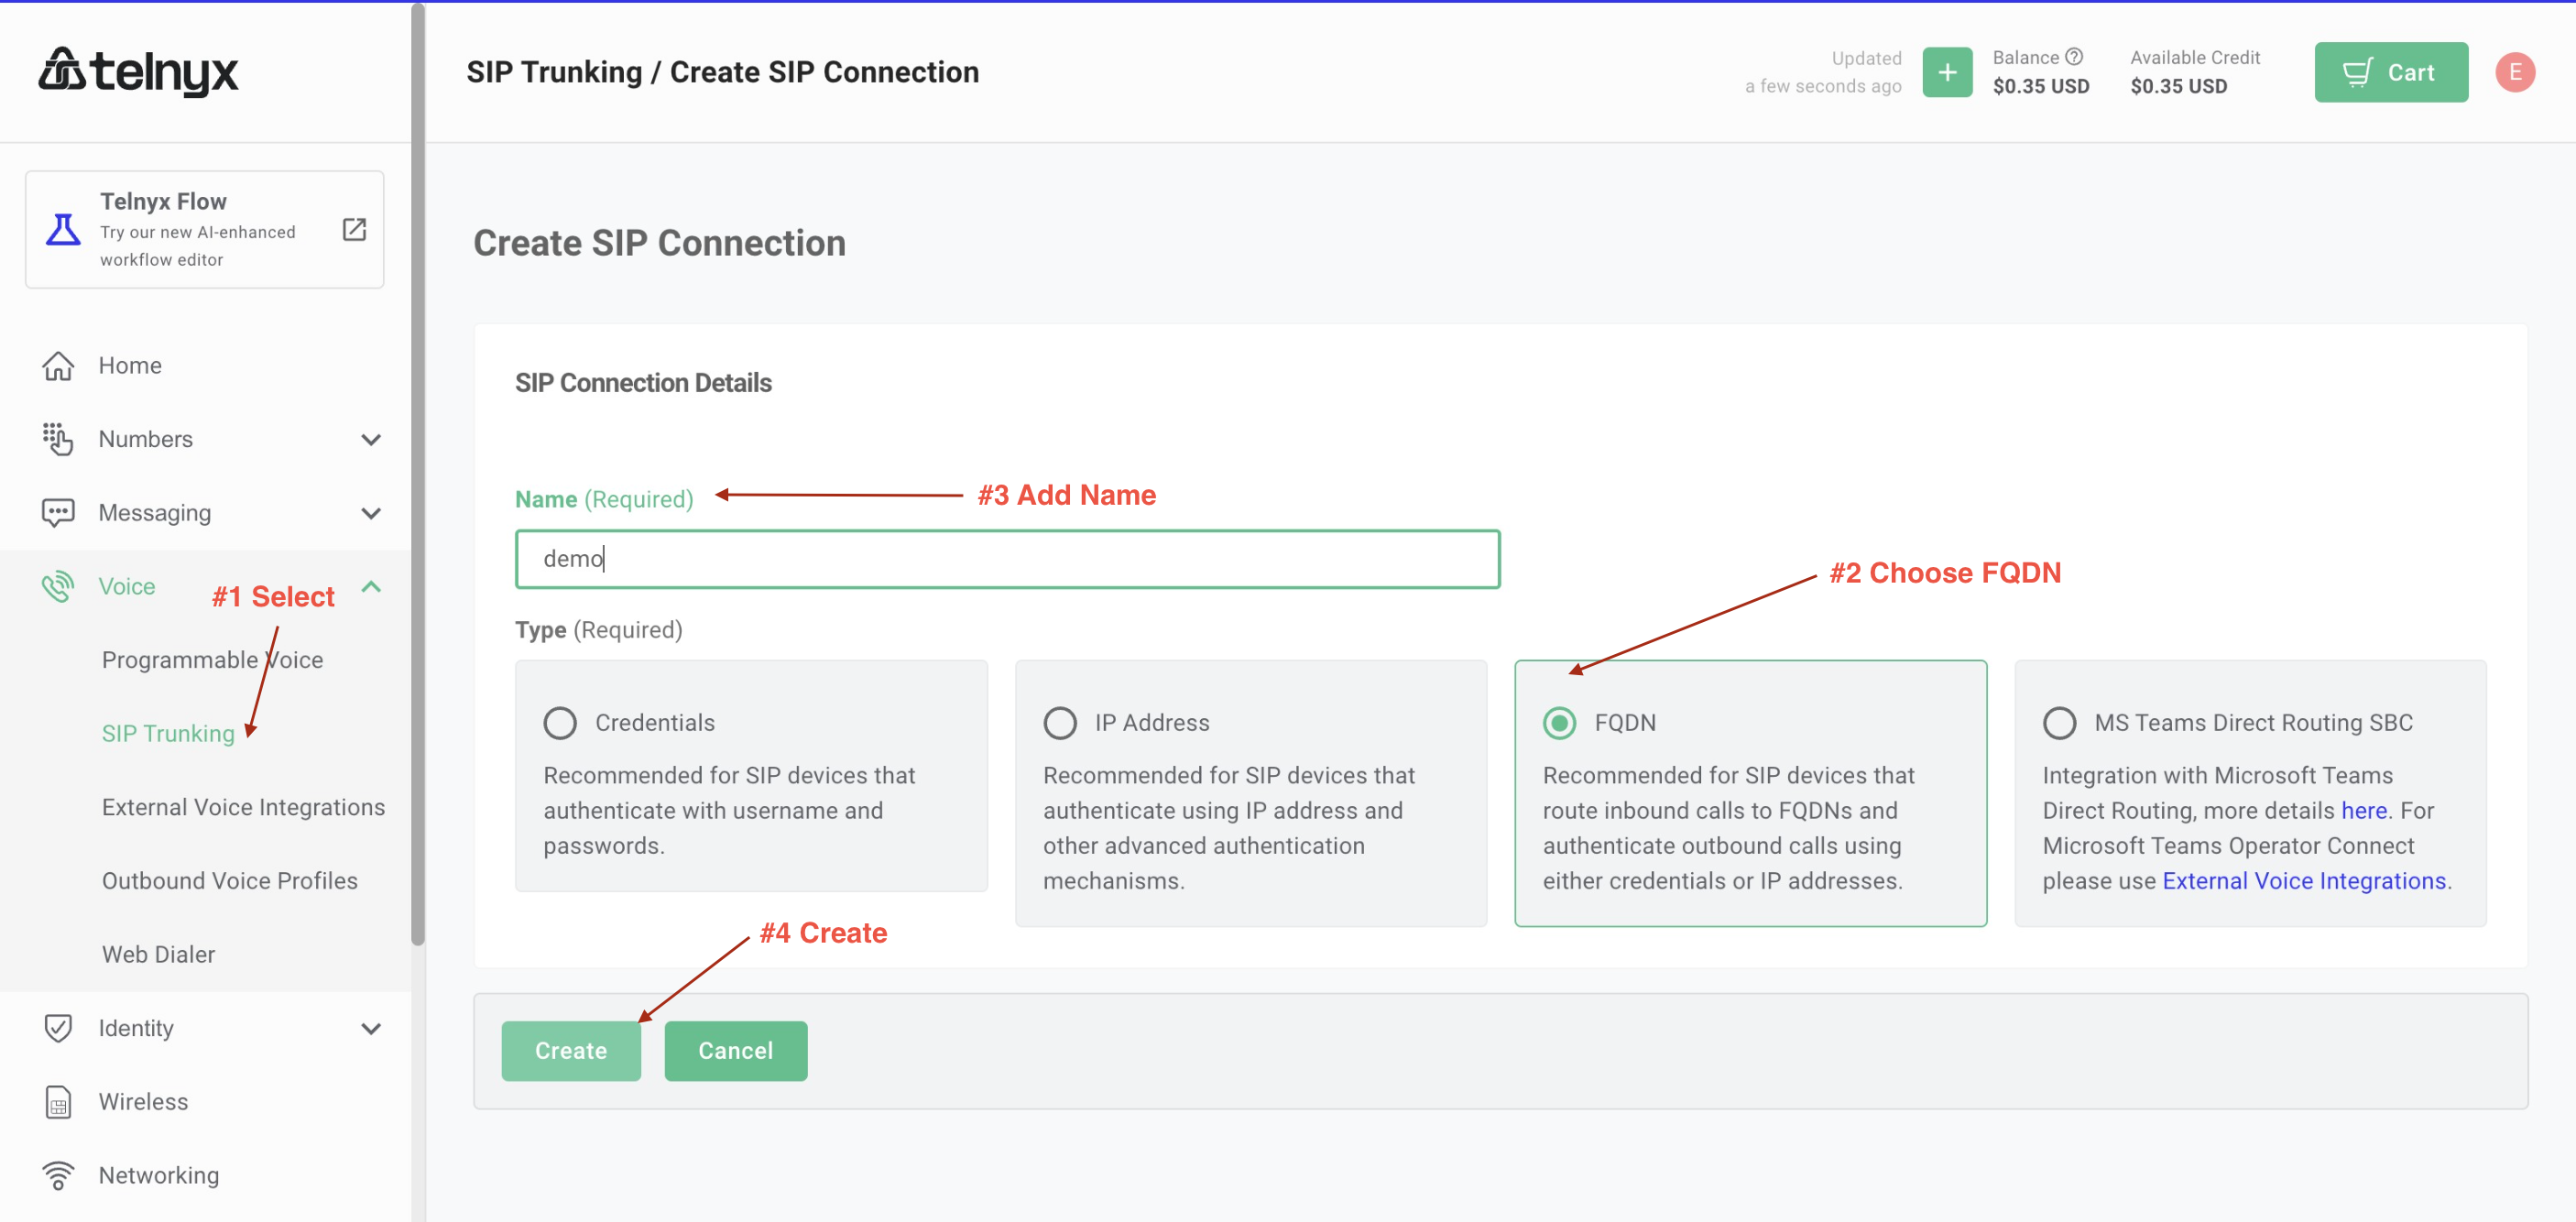
### 1. Setup Telnyx
* **Step #1: Create the SIP trunk:** Create the trunk, select FQDN as the type, and give it a name.
* 
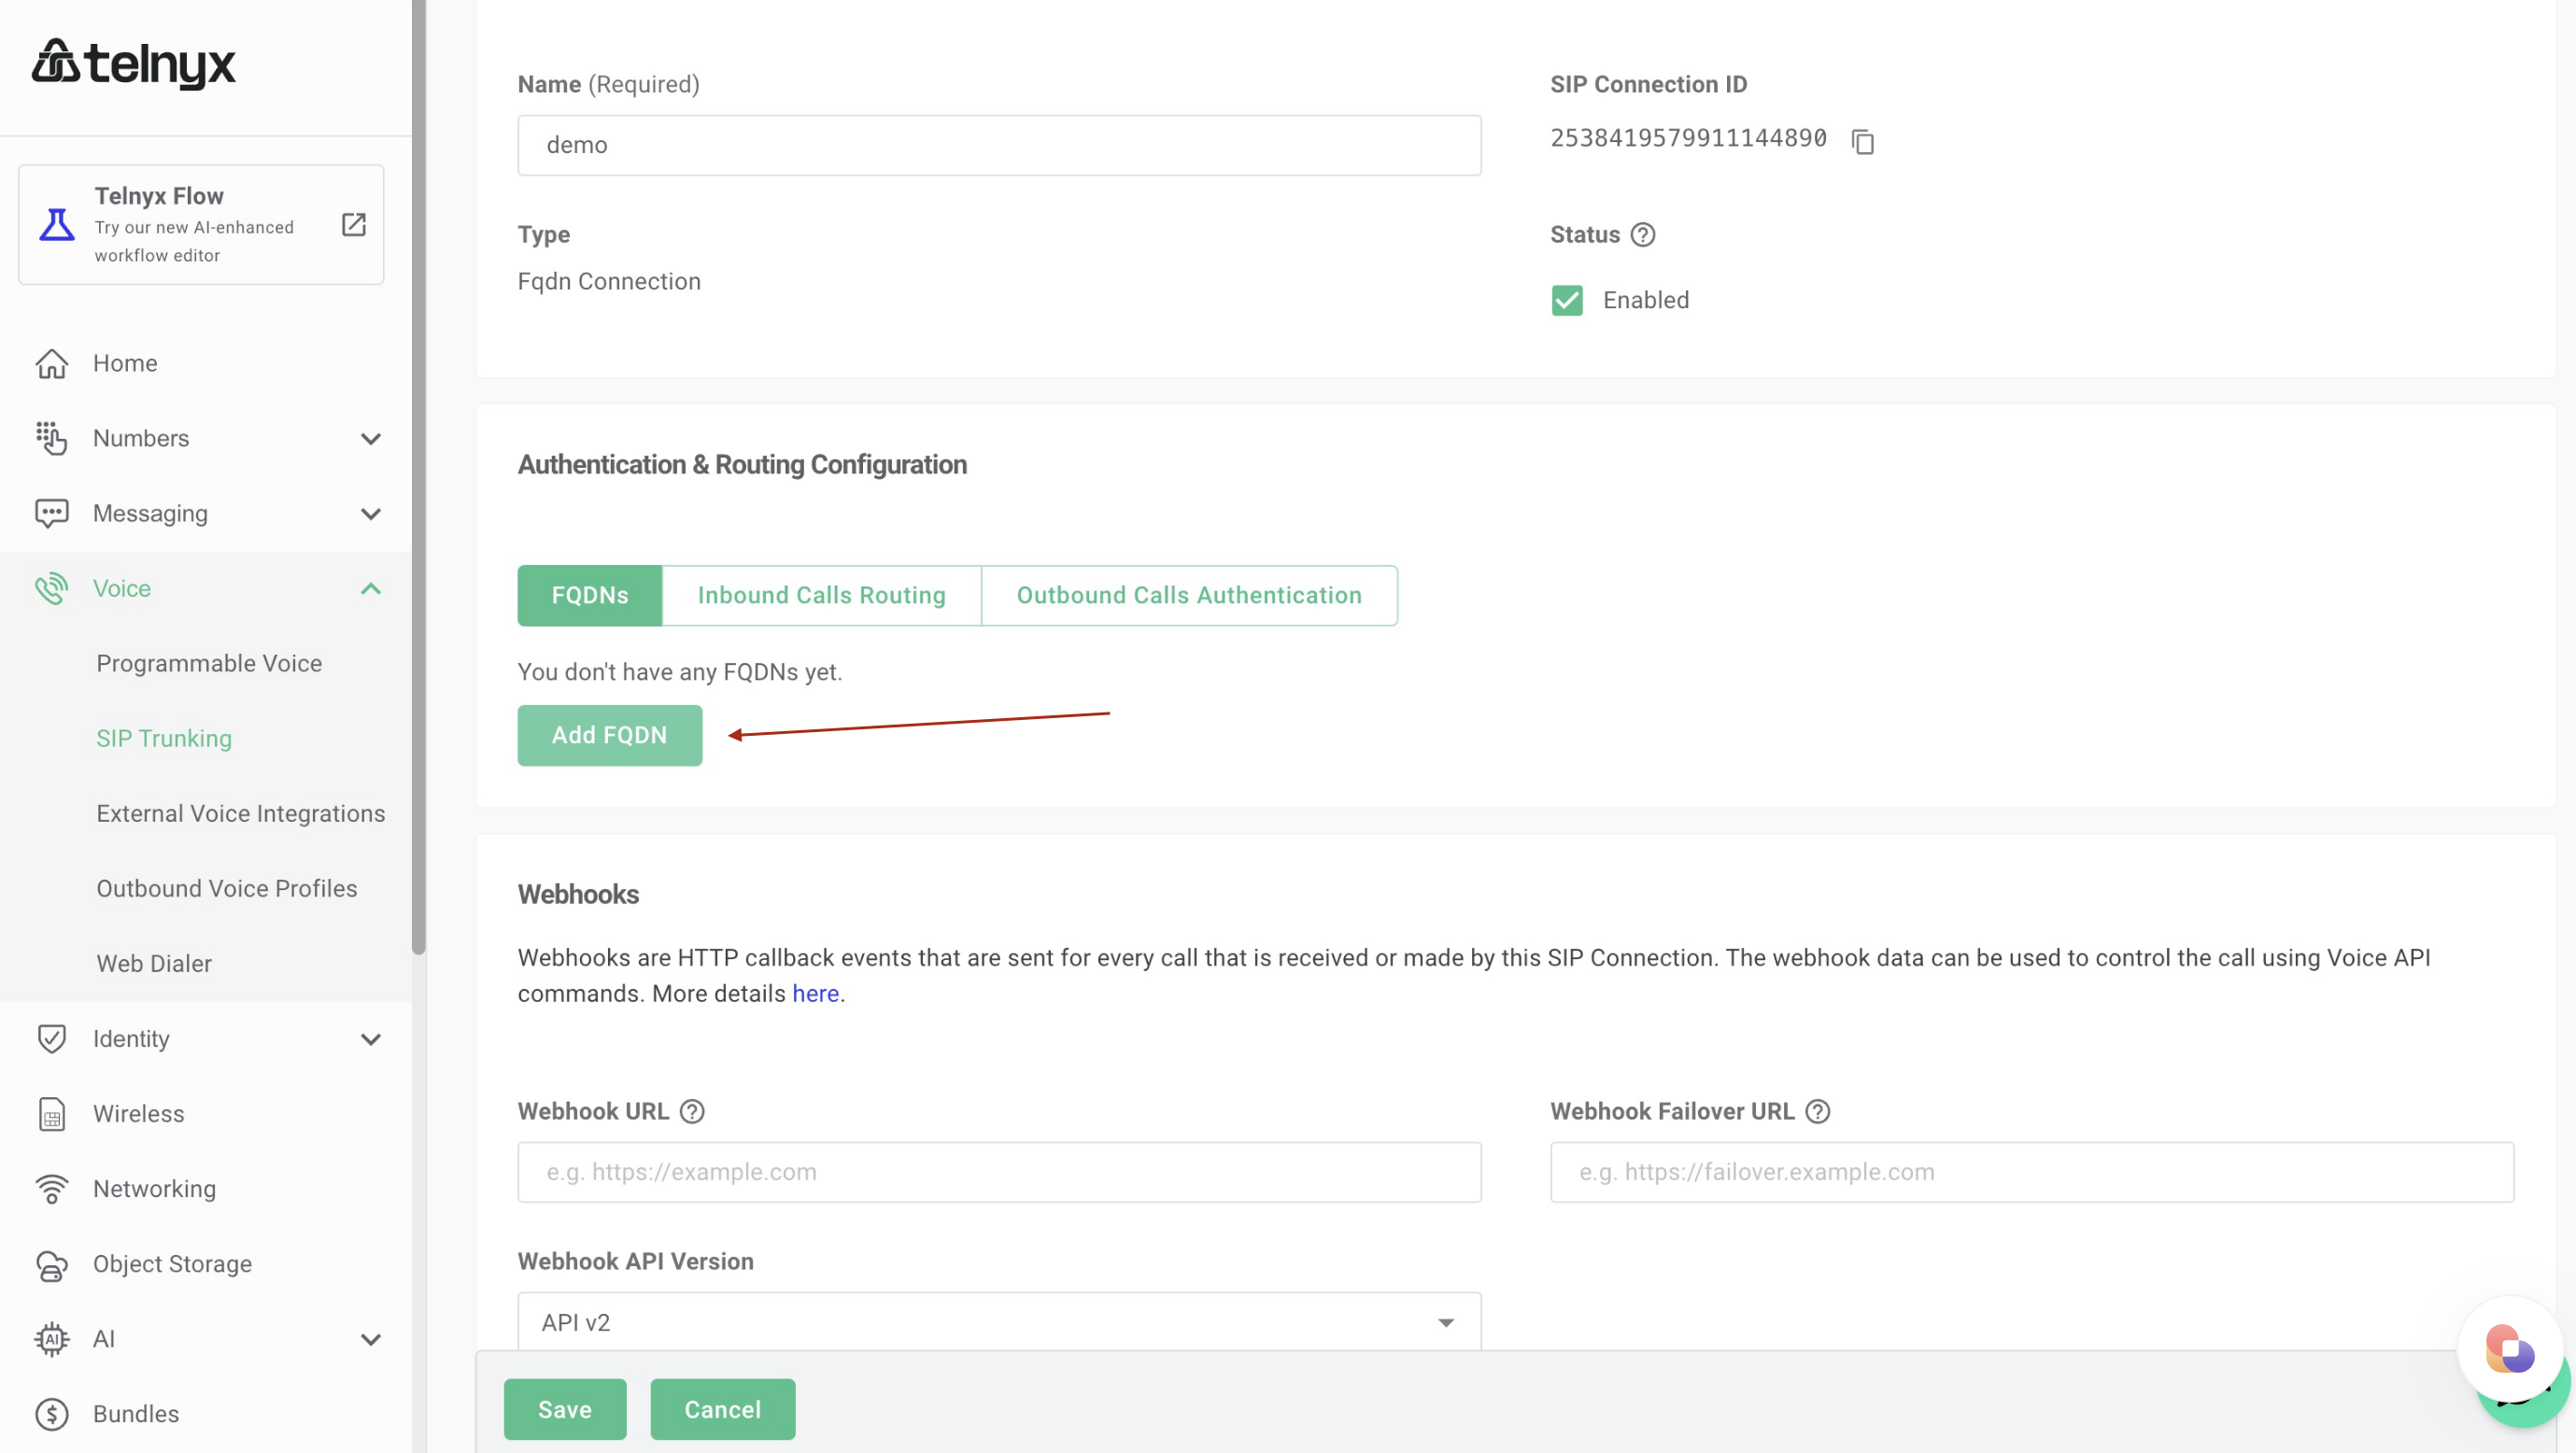
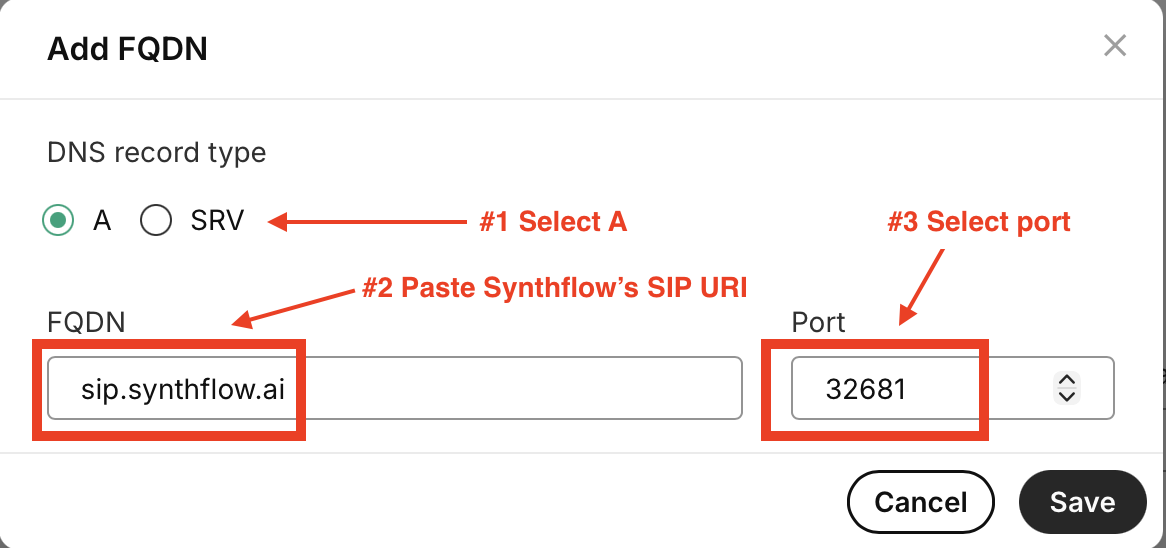
* **Step #2: Add FQDN & Add the FQDN of Synthflow's SIP server:**
* Select `A` as the DNS record type.
* Enter `sip.synthflow.ai` in the FQDN field.
* Enter `32681` in the Port field.
* 
* \*\*Step #3: Setup Authentication for Outbound Calls:\*\*Select credentials as the authentication method, and add the username and password. You will need to use this username and password when importing the number to Synthflow
* 
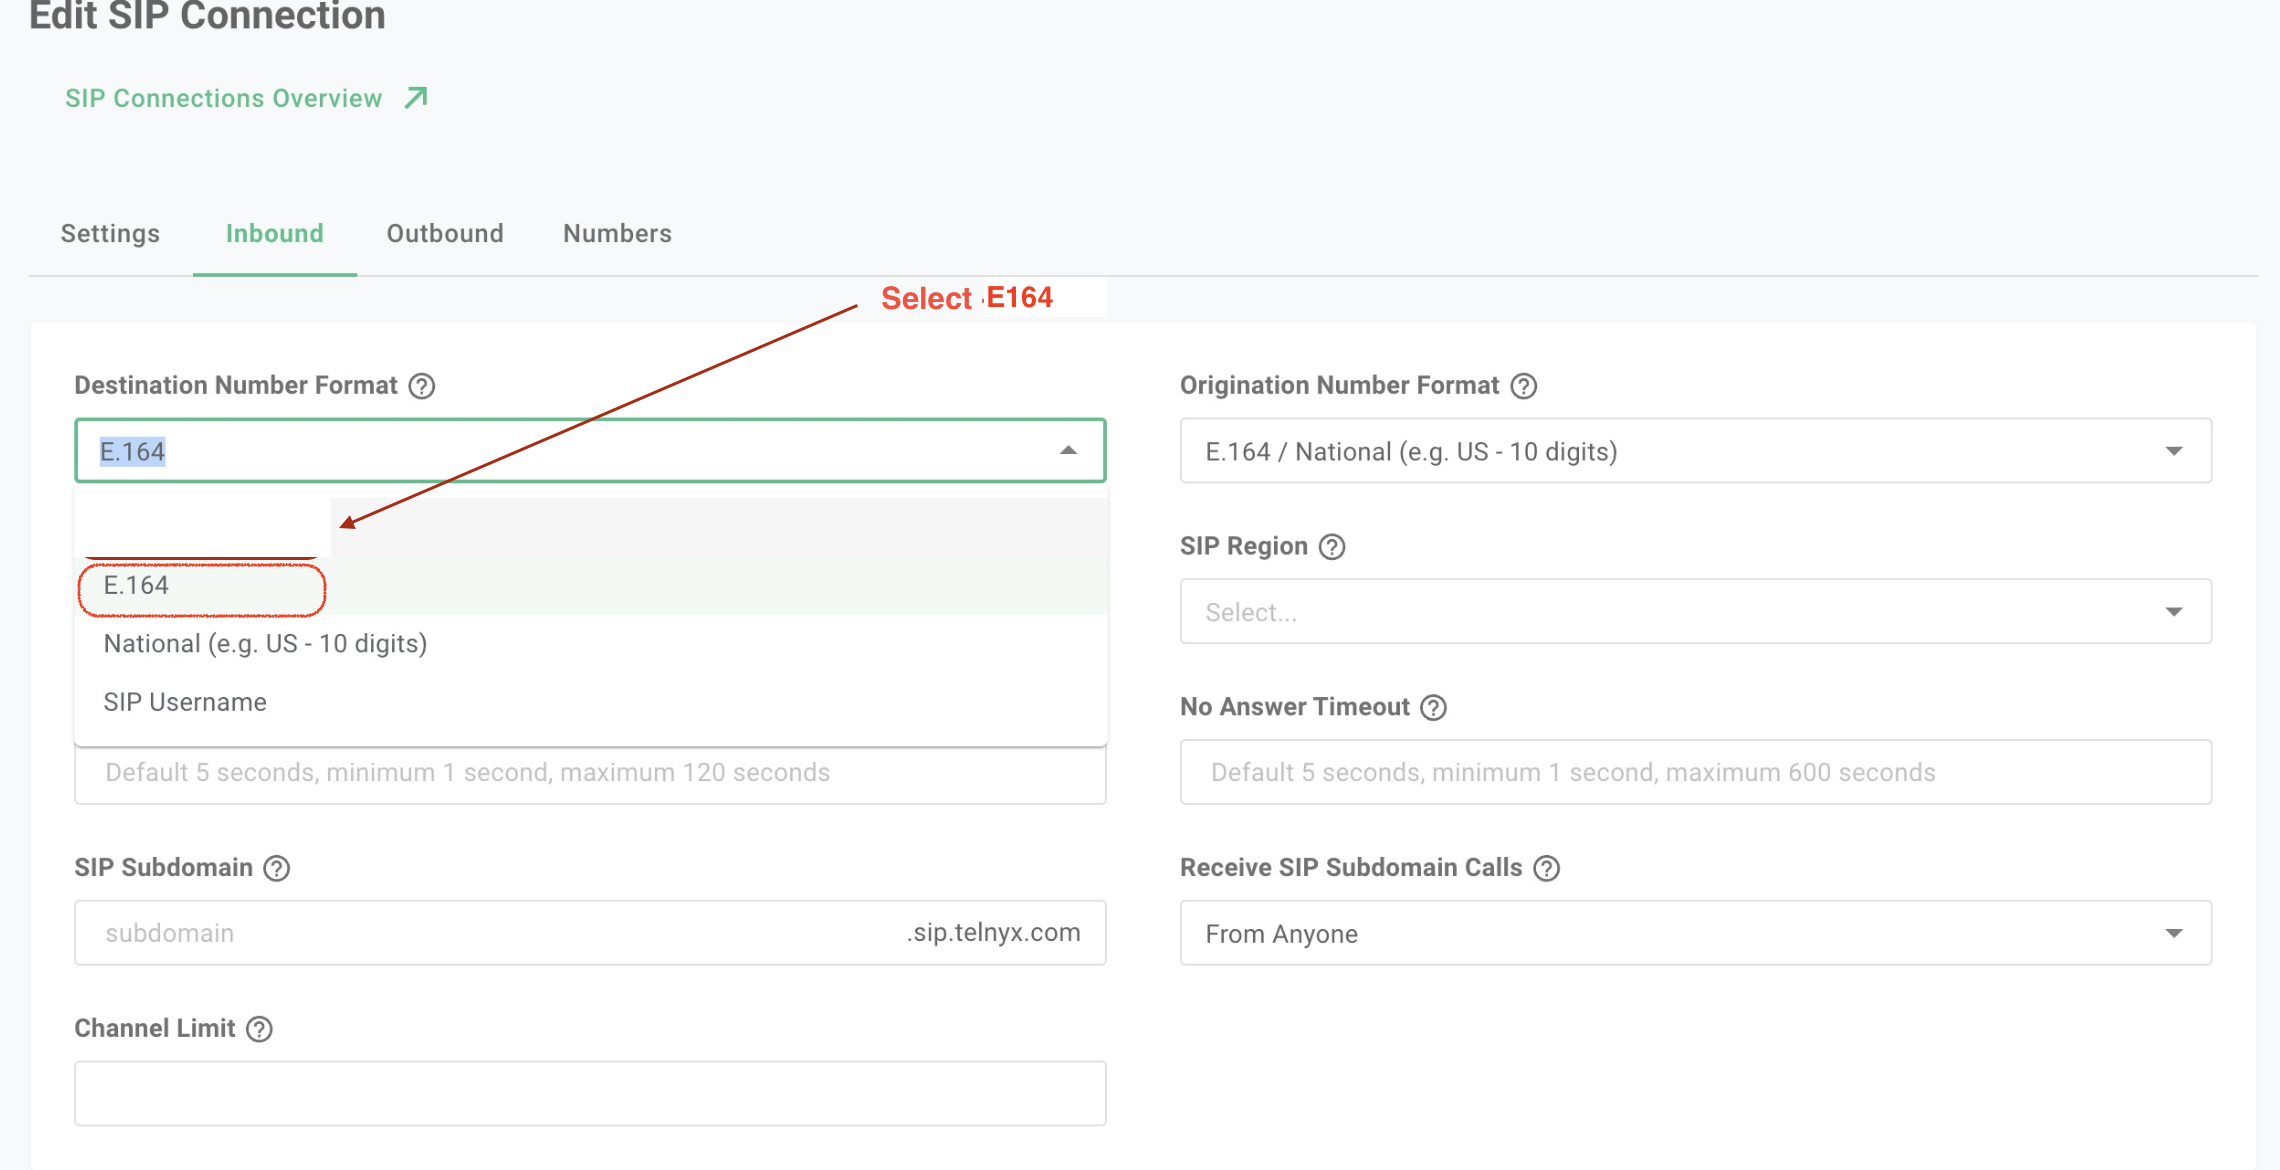
* **Step #4: Setup Settings for Inbound:** Select `+E164` as the number format. Select `G711`and `OPUS` as the codec.
* 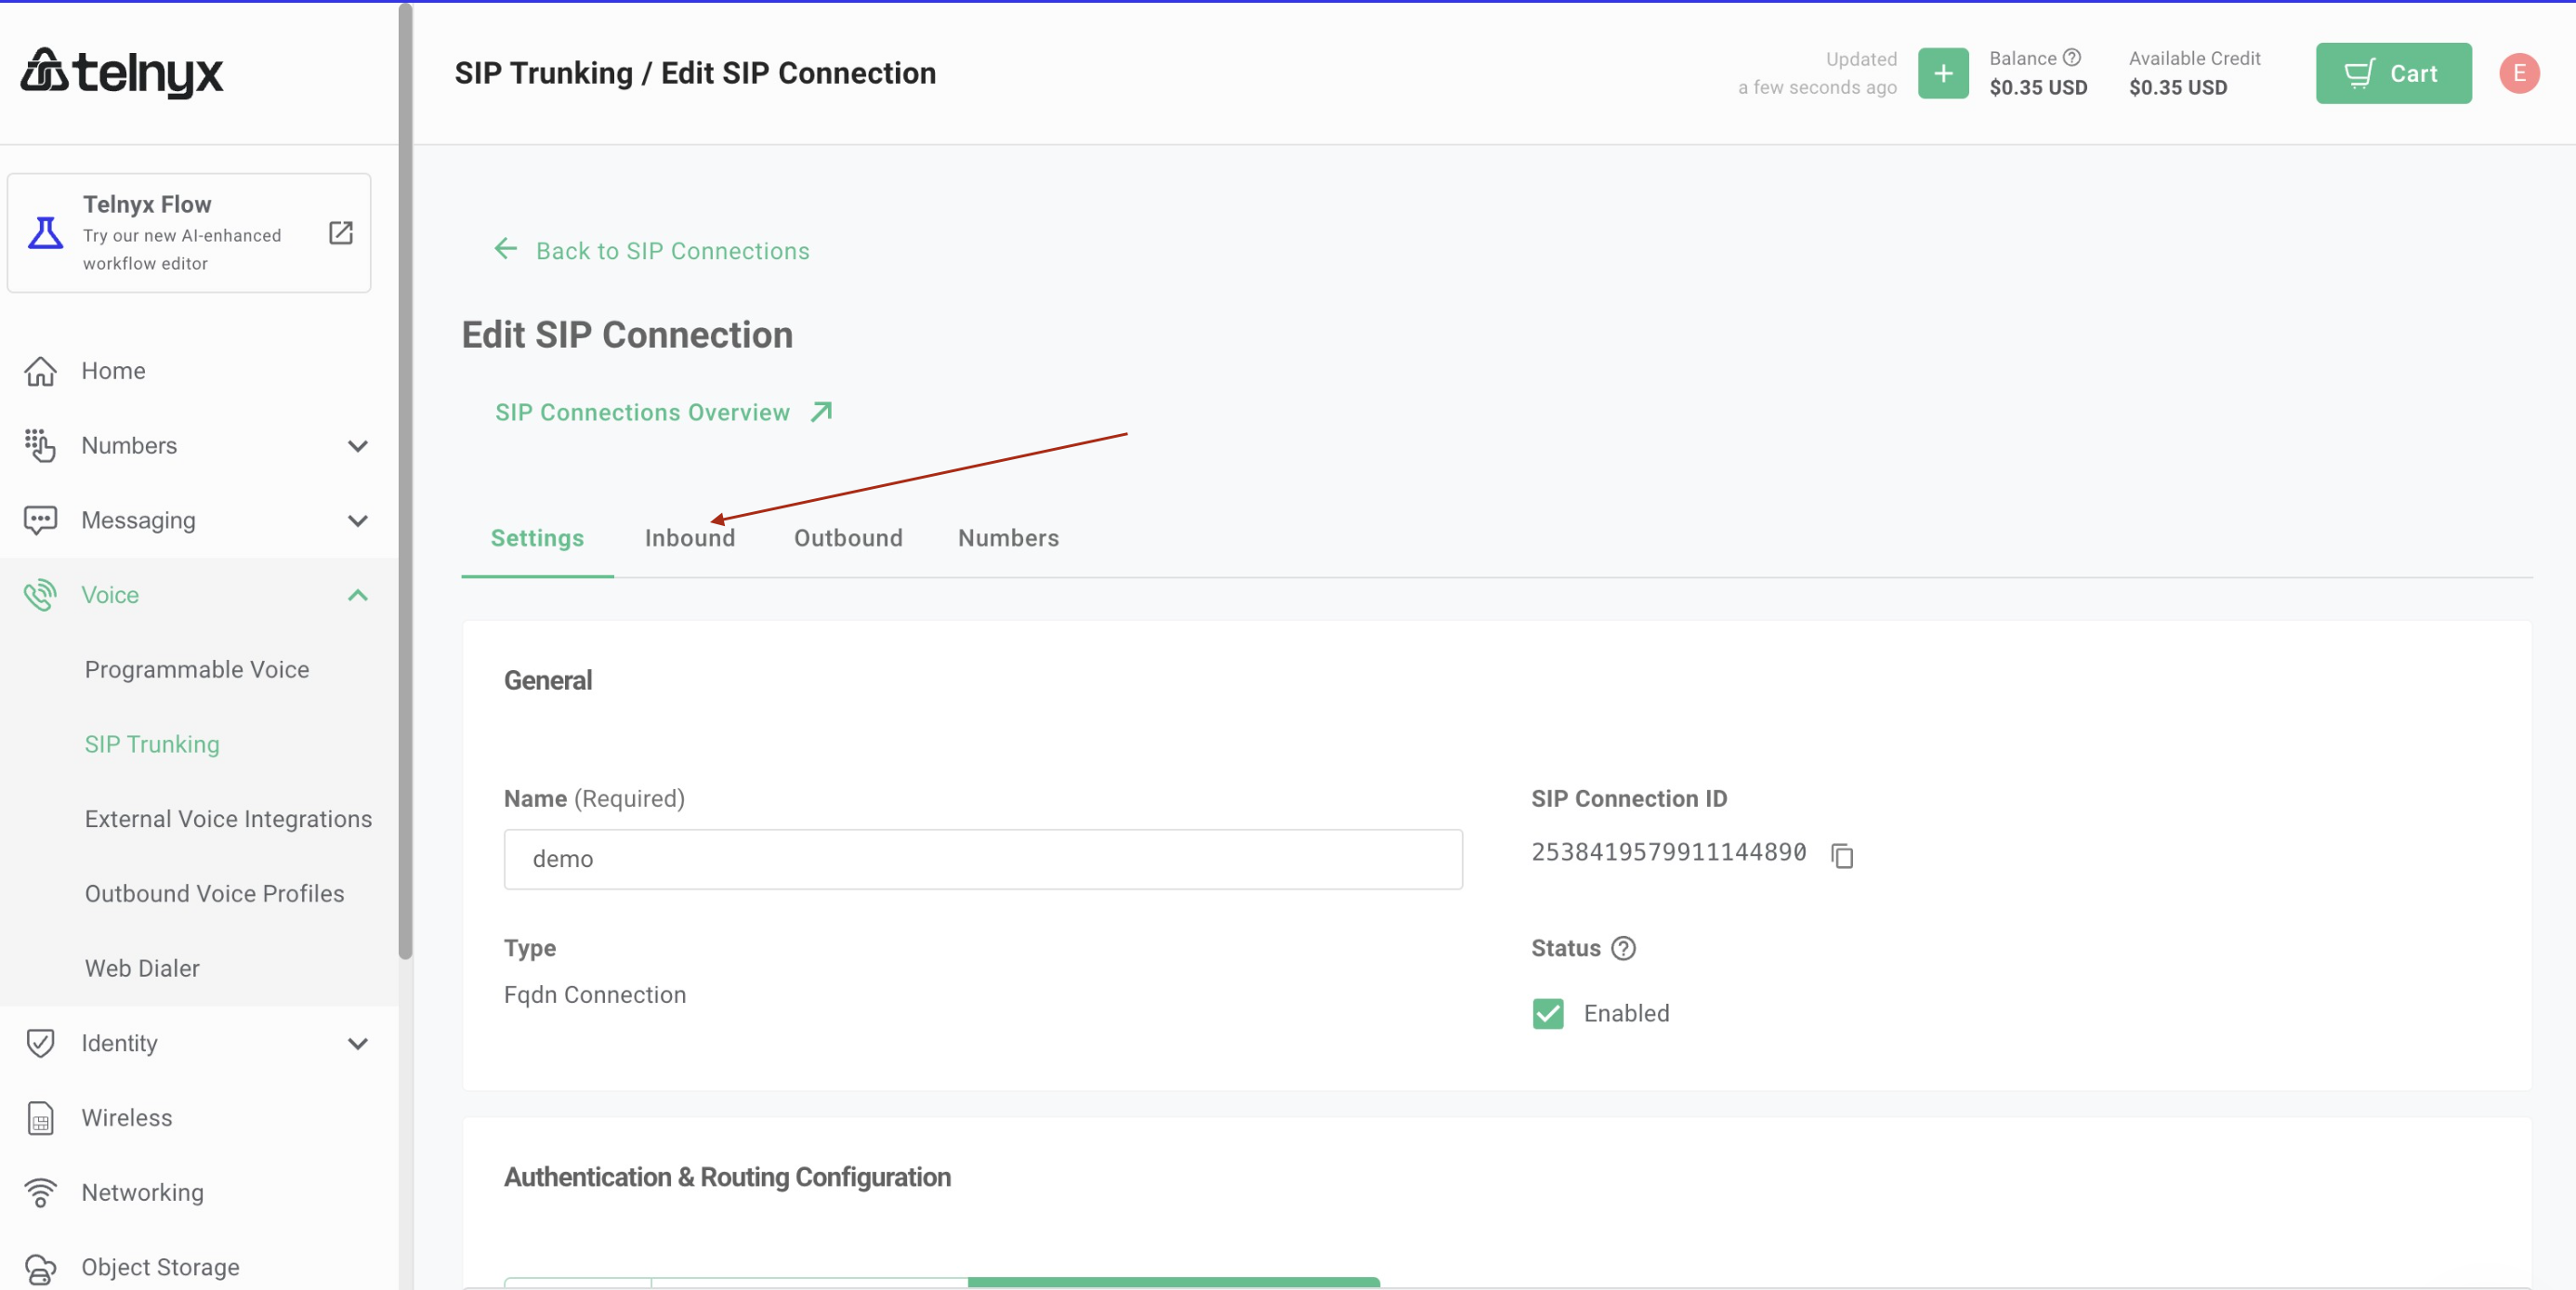
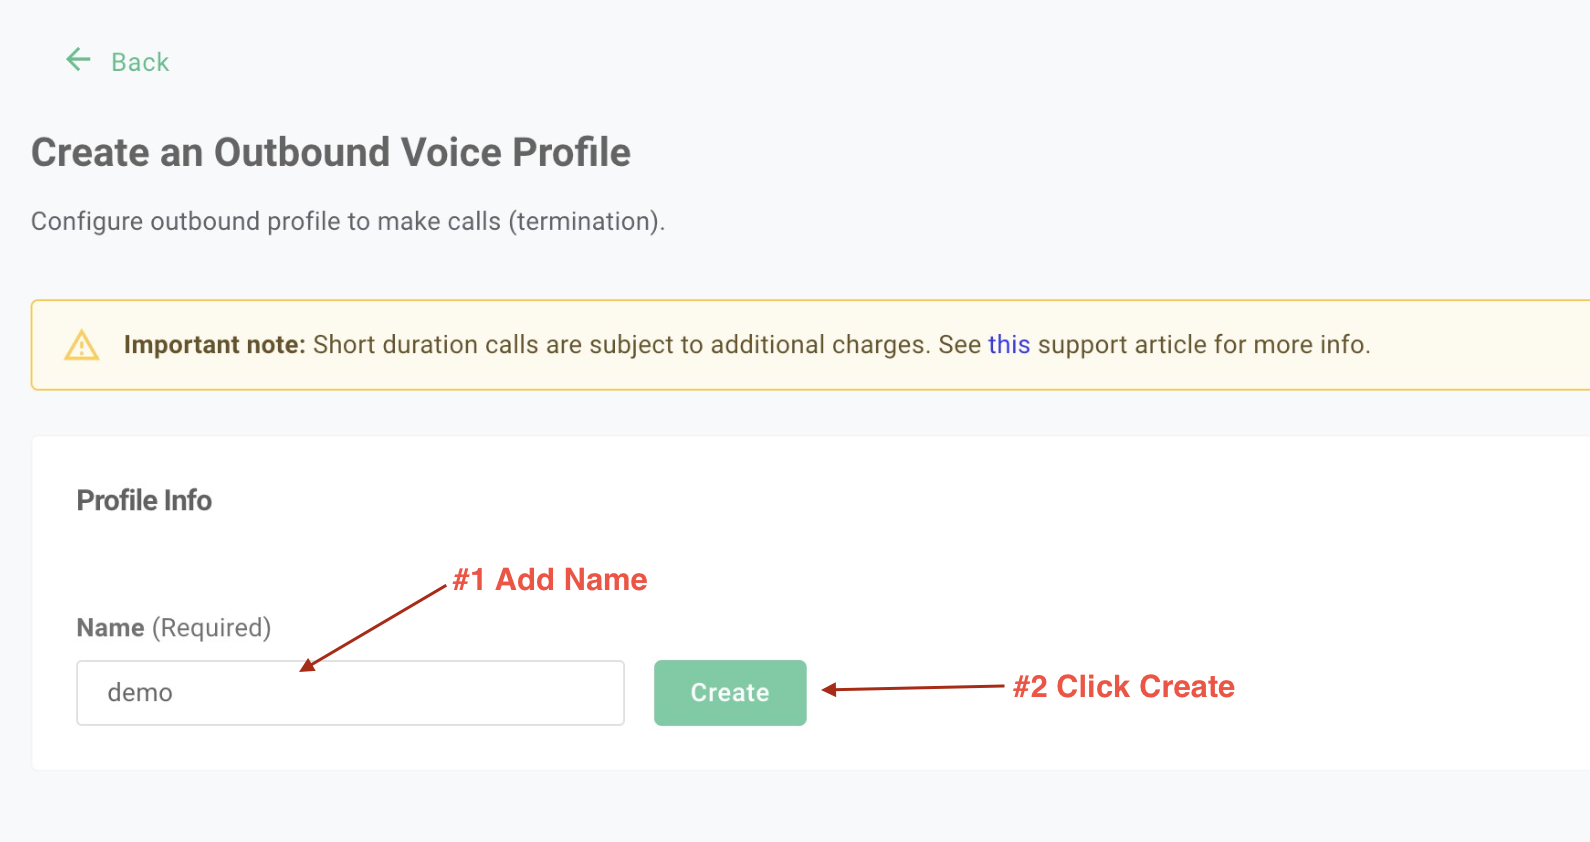
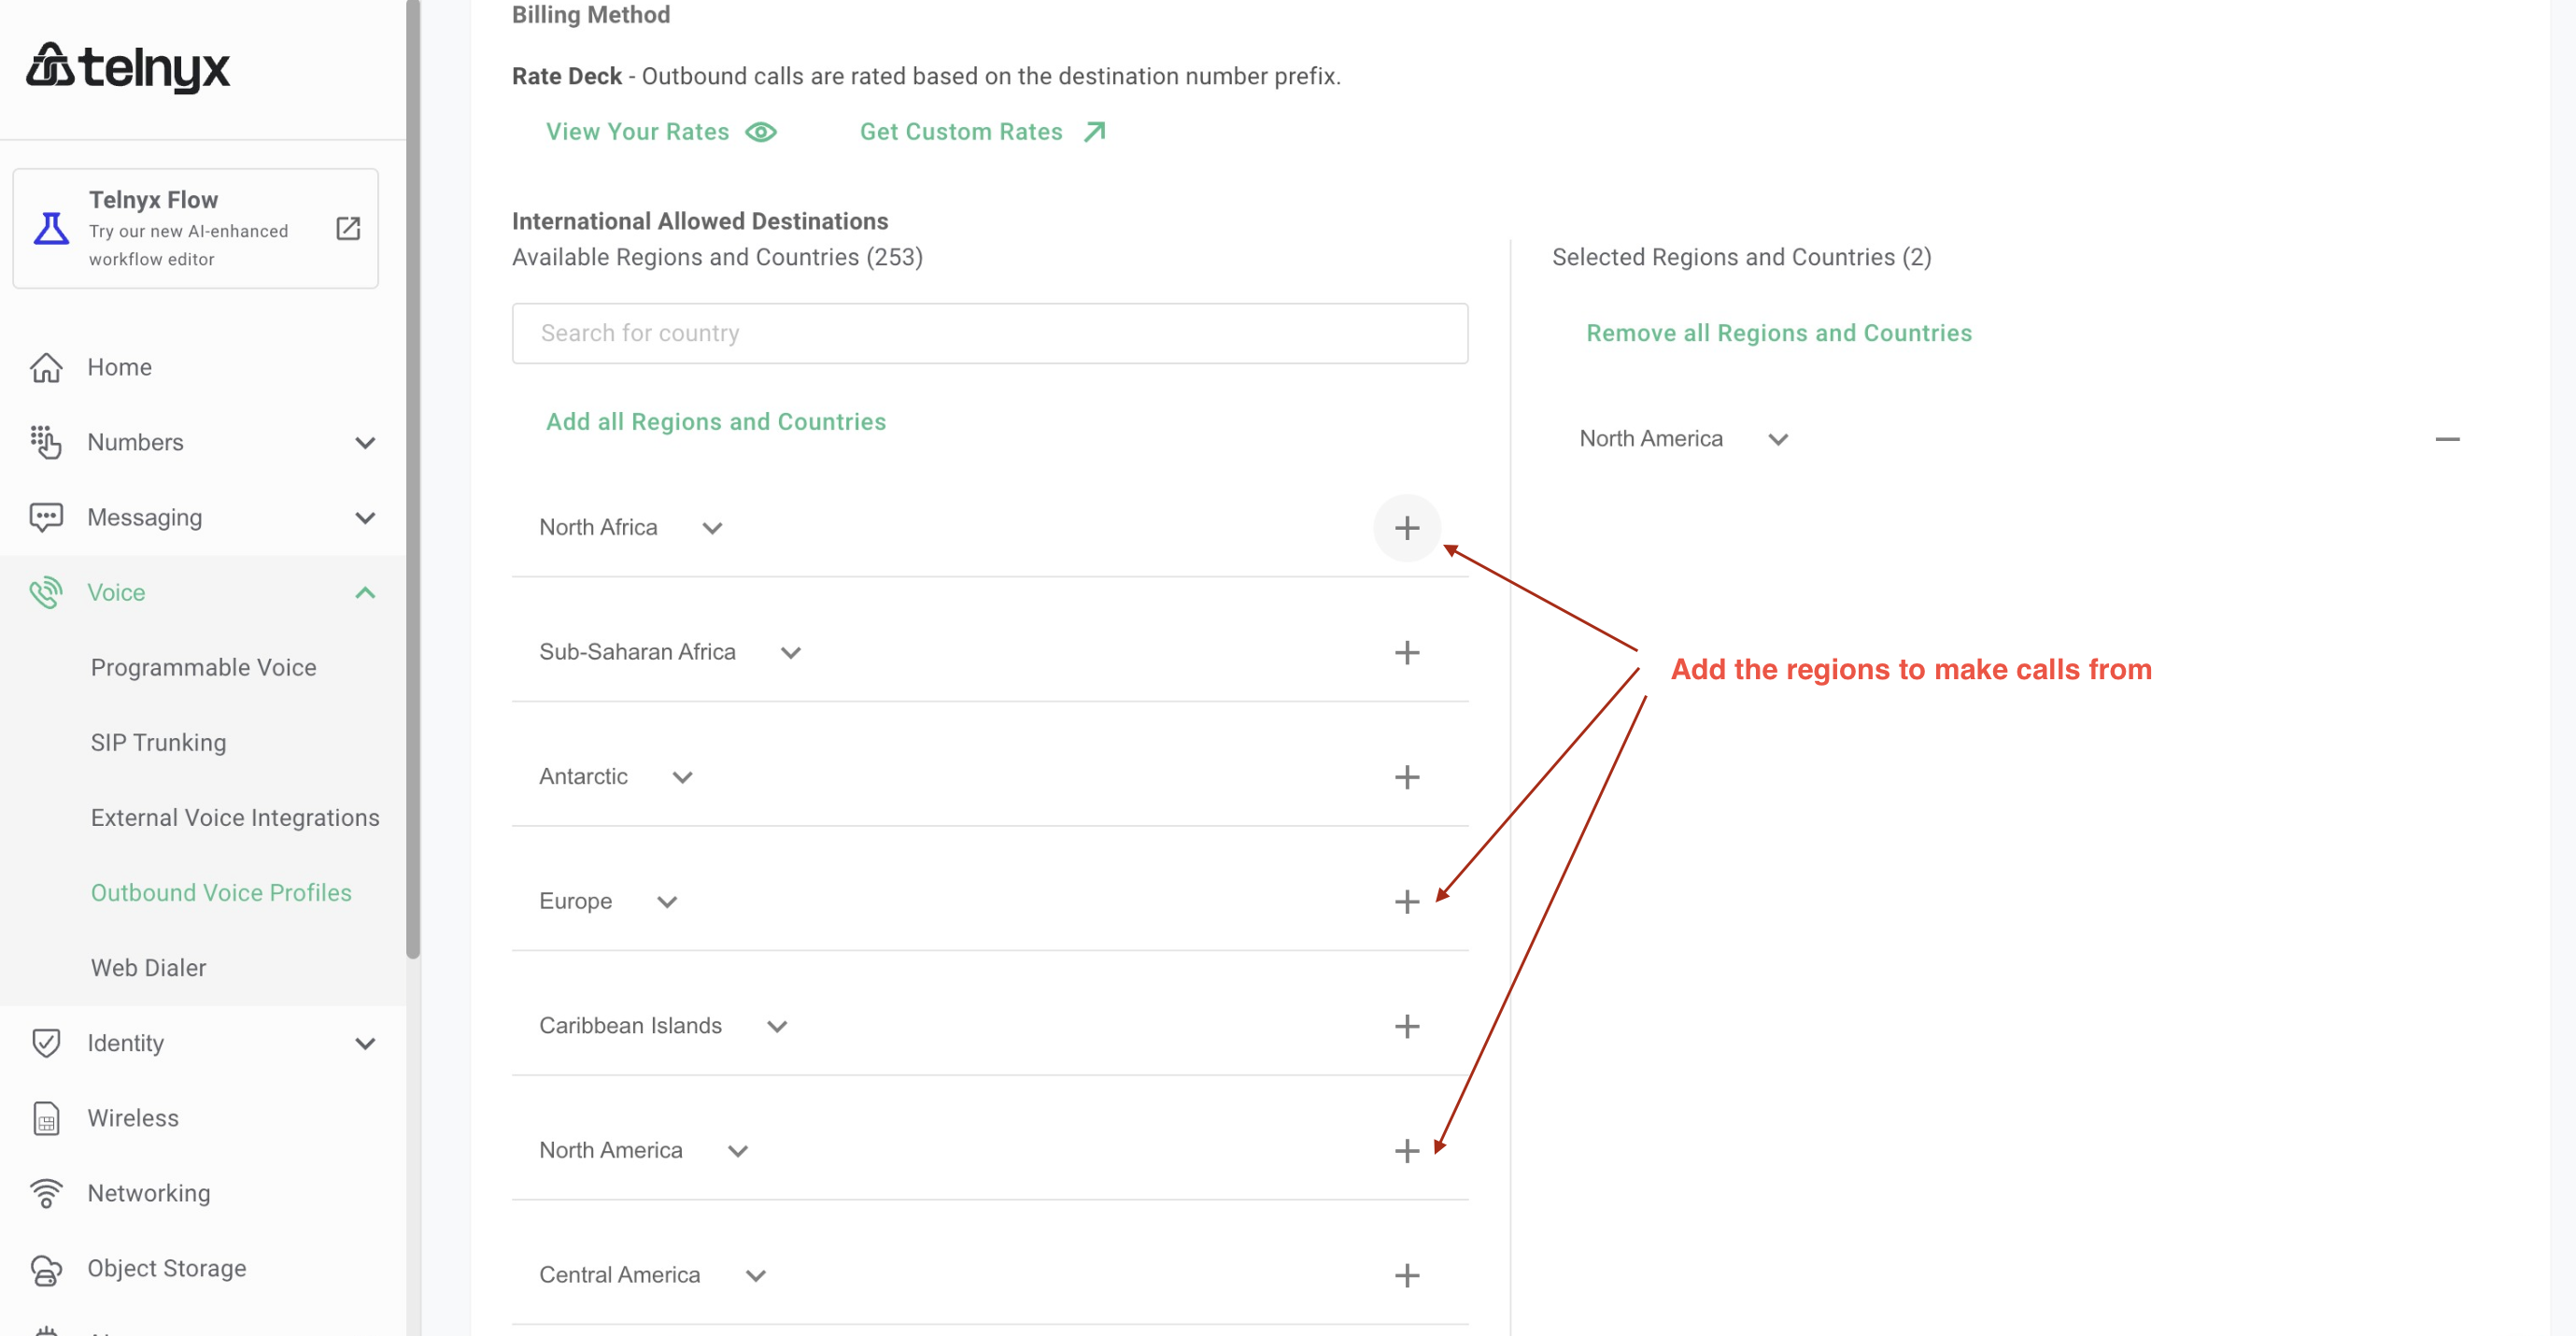
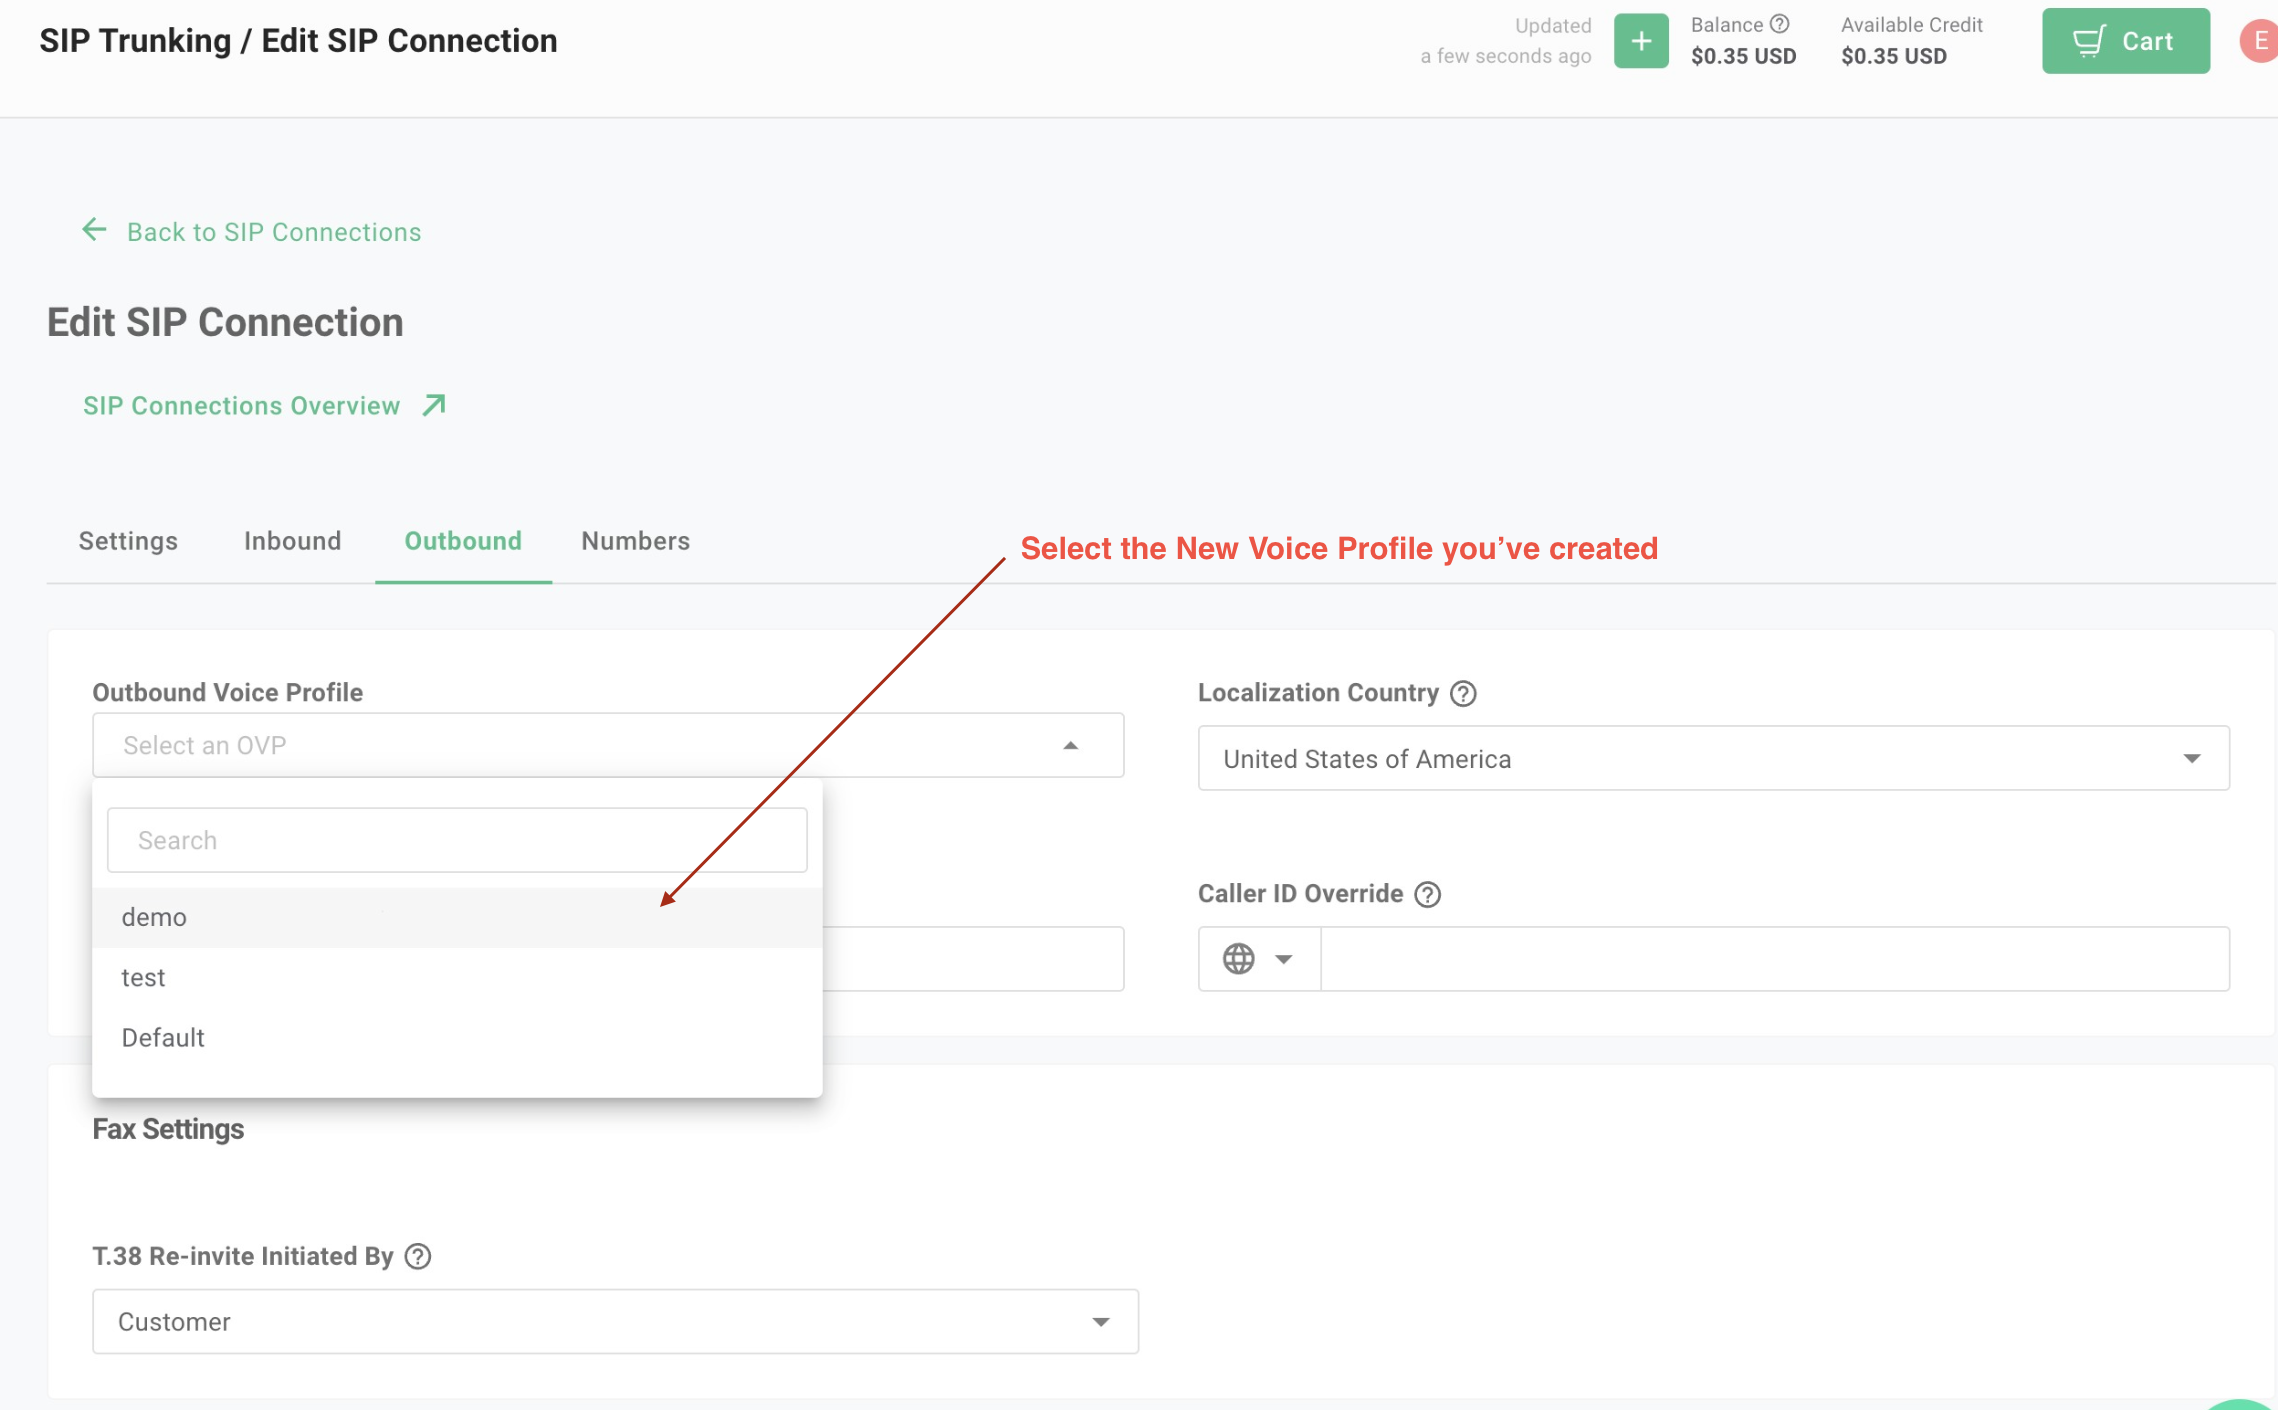
**Step #5: Settings for Outbound:** Create an Outbound Voice Profile. Select your `SIP region`.
* * 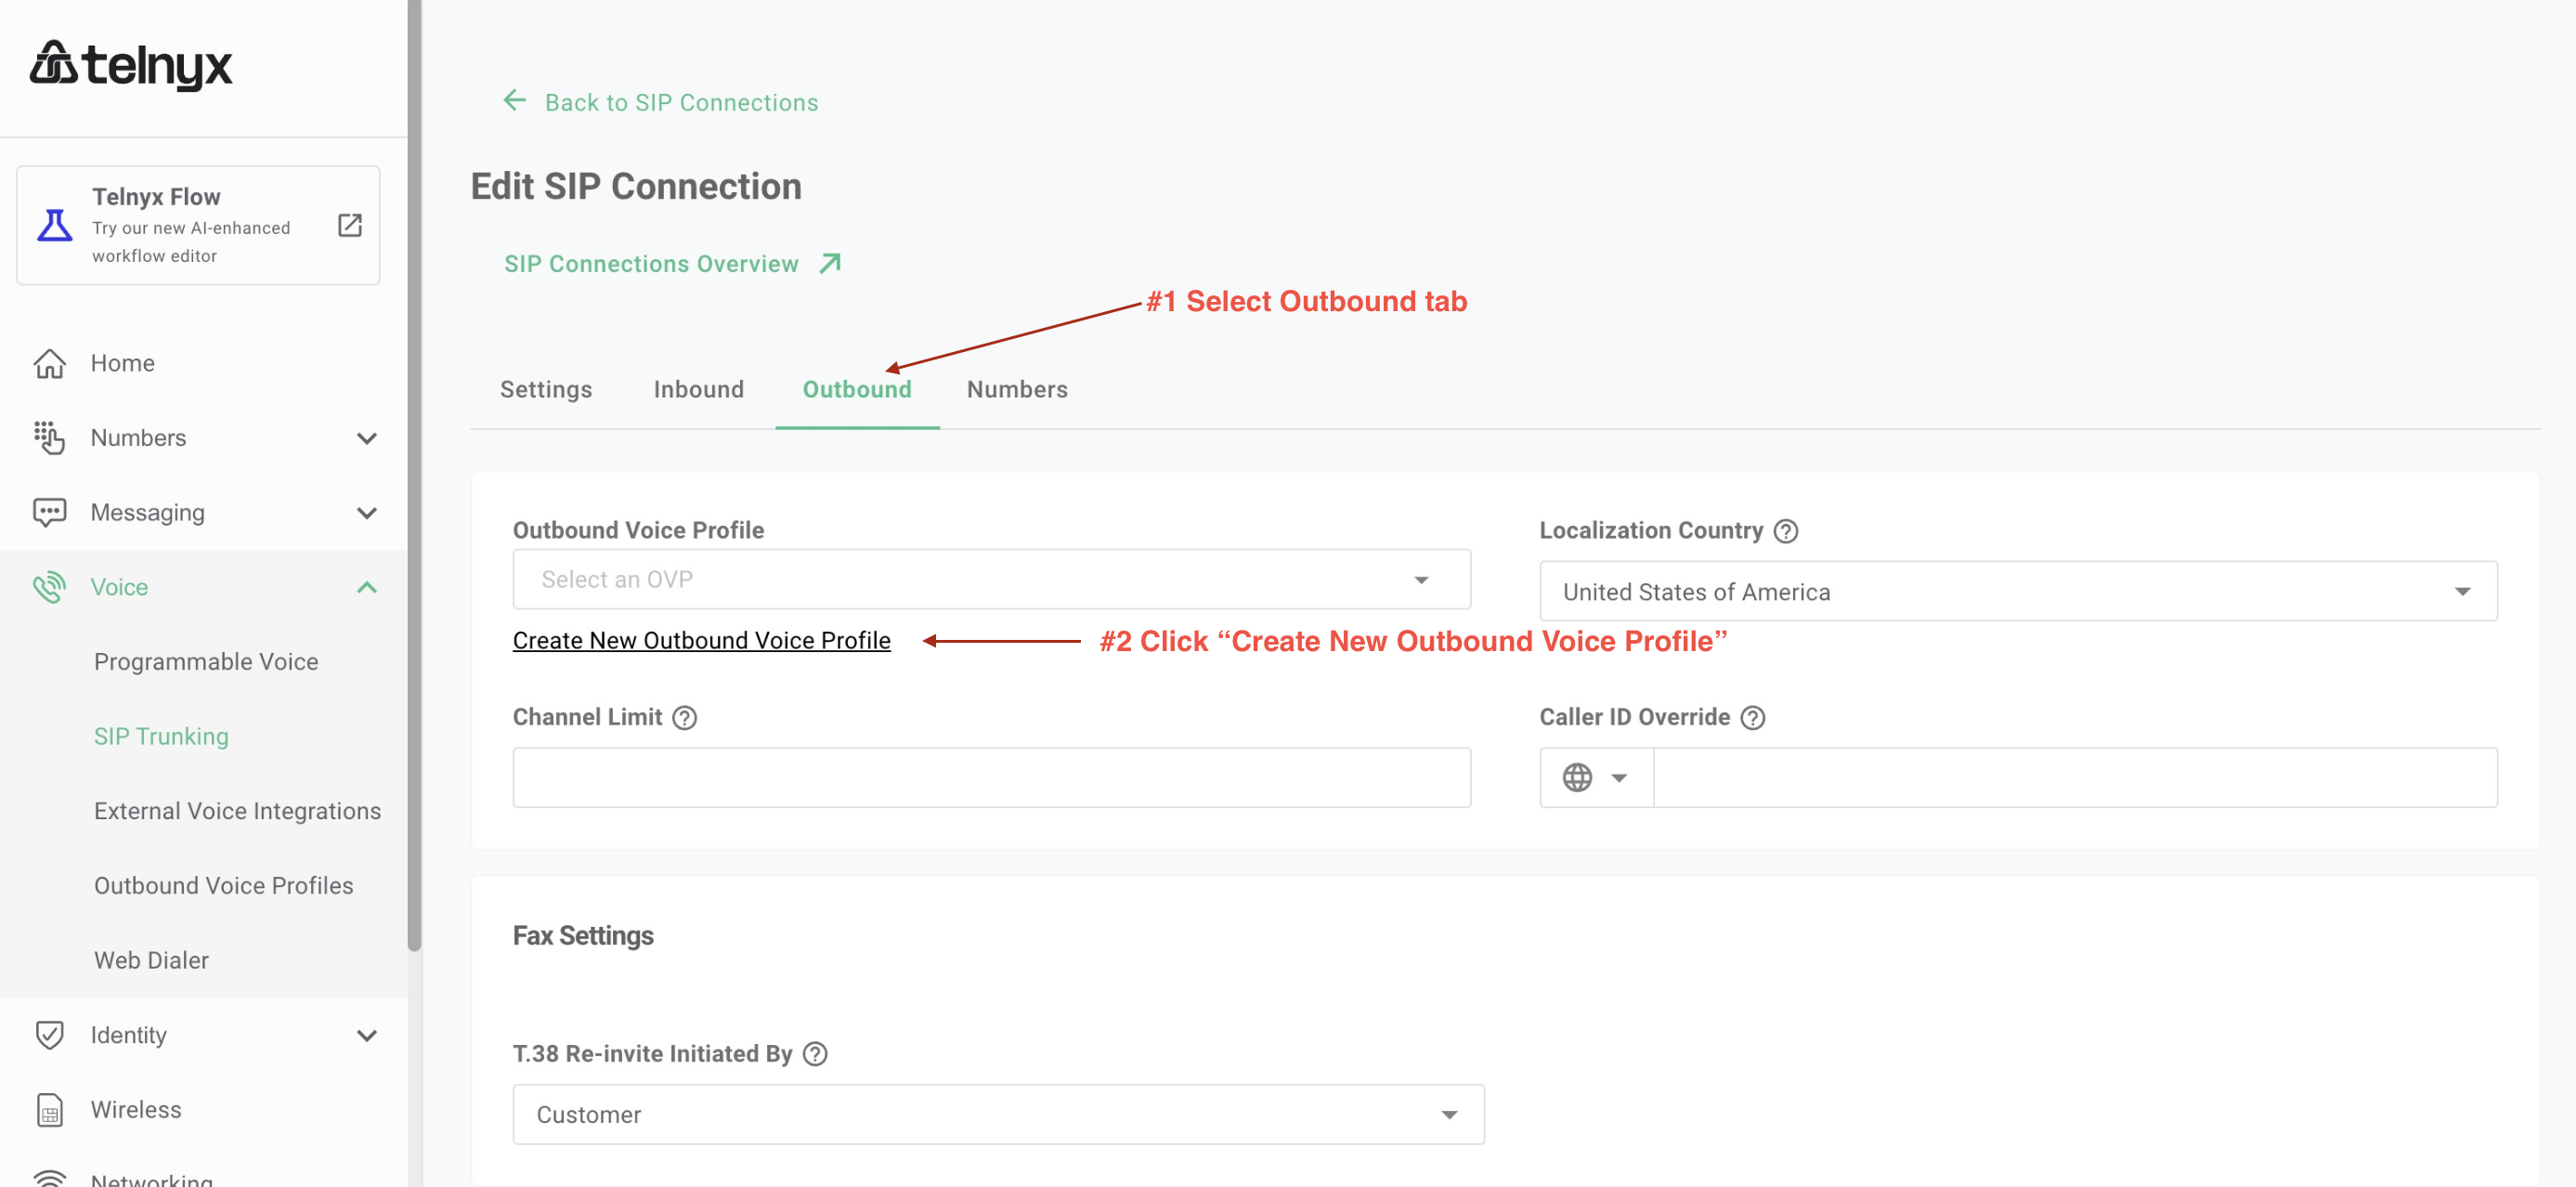
Go back to the new SIP trunk you've created, select the Outbound tab, and now Select the new voice Profile you have created
* 
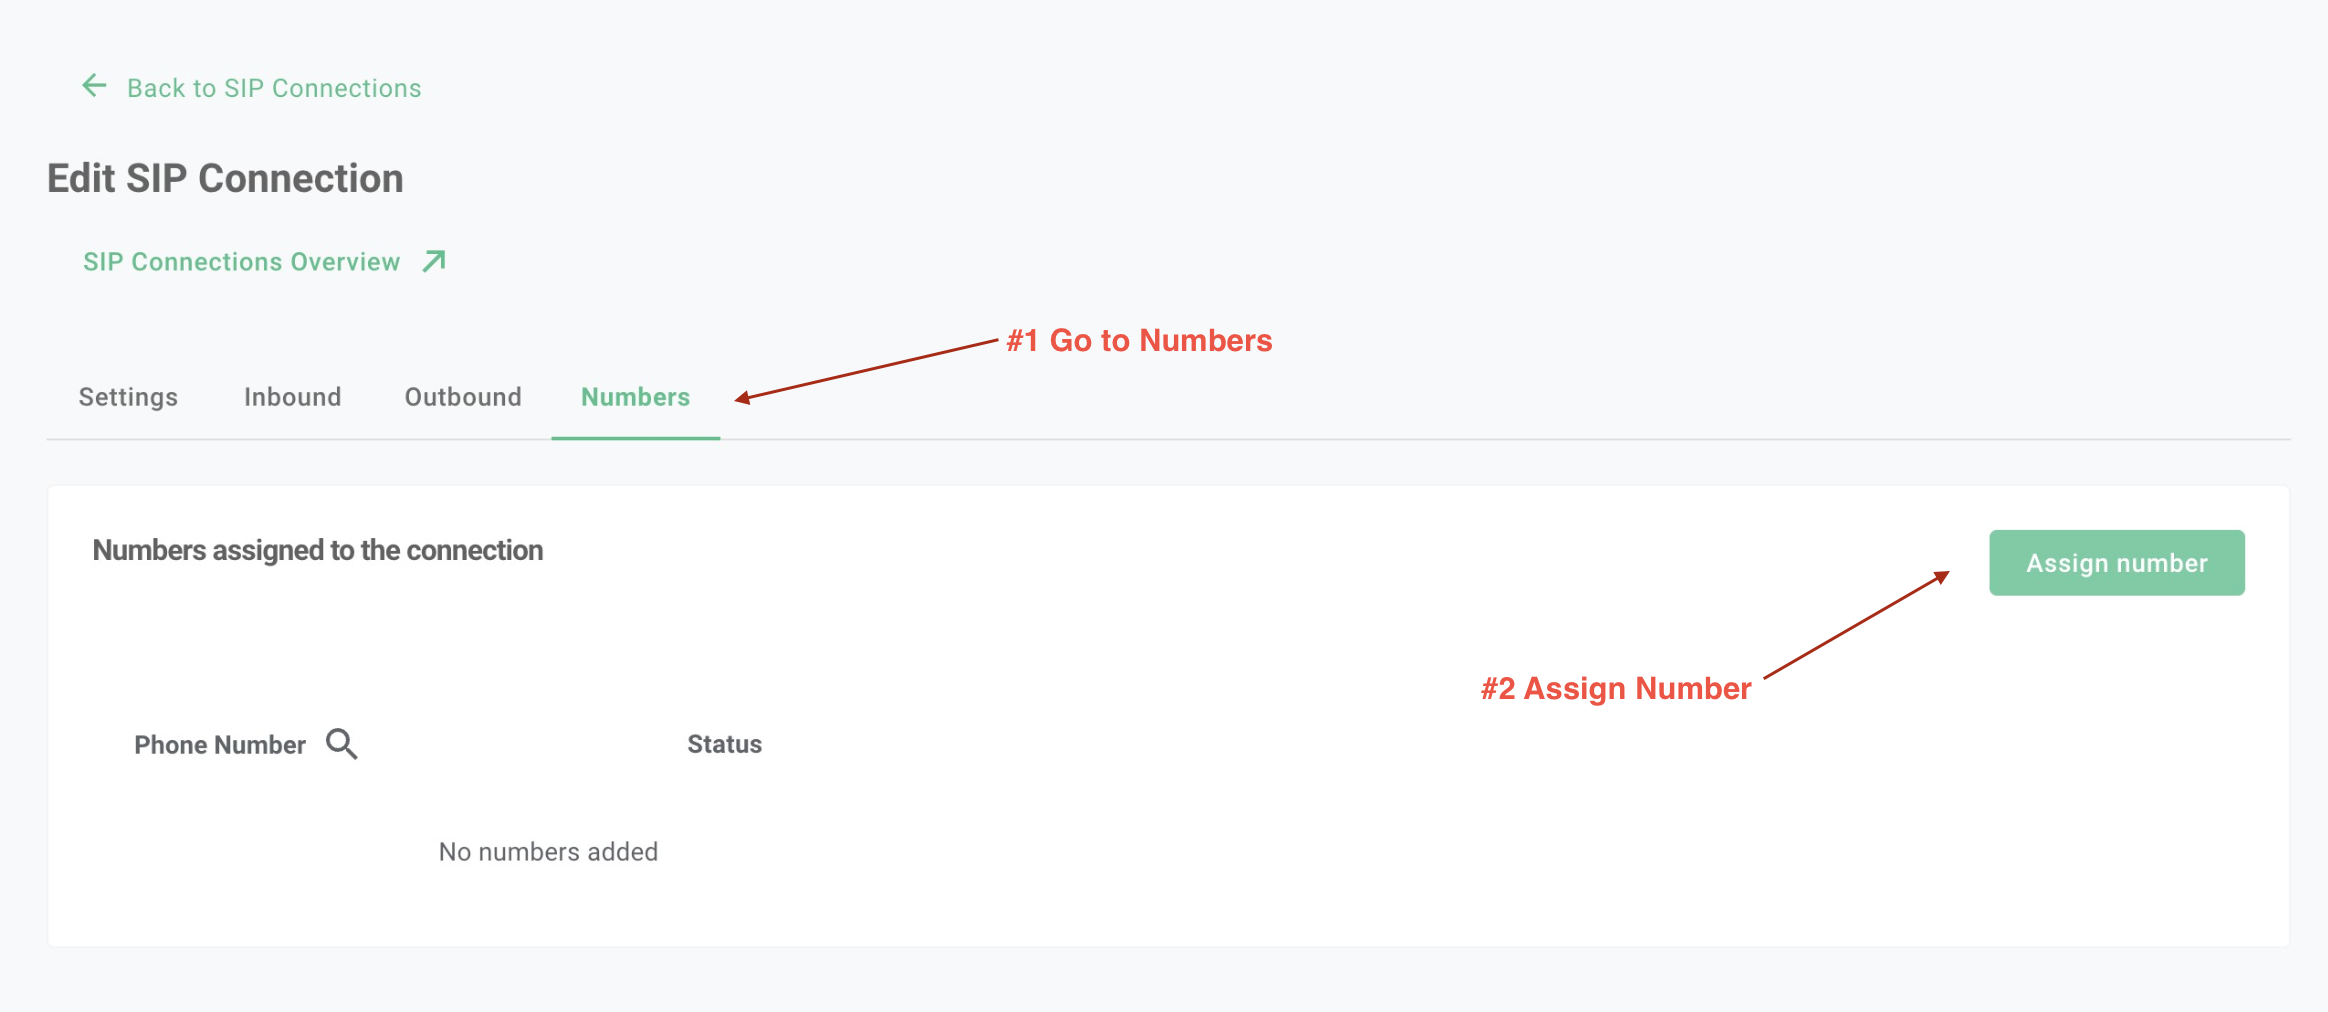
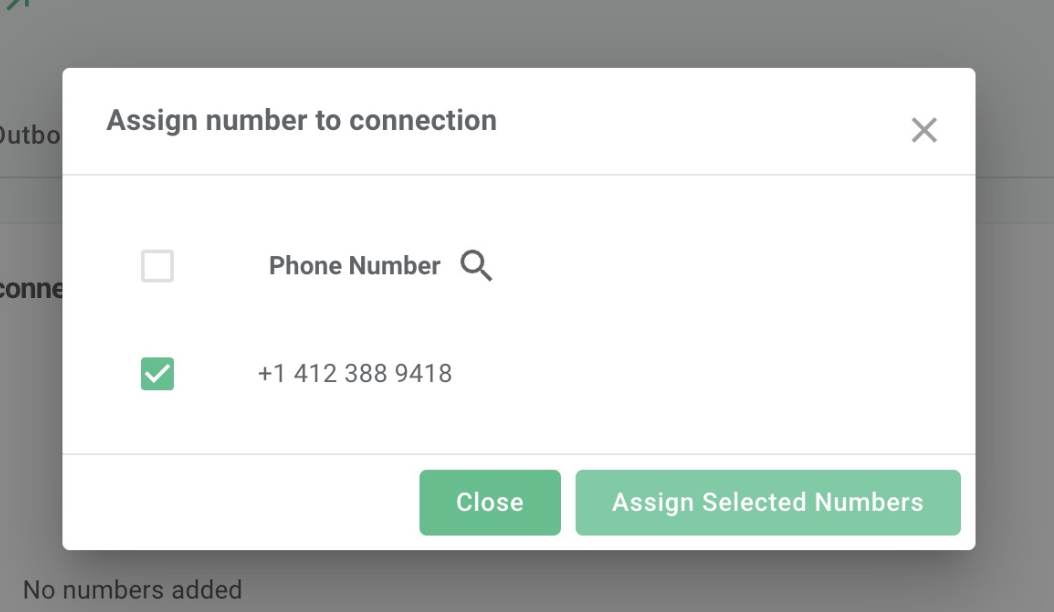
* **Step #6: Add numbers to the SIP Trunk:** You've created the SIP trunk, now you would need to purchase numbers / move existing numbers to this trunk.
* 
### 2. Import Numbers to Synthflow\.ai
Now that the number is set up with your SIP trunking, you need to **import the number to Synthflow\.ai** so that we will know how to route the call.
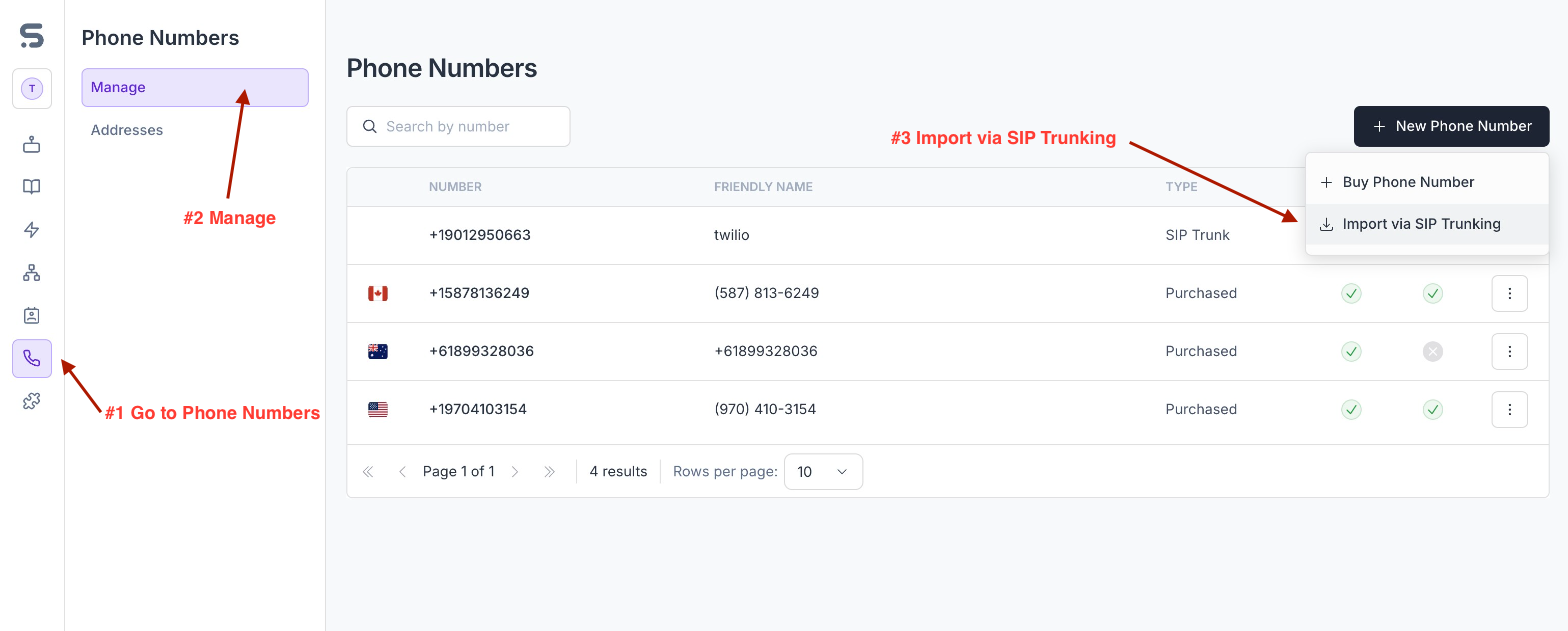
* Here, you will supply the **termination SIP URI**which is `sip.telnyx.com`
* You will need to supply the **username and password** as well.
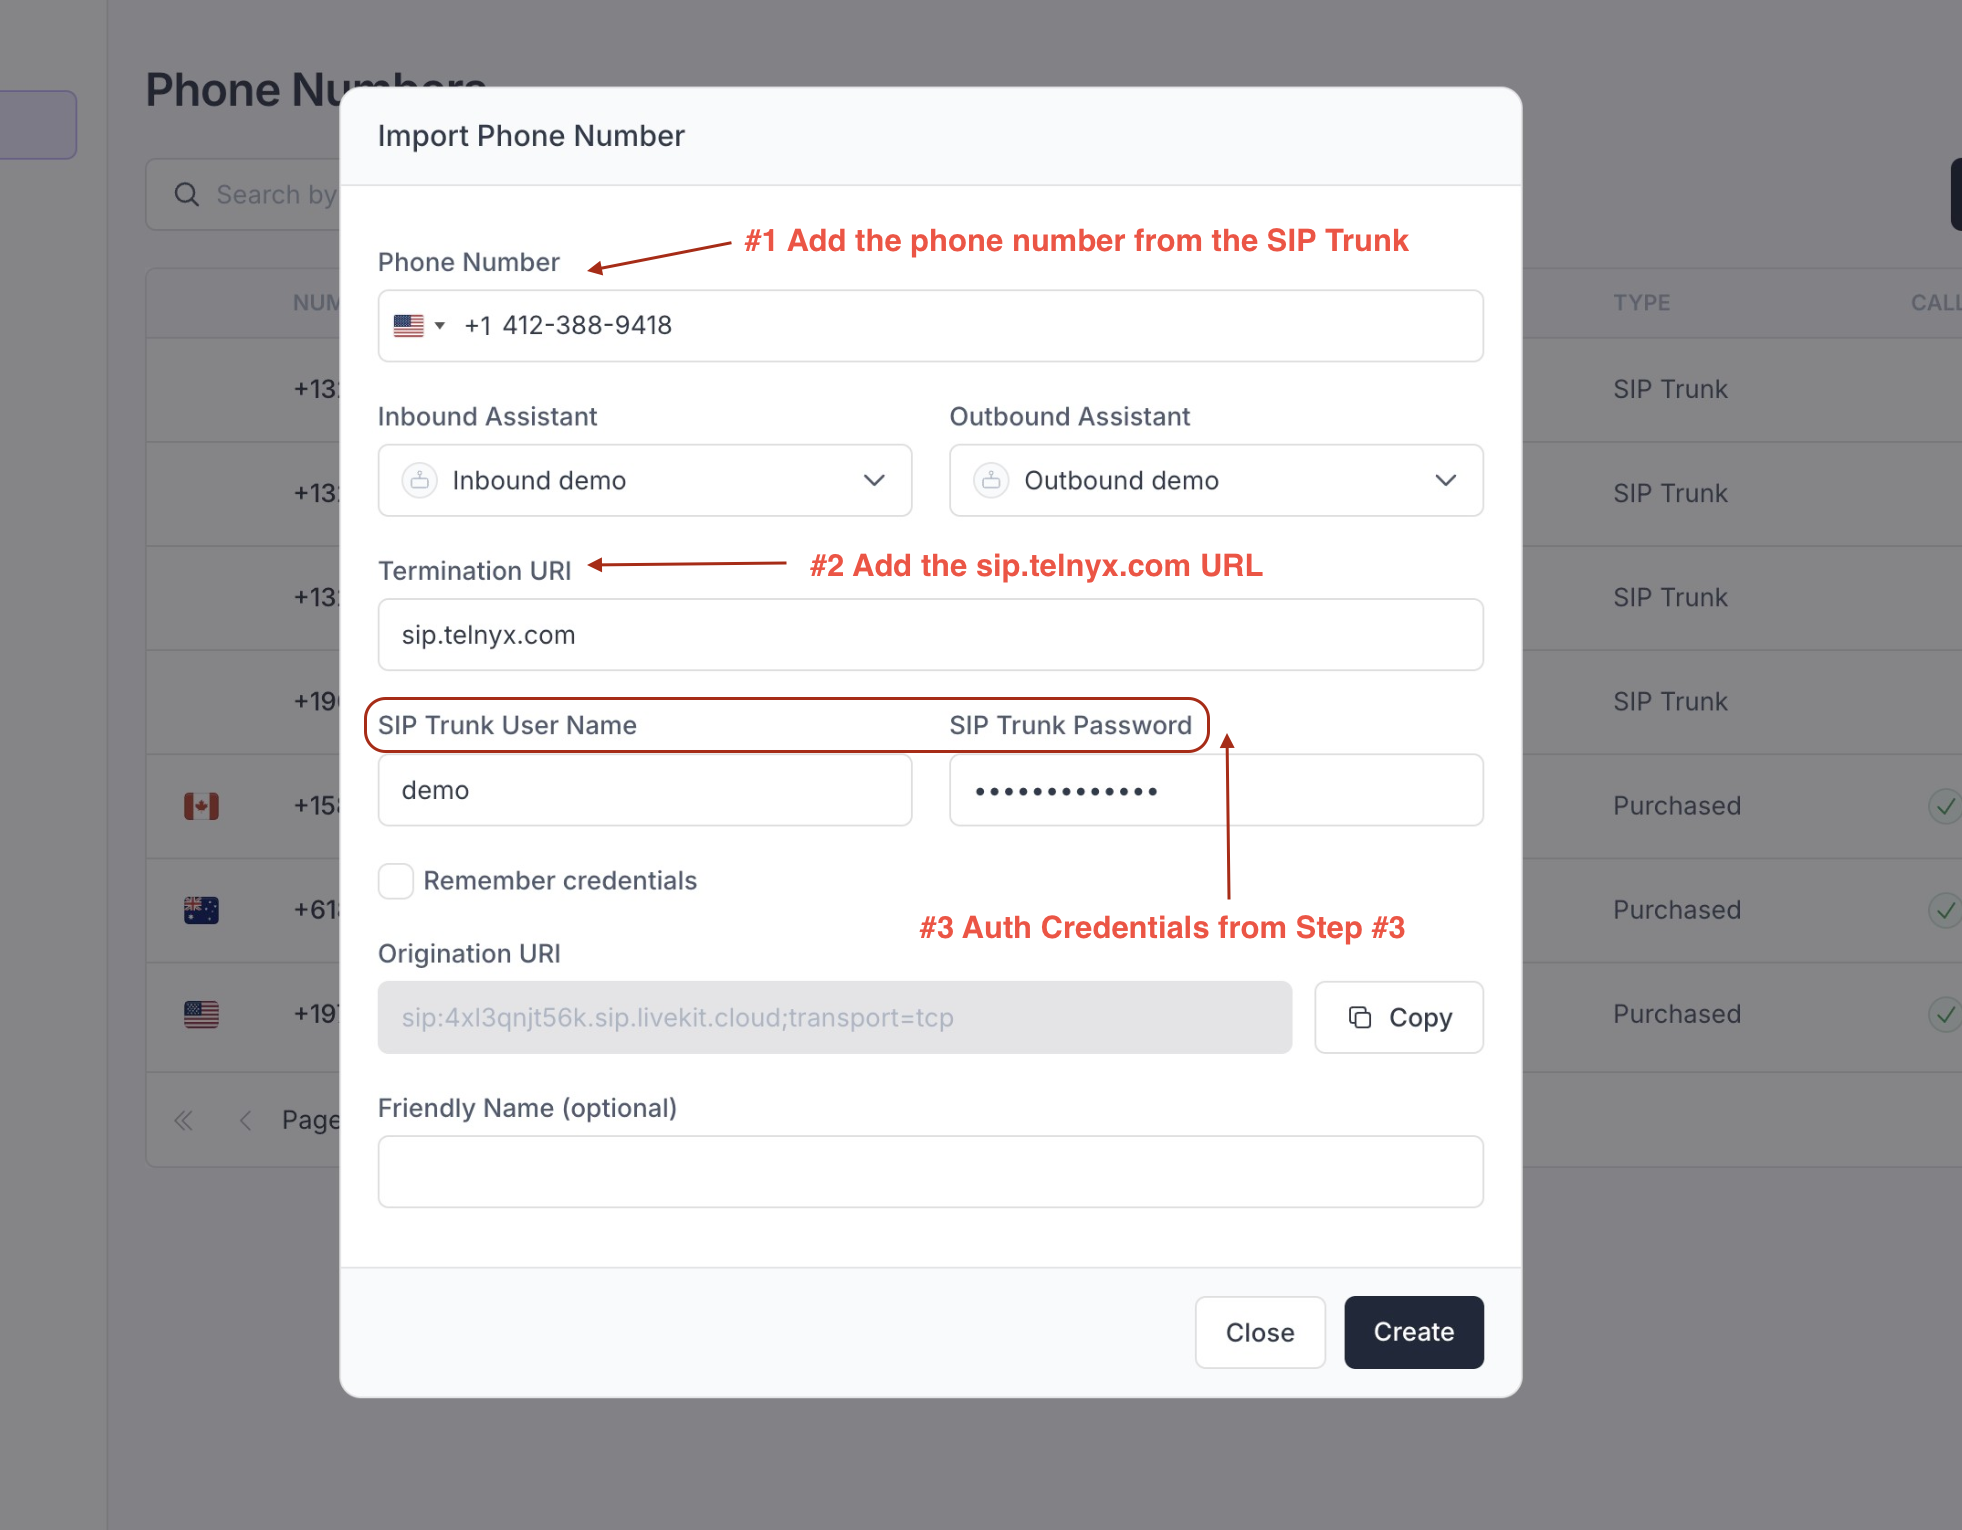
Once the number is imported, you can make and receive calls with this number just like a number you purchased from **Synthflow\.ai**.
If you wish for **Synthflow\.ai** to stop using this number, you can delete it from the dashboard or via the **Delete Number API**.