GoHighLevel
Use this guide to connect GoHighLevel to Synthflow, sync agencies and subaccounts, import calendars for Real Time Booking, and build inbound/outbound call workflows.
Overview
GoHighLevel is an all-in-one marketing, sales, and CRM platform designed for agencies and businesses to manage customer relationships, automate marketing, and streamline sales processes. With Synthflow, you can connect GoHighLevel to:
- Sync agencies and subaccounts.
- Enable Real Time Booking via GoHighLevel calendars.
- Automate inbound and outbound calls with AI agents.
- Push call data back into your GoHighLevel workflows.
Getting Started
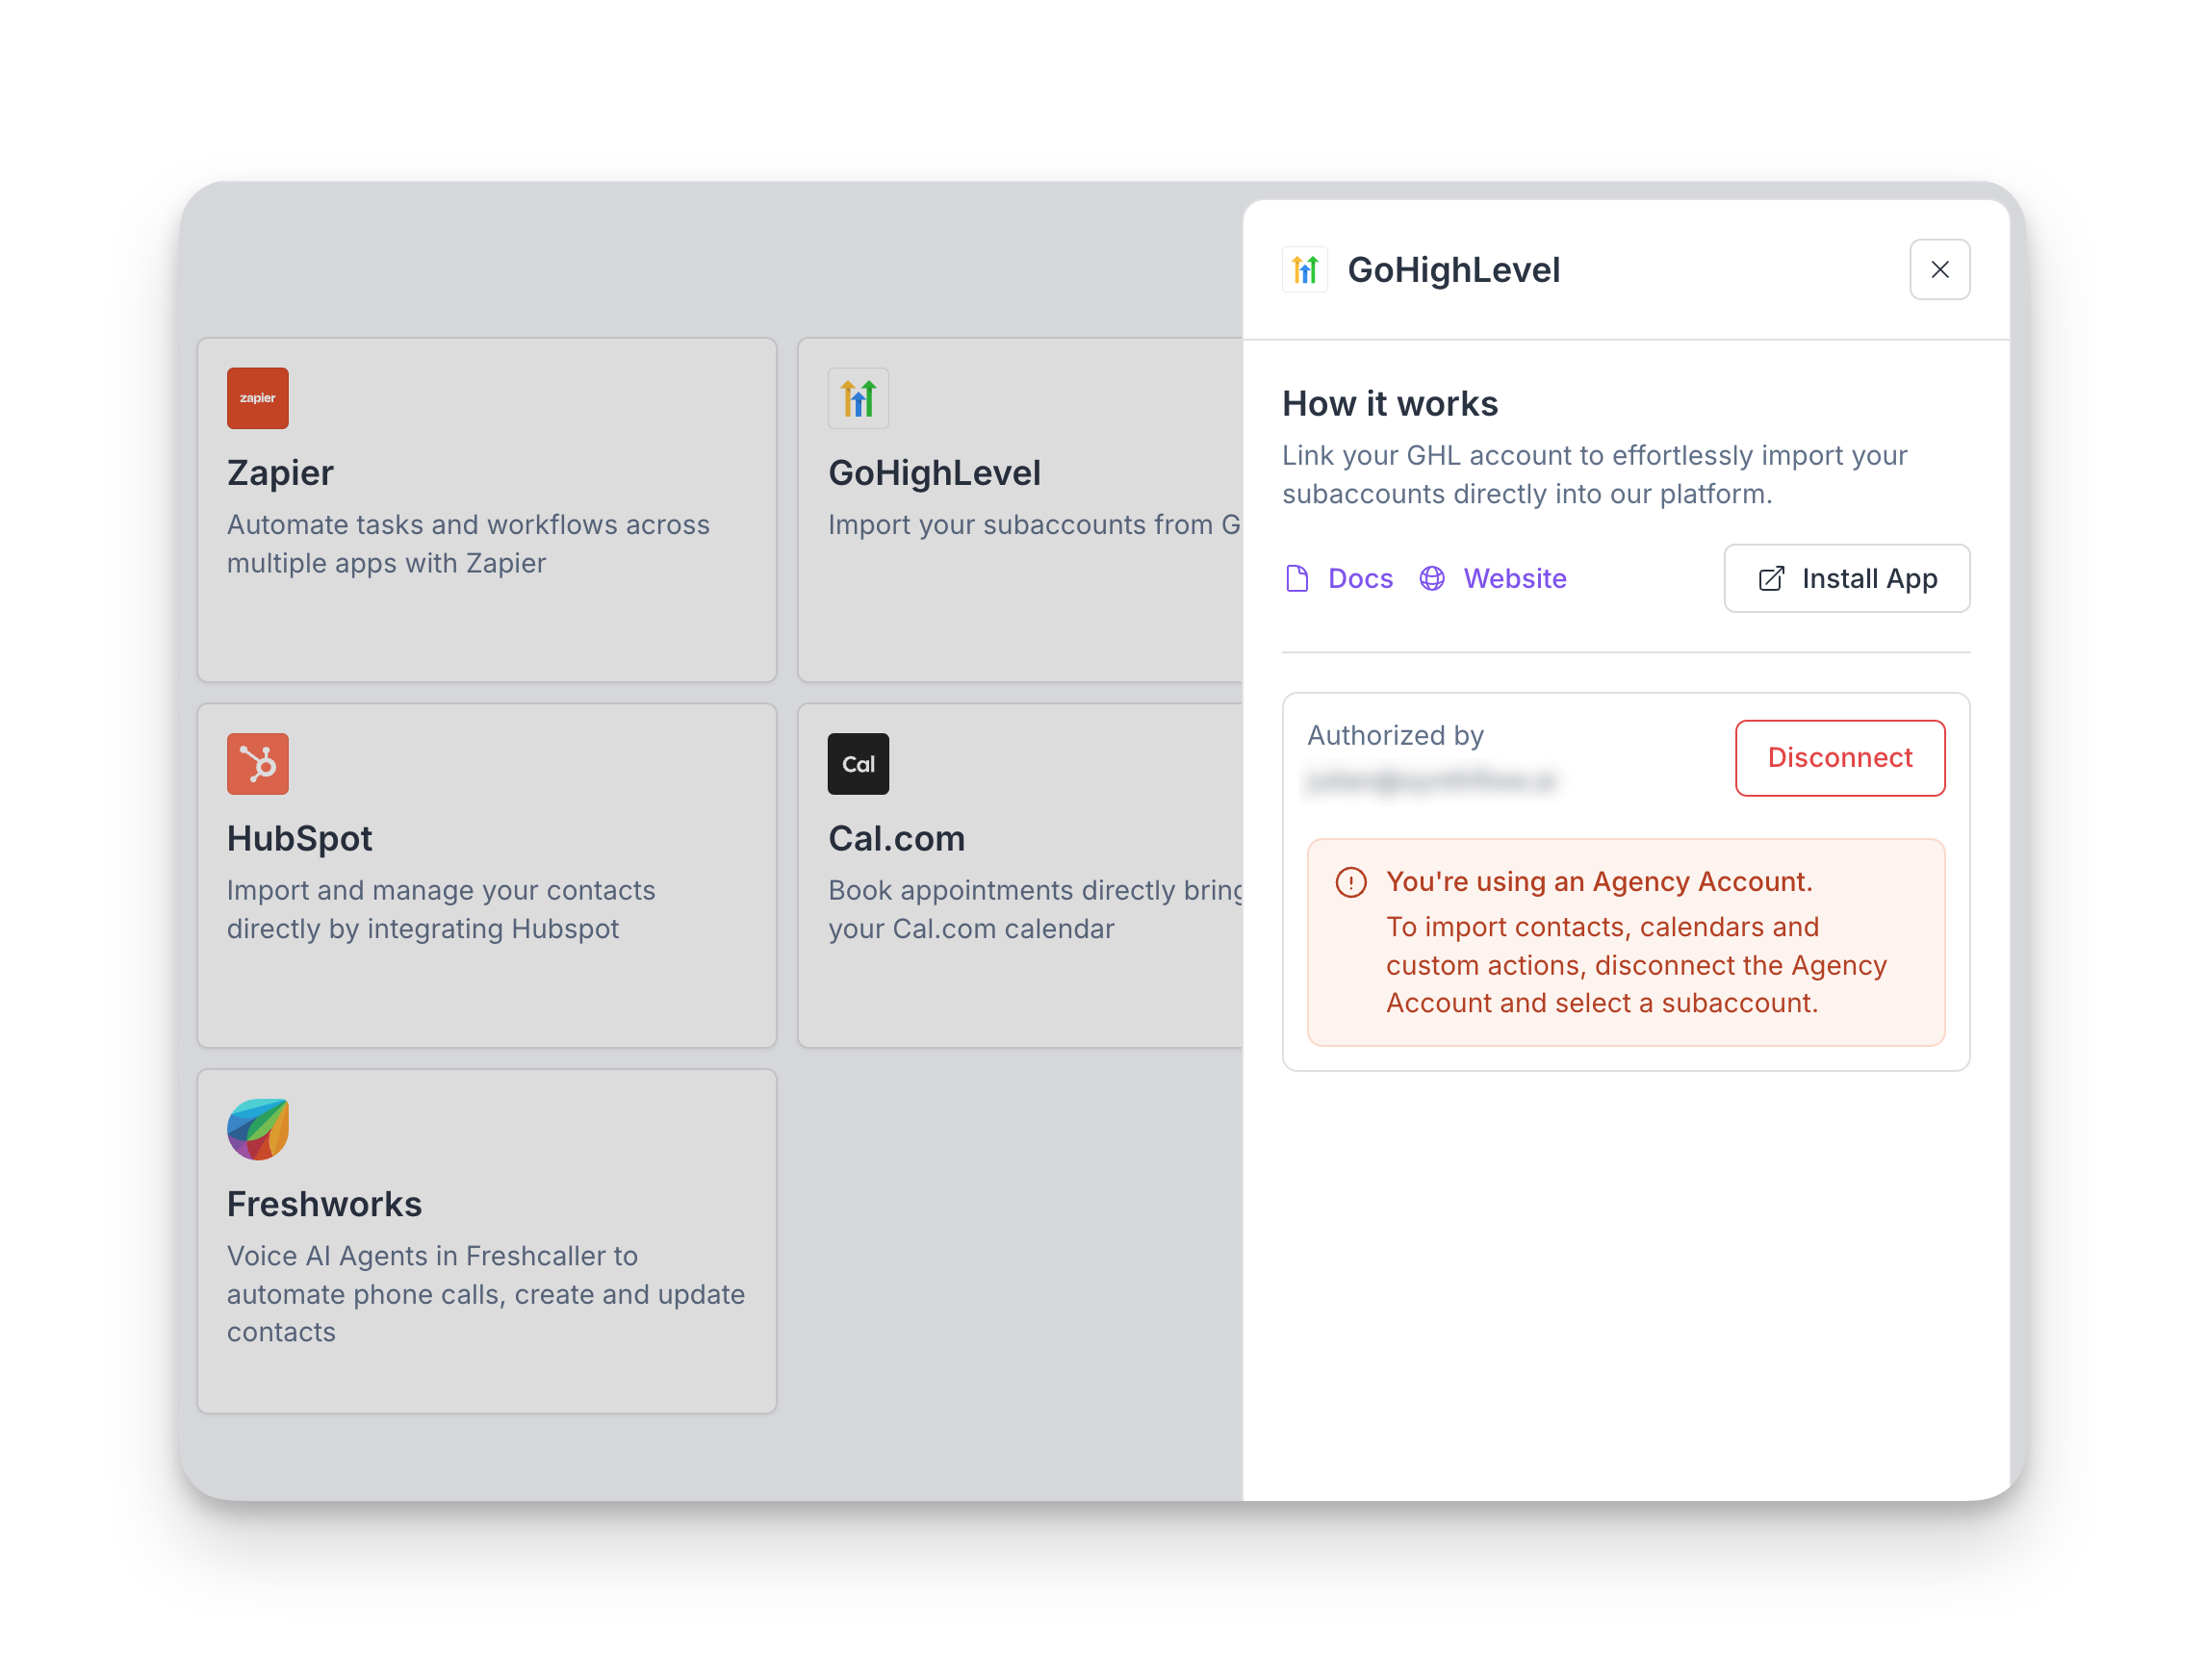
GoHighLevel has two account types that change how you connect to Synthflow:
- Agency accounts manage and authorize subaccounts. Connect once at the agency level, then import or create subaccounts in Synthflow (see more on managing subaccounts here.)
- Subaccounts are where you connect calendars and actions. Each subaccount can import its GoHighLevel calendars to power Real Time Booking actions.
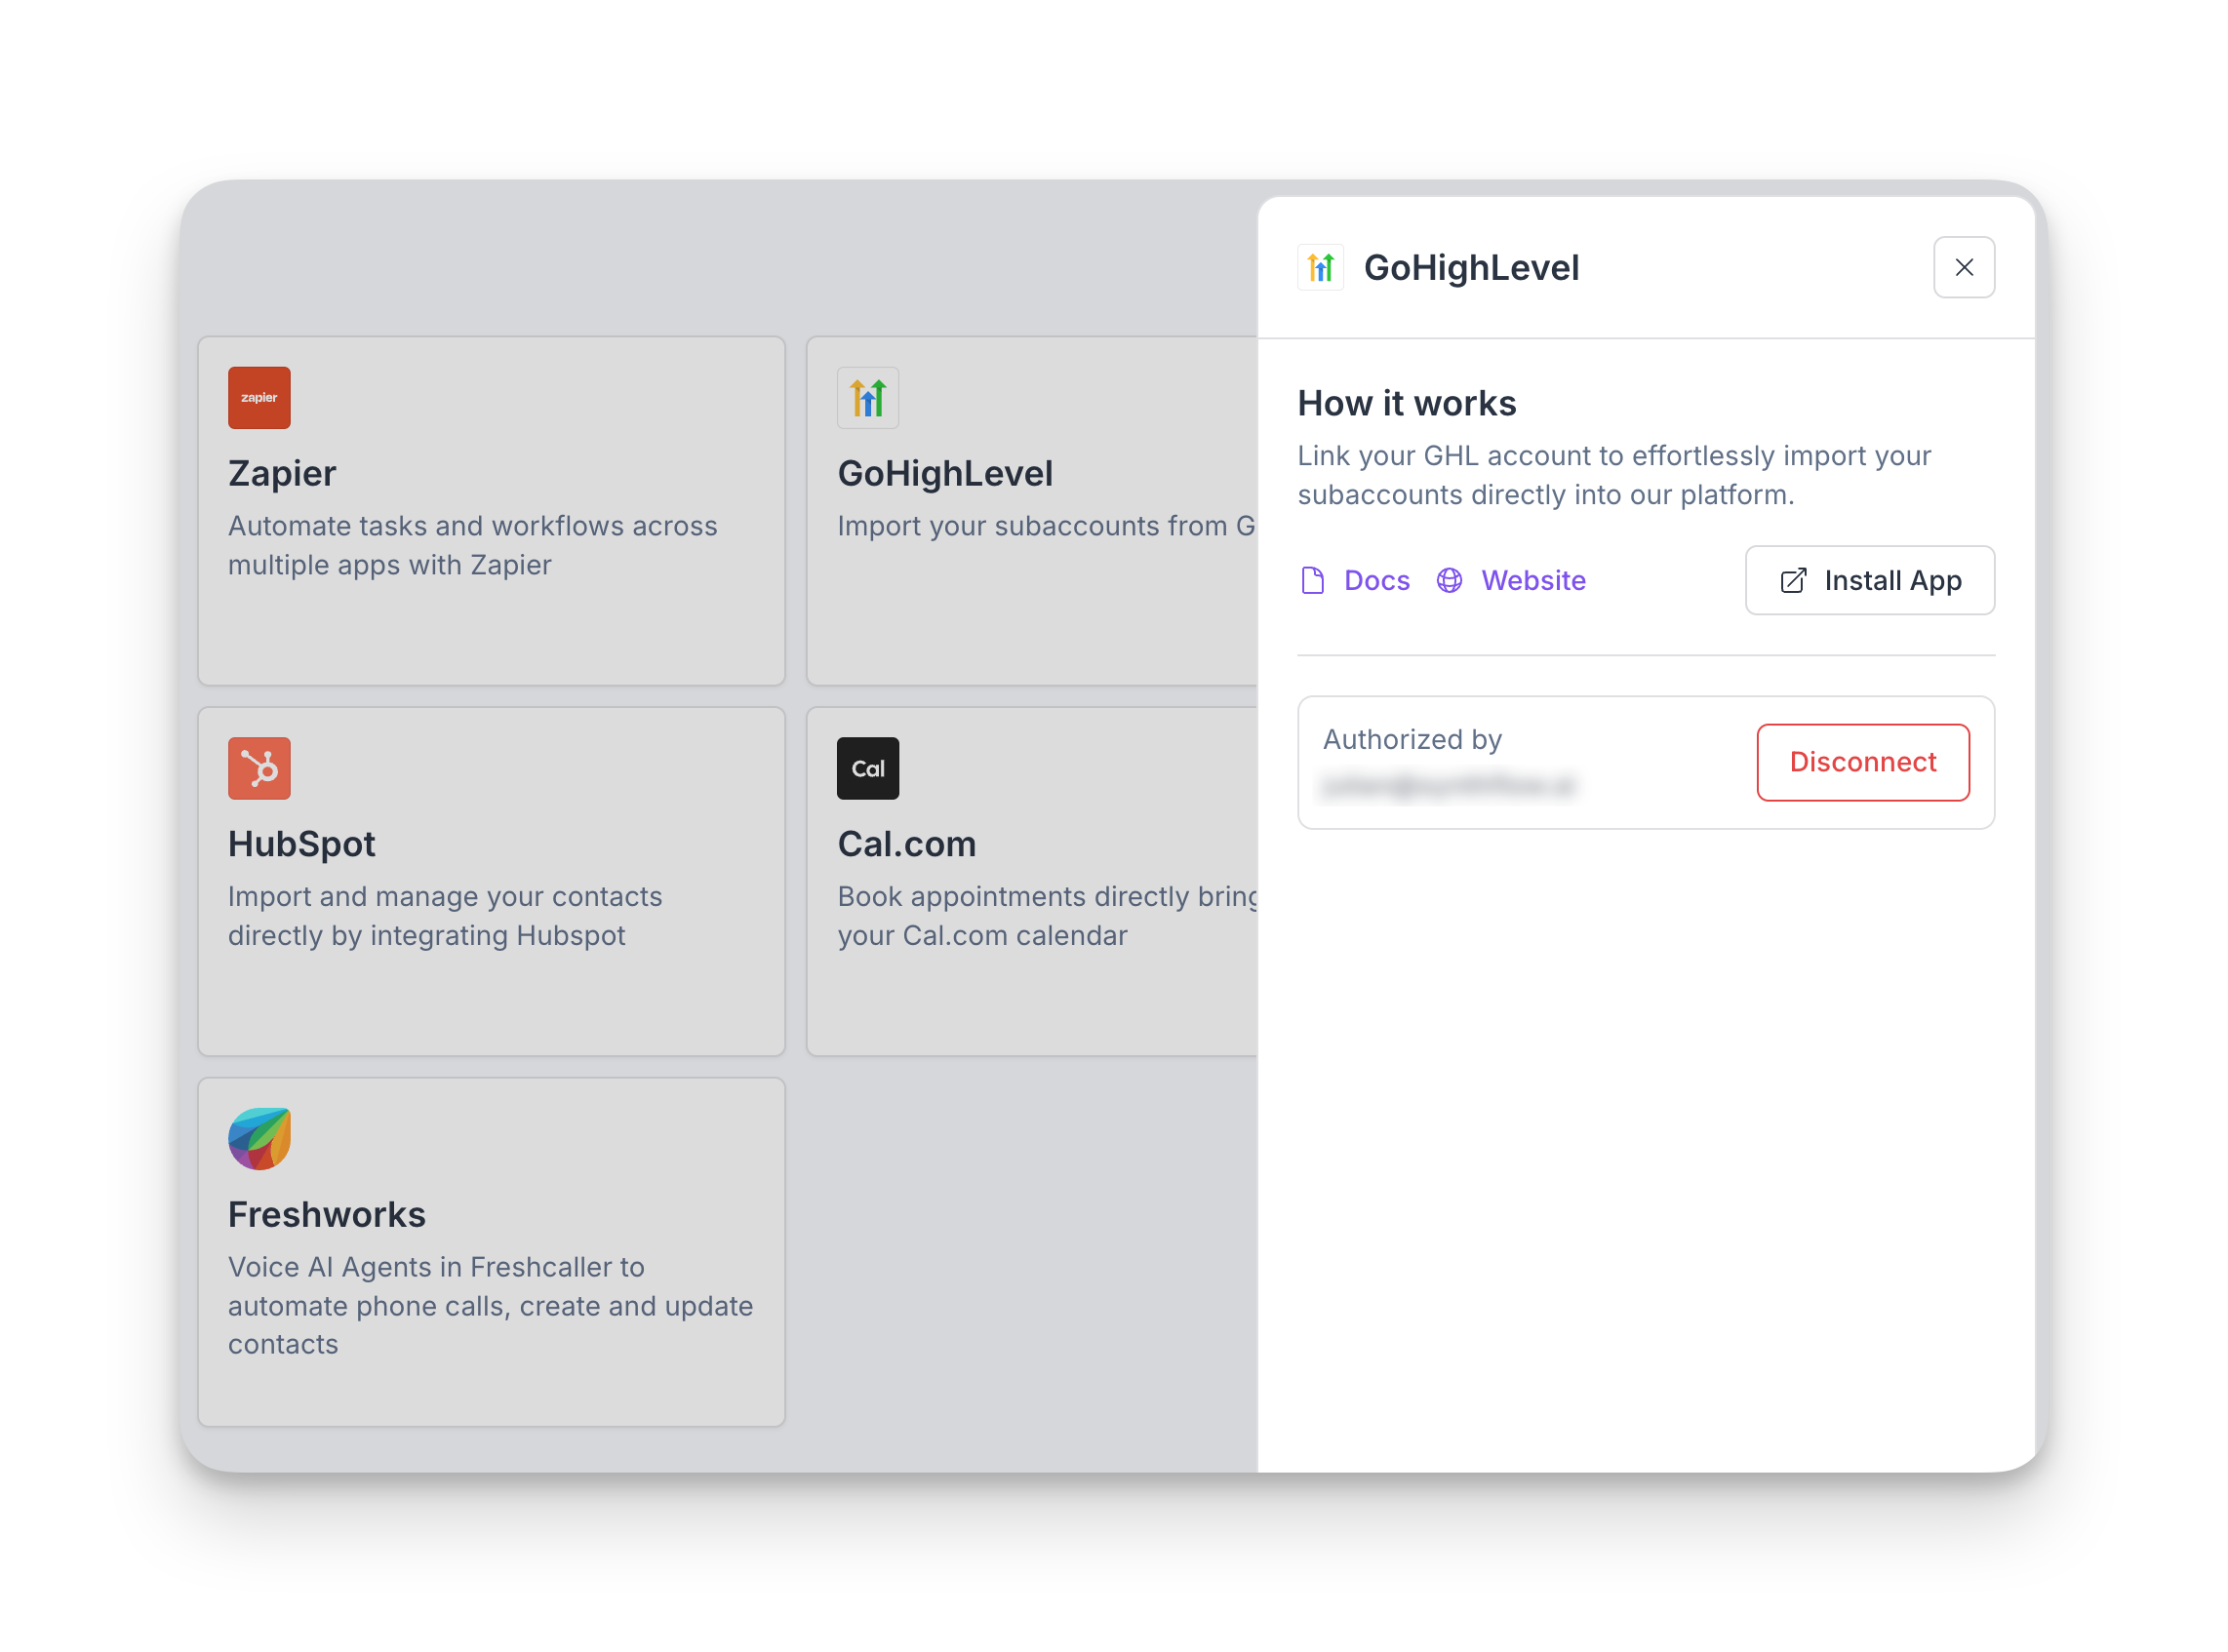
How to connect
In Synthflow, navigate to Integrations > GoHighLevel and click Connect. You will be redirected to GoHighLevel’s marketplace dedicated page for Synthflow’s app.
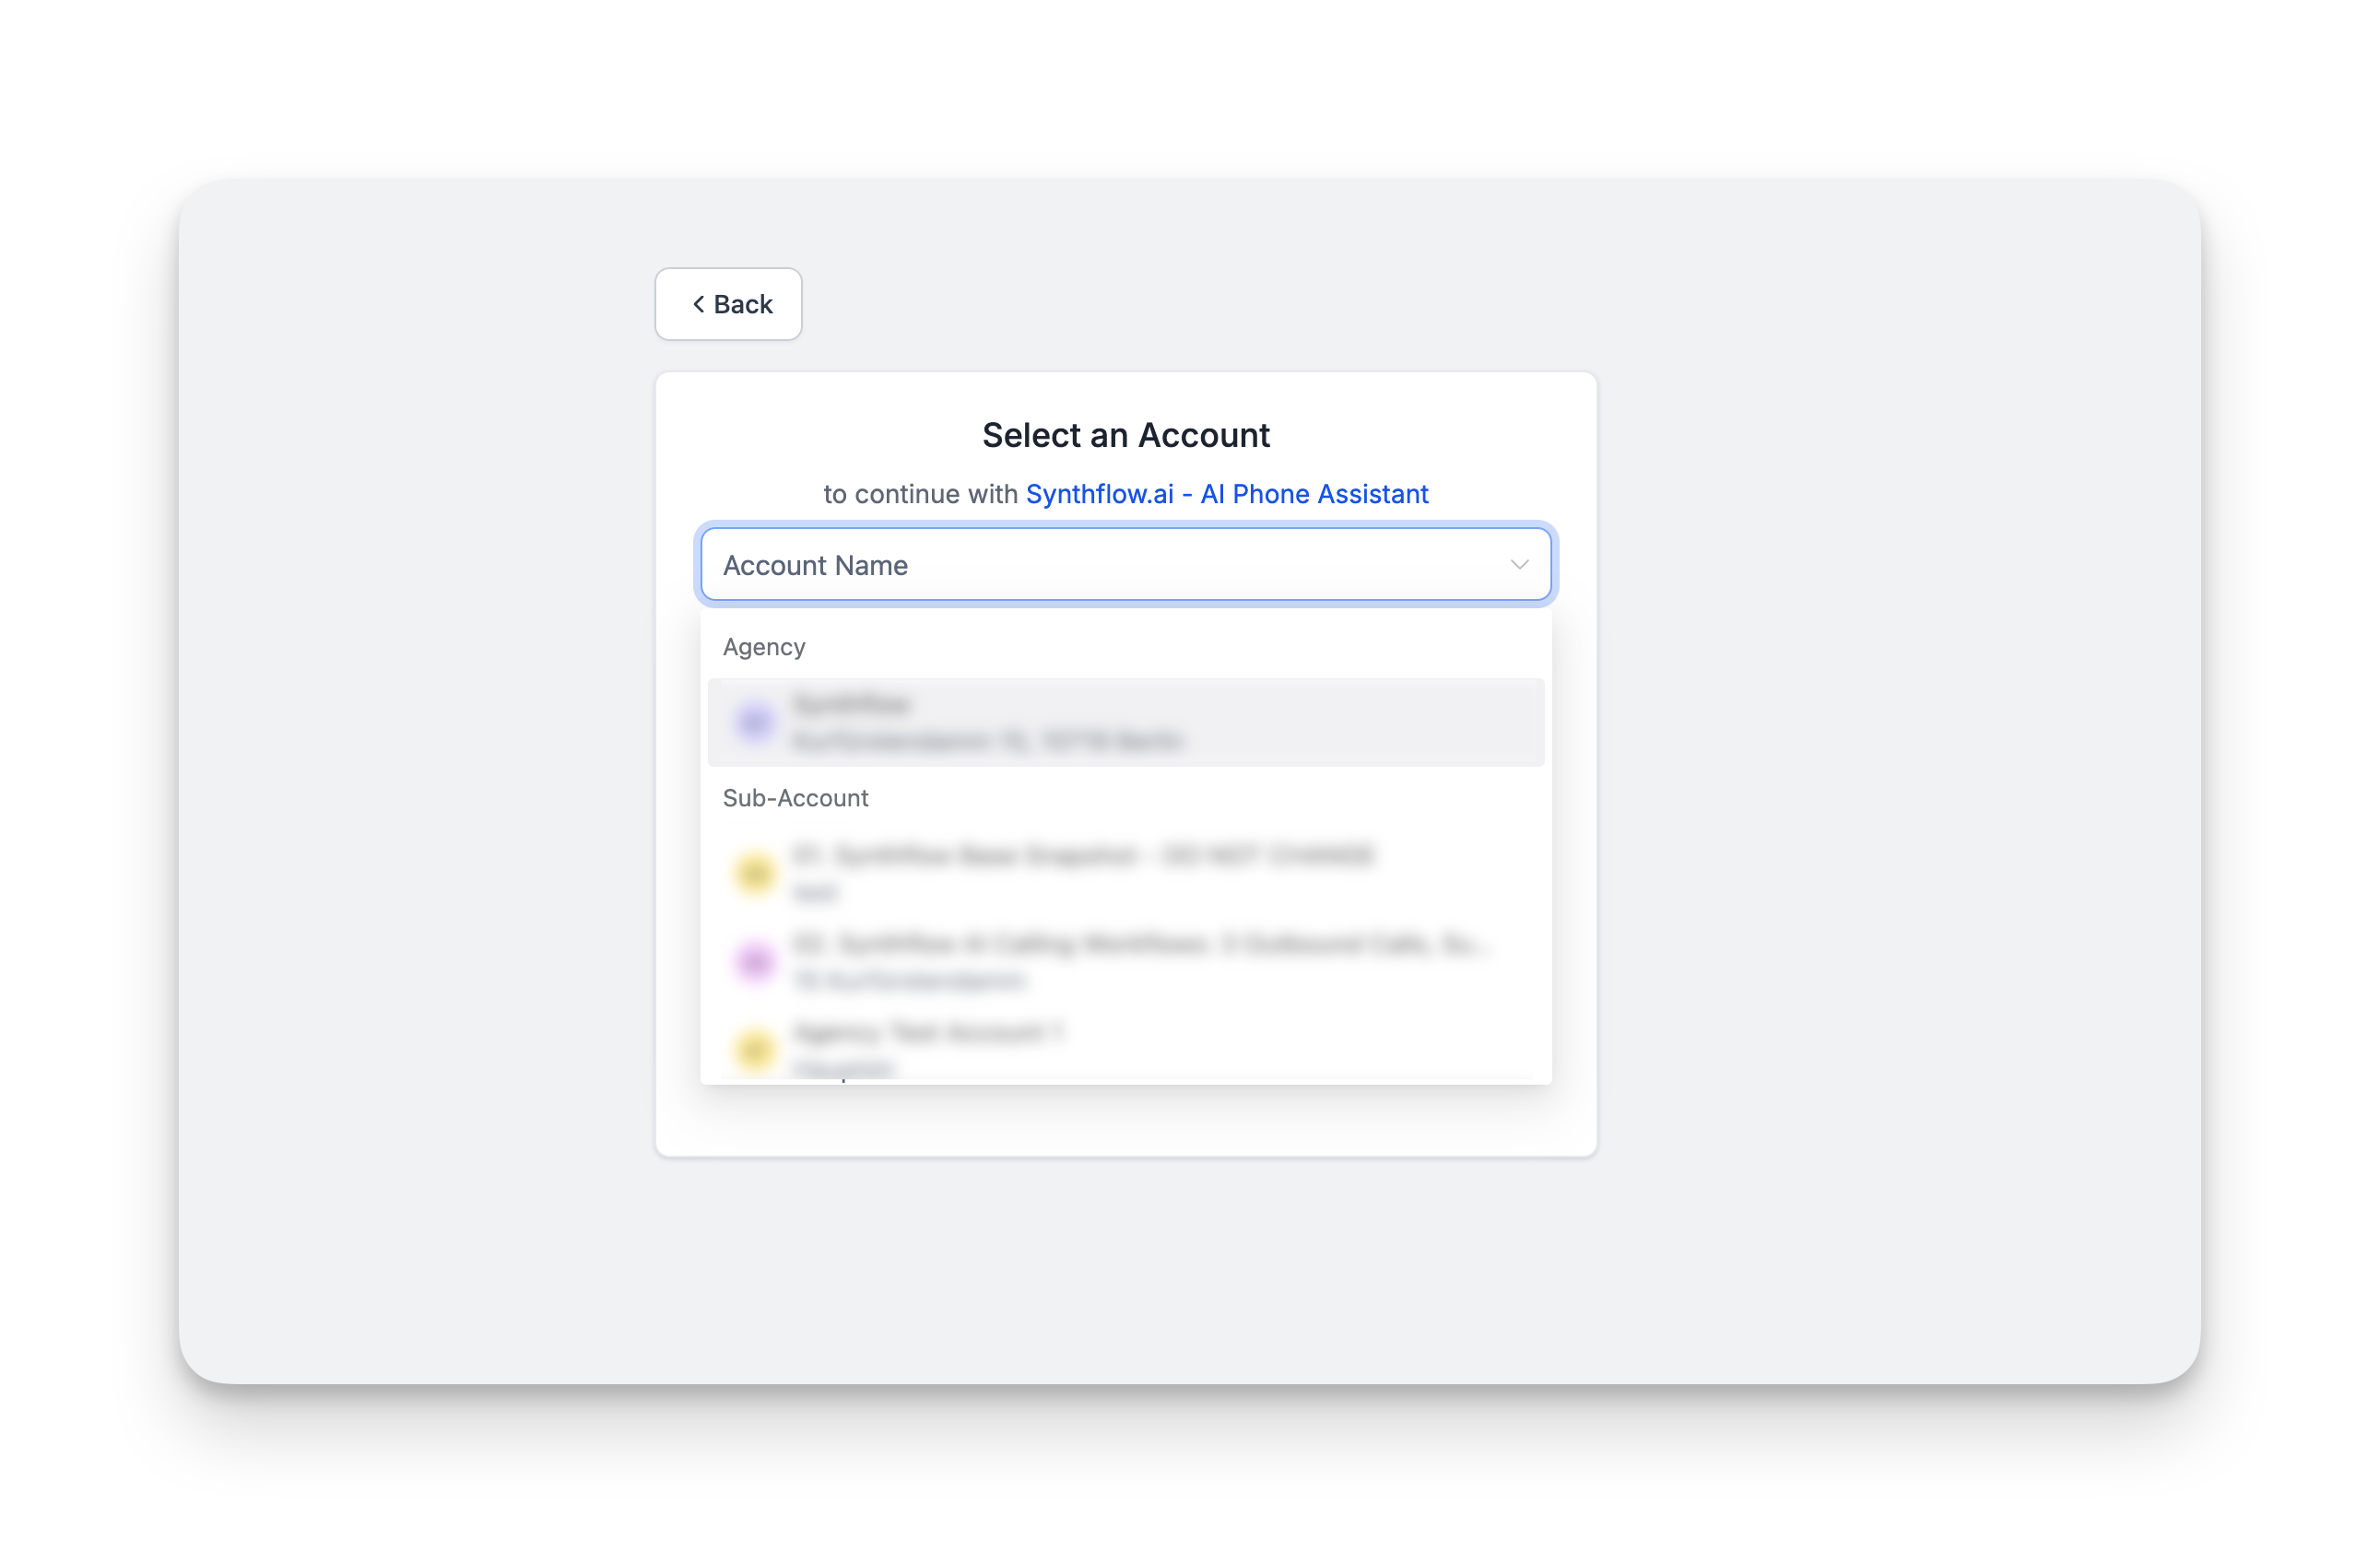
Agency
Import GoHighLevel subaccounts
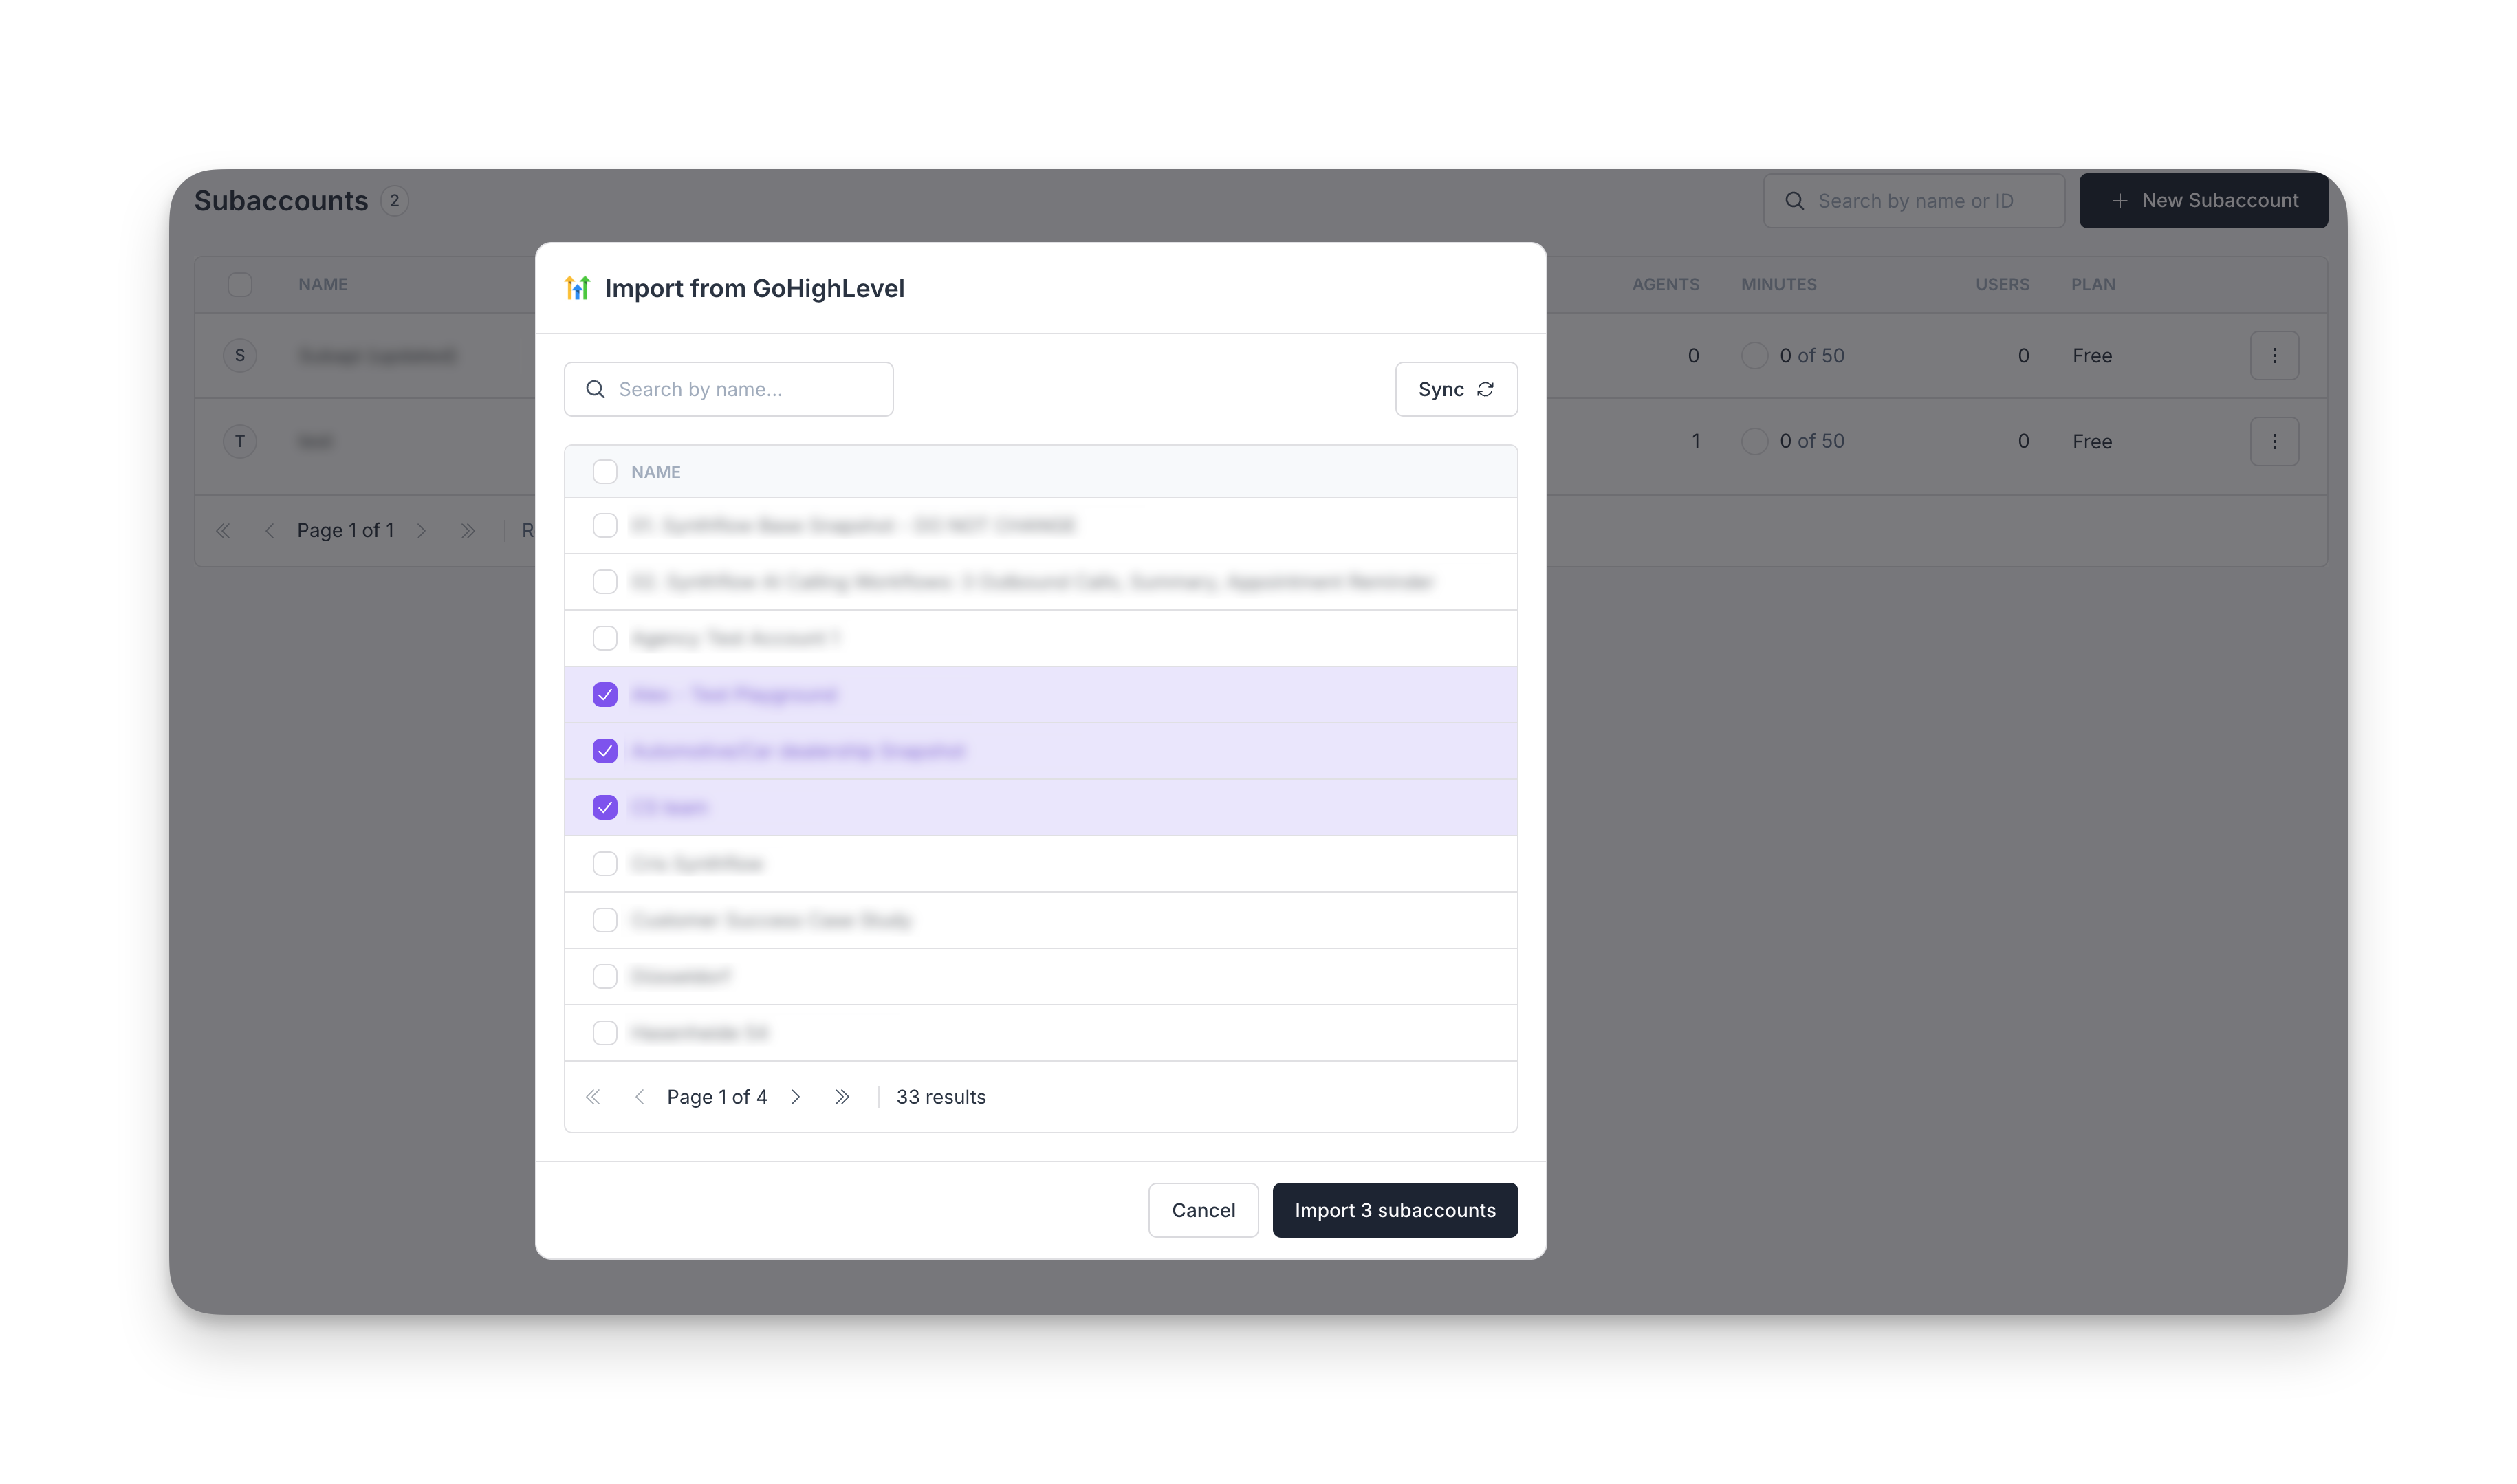
Synthflow lets you import existing GoHighLevel subaccounts directly inside the app. Go to Agency > Subaccounts > Create Subaccount > GoHighLevel, then select the subaccounts you want to import. Any changes made to those subaccounts stay in sync between GoHighLevel and Synthflow.
This feature is specific to GoHighLevel agency accounts.
Subaccount
After selecting your GoHighLevel subaccount in the account selector, you’ll be redirected back to Synthflow and should see the confirmation screen below.
Import your calendars
You can import your GoHighLevel calendars so Synthflow agents can book appointments via the Real Time Booking action. Go to Actions > Real Time Booking > Create Event, select the calendar from your GHL account you wish to import to sync for bookings.
Learn more about the Real Time Booking action configurations here.
Set up an inbound call
Requirements
There are two main requirements to set up an inbound call in Synthflow:
- An inbound agent within Synthflow.
- An inbound webhook trigger in your GoHighLevel workflows.
Step-by-step guide
Here is a detailed step by step on how to set up your inbound agent:
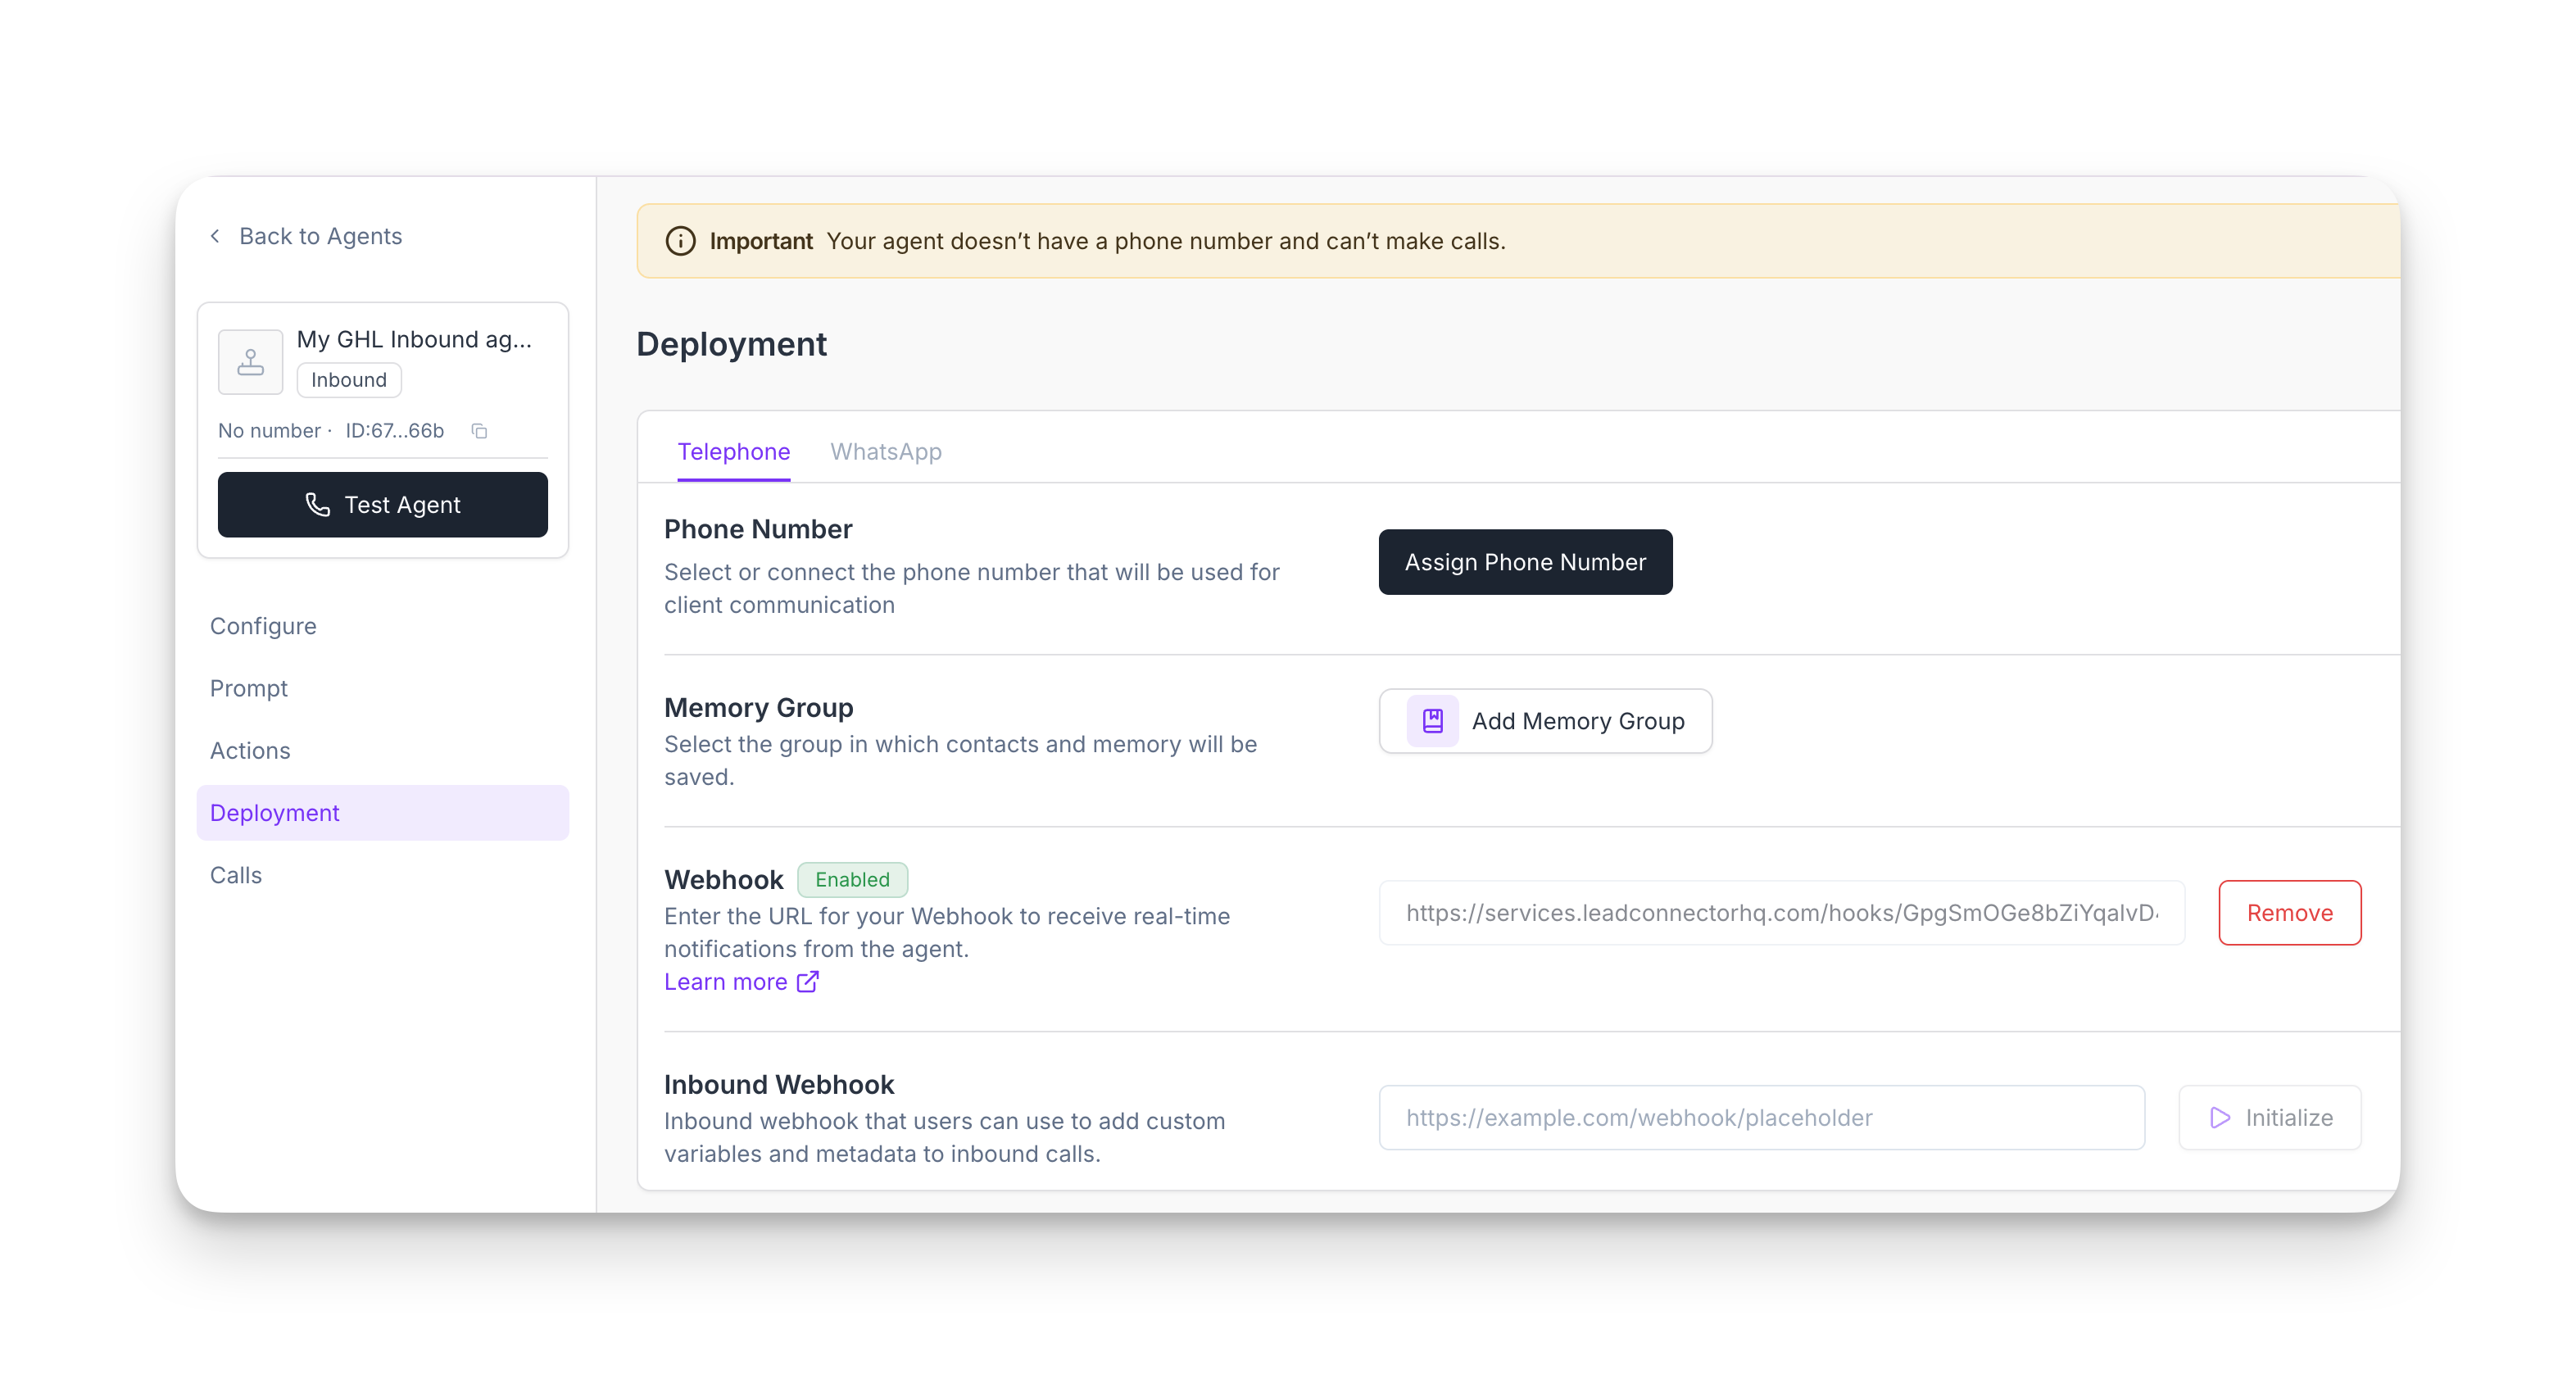
Then navigate to the Deployment tab of your agent. The goal is to find a webhook URL for your post-call processing. This URL can be found in your GHL account.
Navigate to your GoHighLevel account, then Automation > Create Workflow. In this example we will be creating a workflow from scratch.
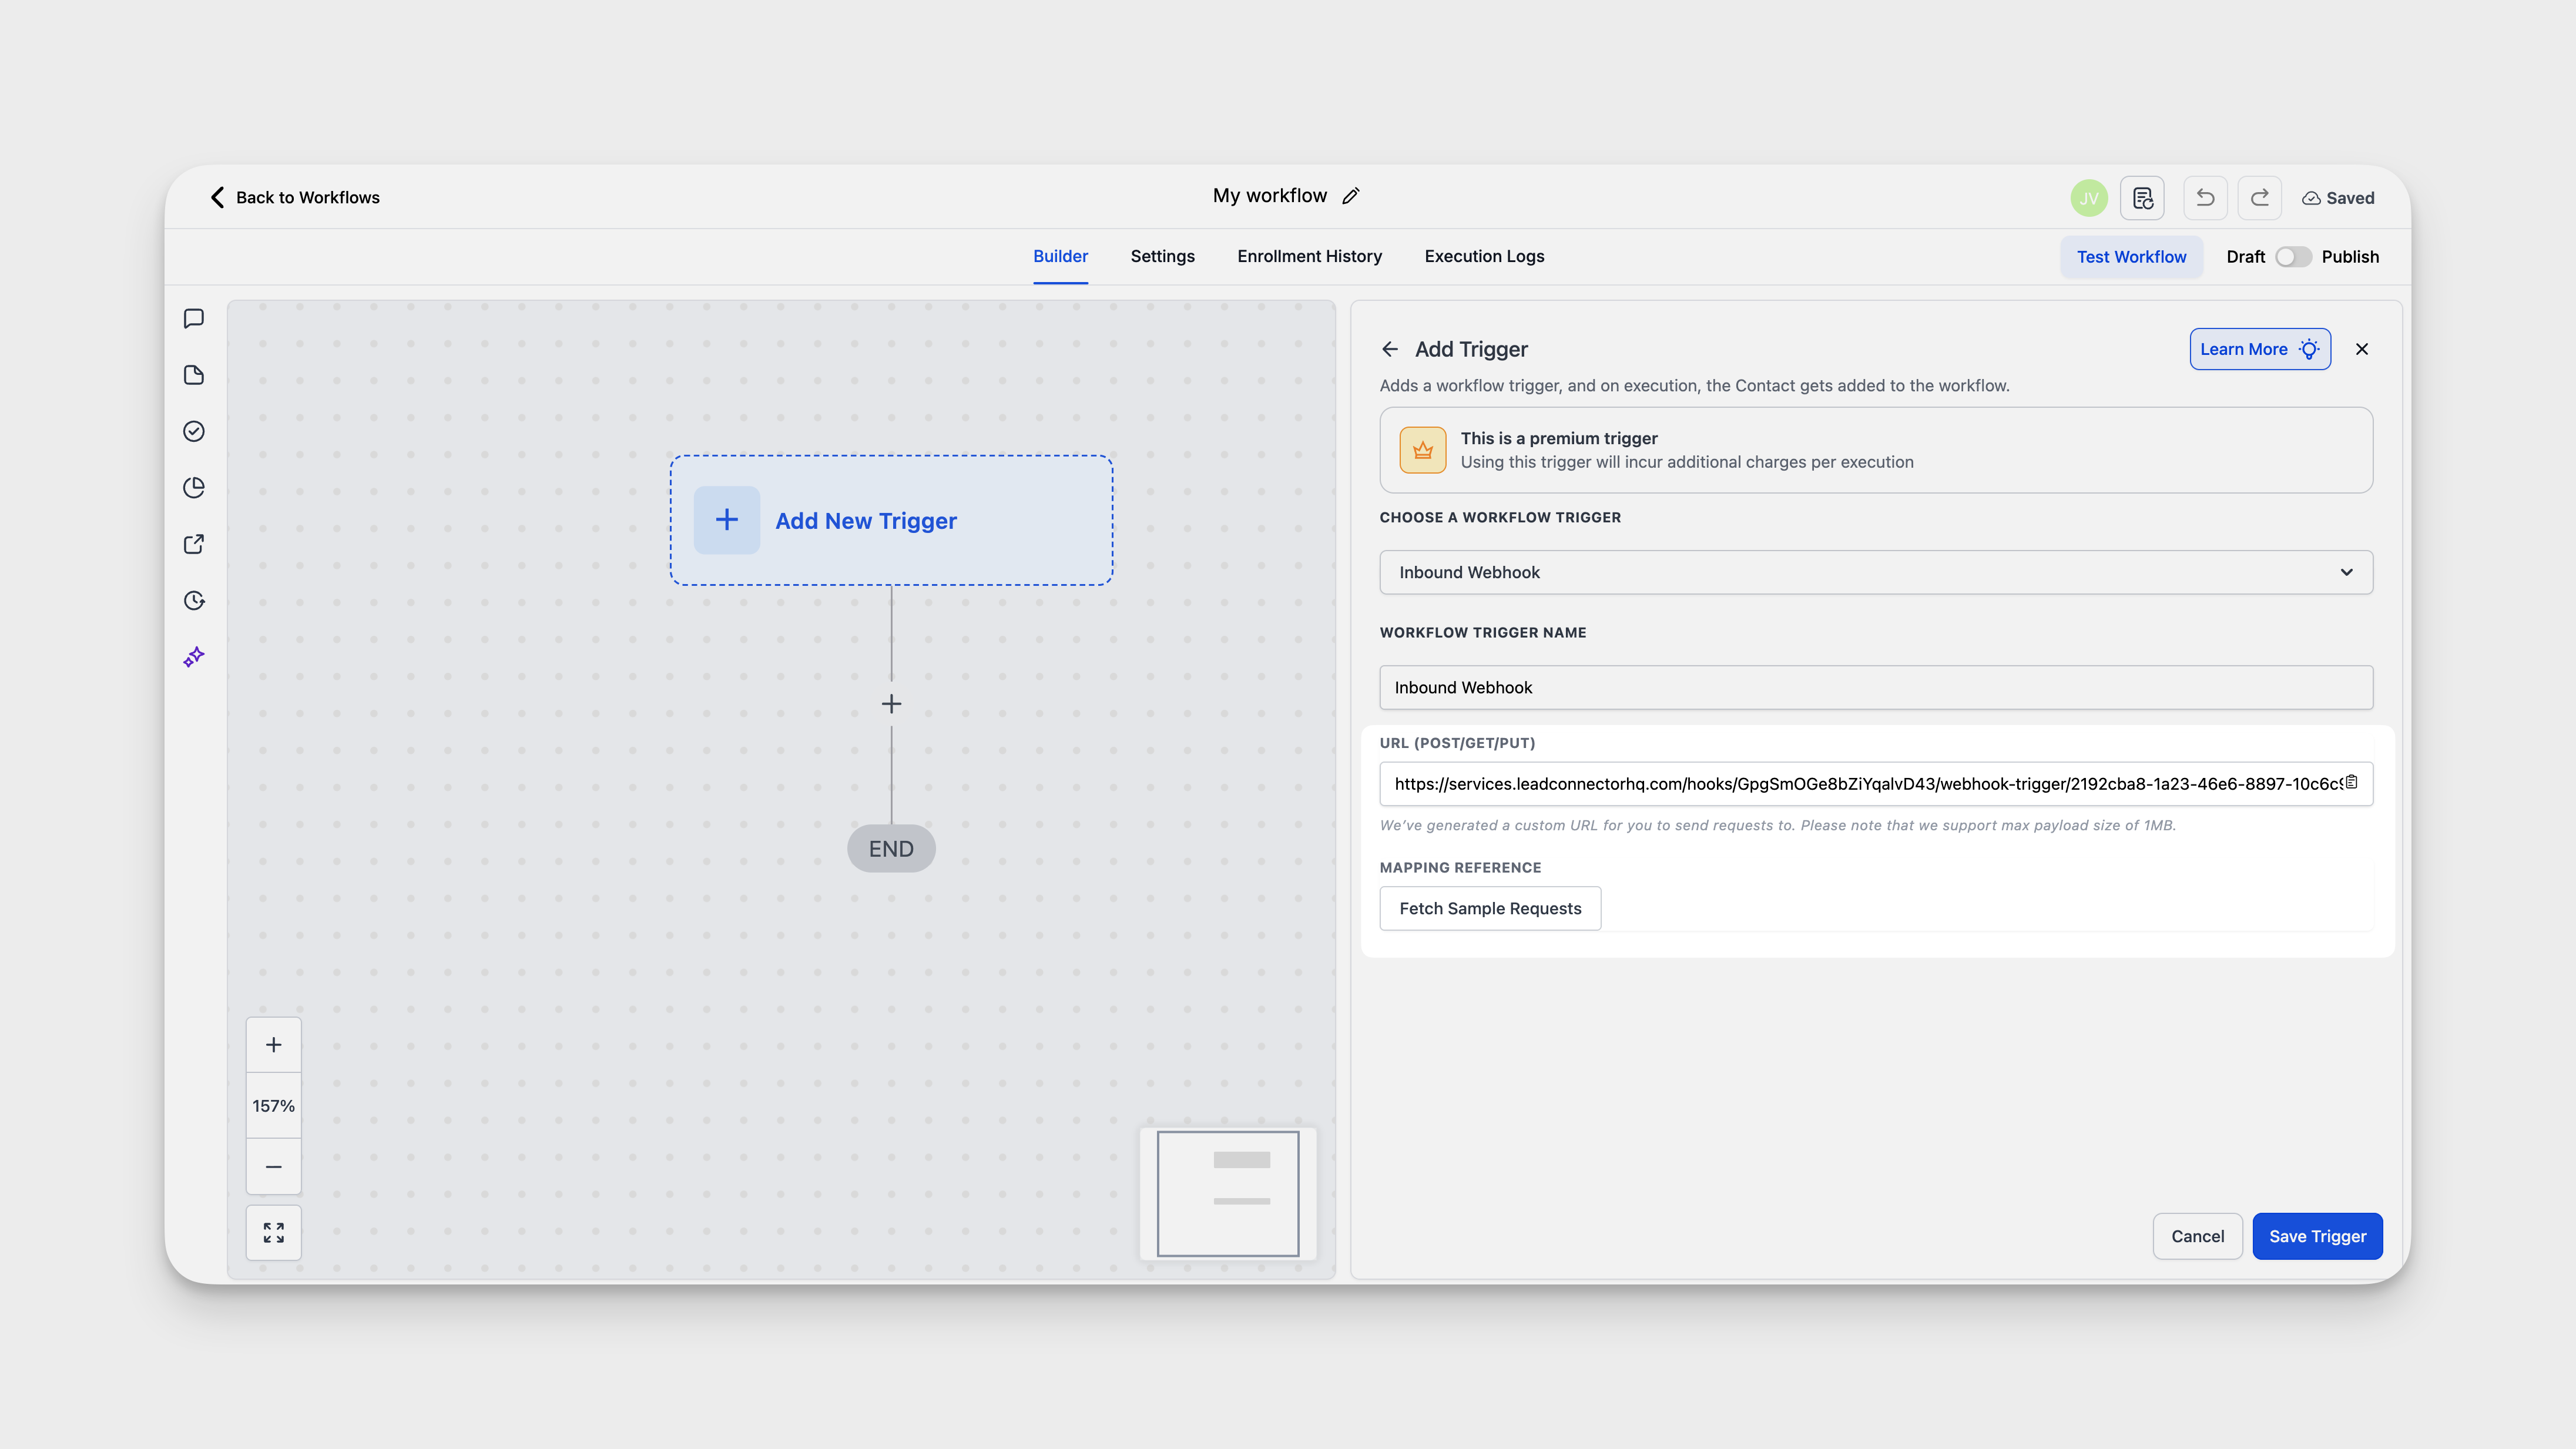
Copy the URL and then navigate back to your Synthflow agent. Paste that URL in the post-call webhook and initialize it.
Now that your webhook is initialized, head back to your GHL account, and map the most recent payload that your webhook has received. Your payload should have a structure similar to the following JSON:
You can find more information about the post-call webhook structure in its dedicated page.
Set up an outbound call
Use this flow to trigger outbound calls from GoHighLevel data.
- In GoHighLevel, open App Marketplace and install the Synthflow app, then go to Automation and click Create Workflow.
- Choose Start from Scratch, then Add New Trigger. Search triggers and pick Contact Tag (or another trigger such as Pipeline Stage, Opportunity Status, or Form Completed). Add a filter for Tag Added, select/create the tag, and Save Trigger.
- Add an action and choose Make A Phone Call.
- In Synthflow, open your agent, go to Deployment, and copy the Model ID and your API key.
- Back in GoHighLevel, paste the Model ID and API key into the action.
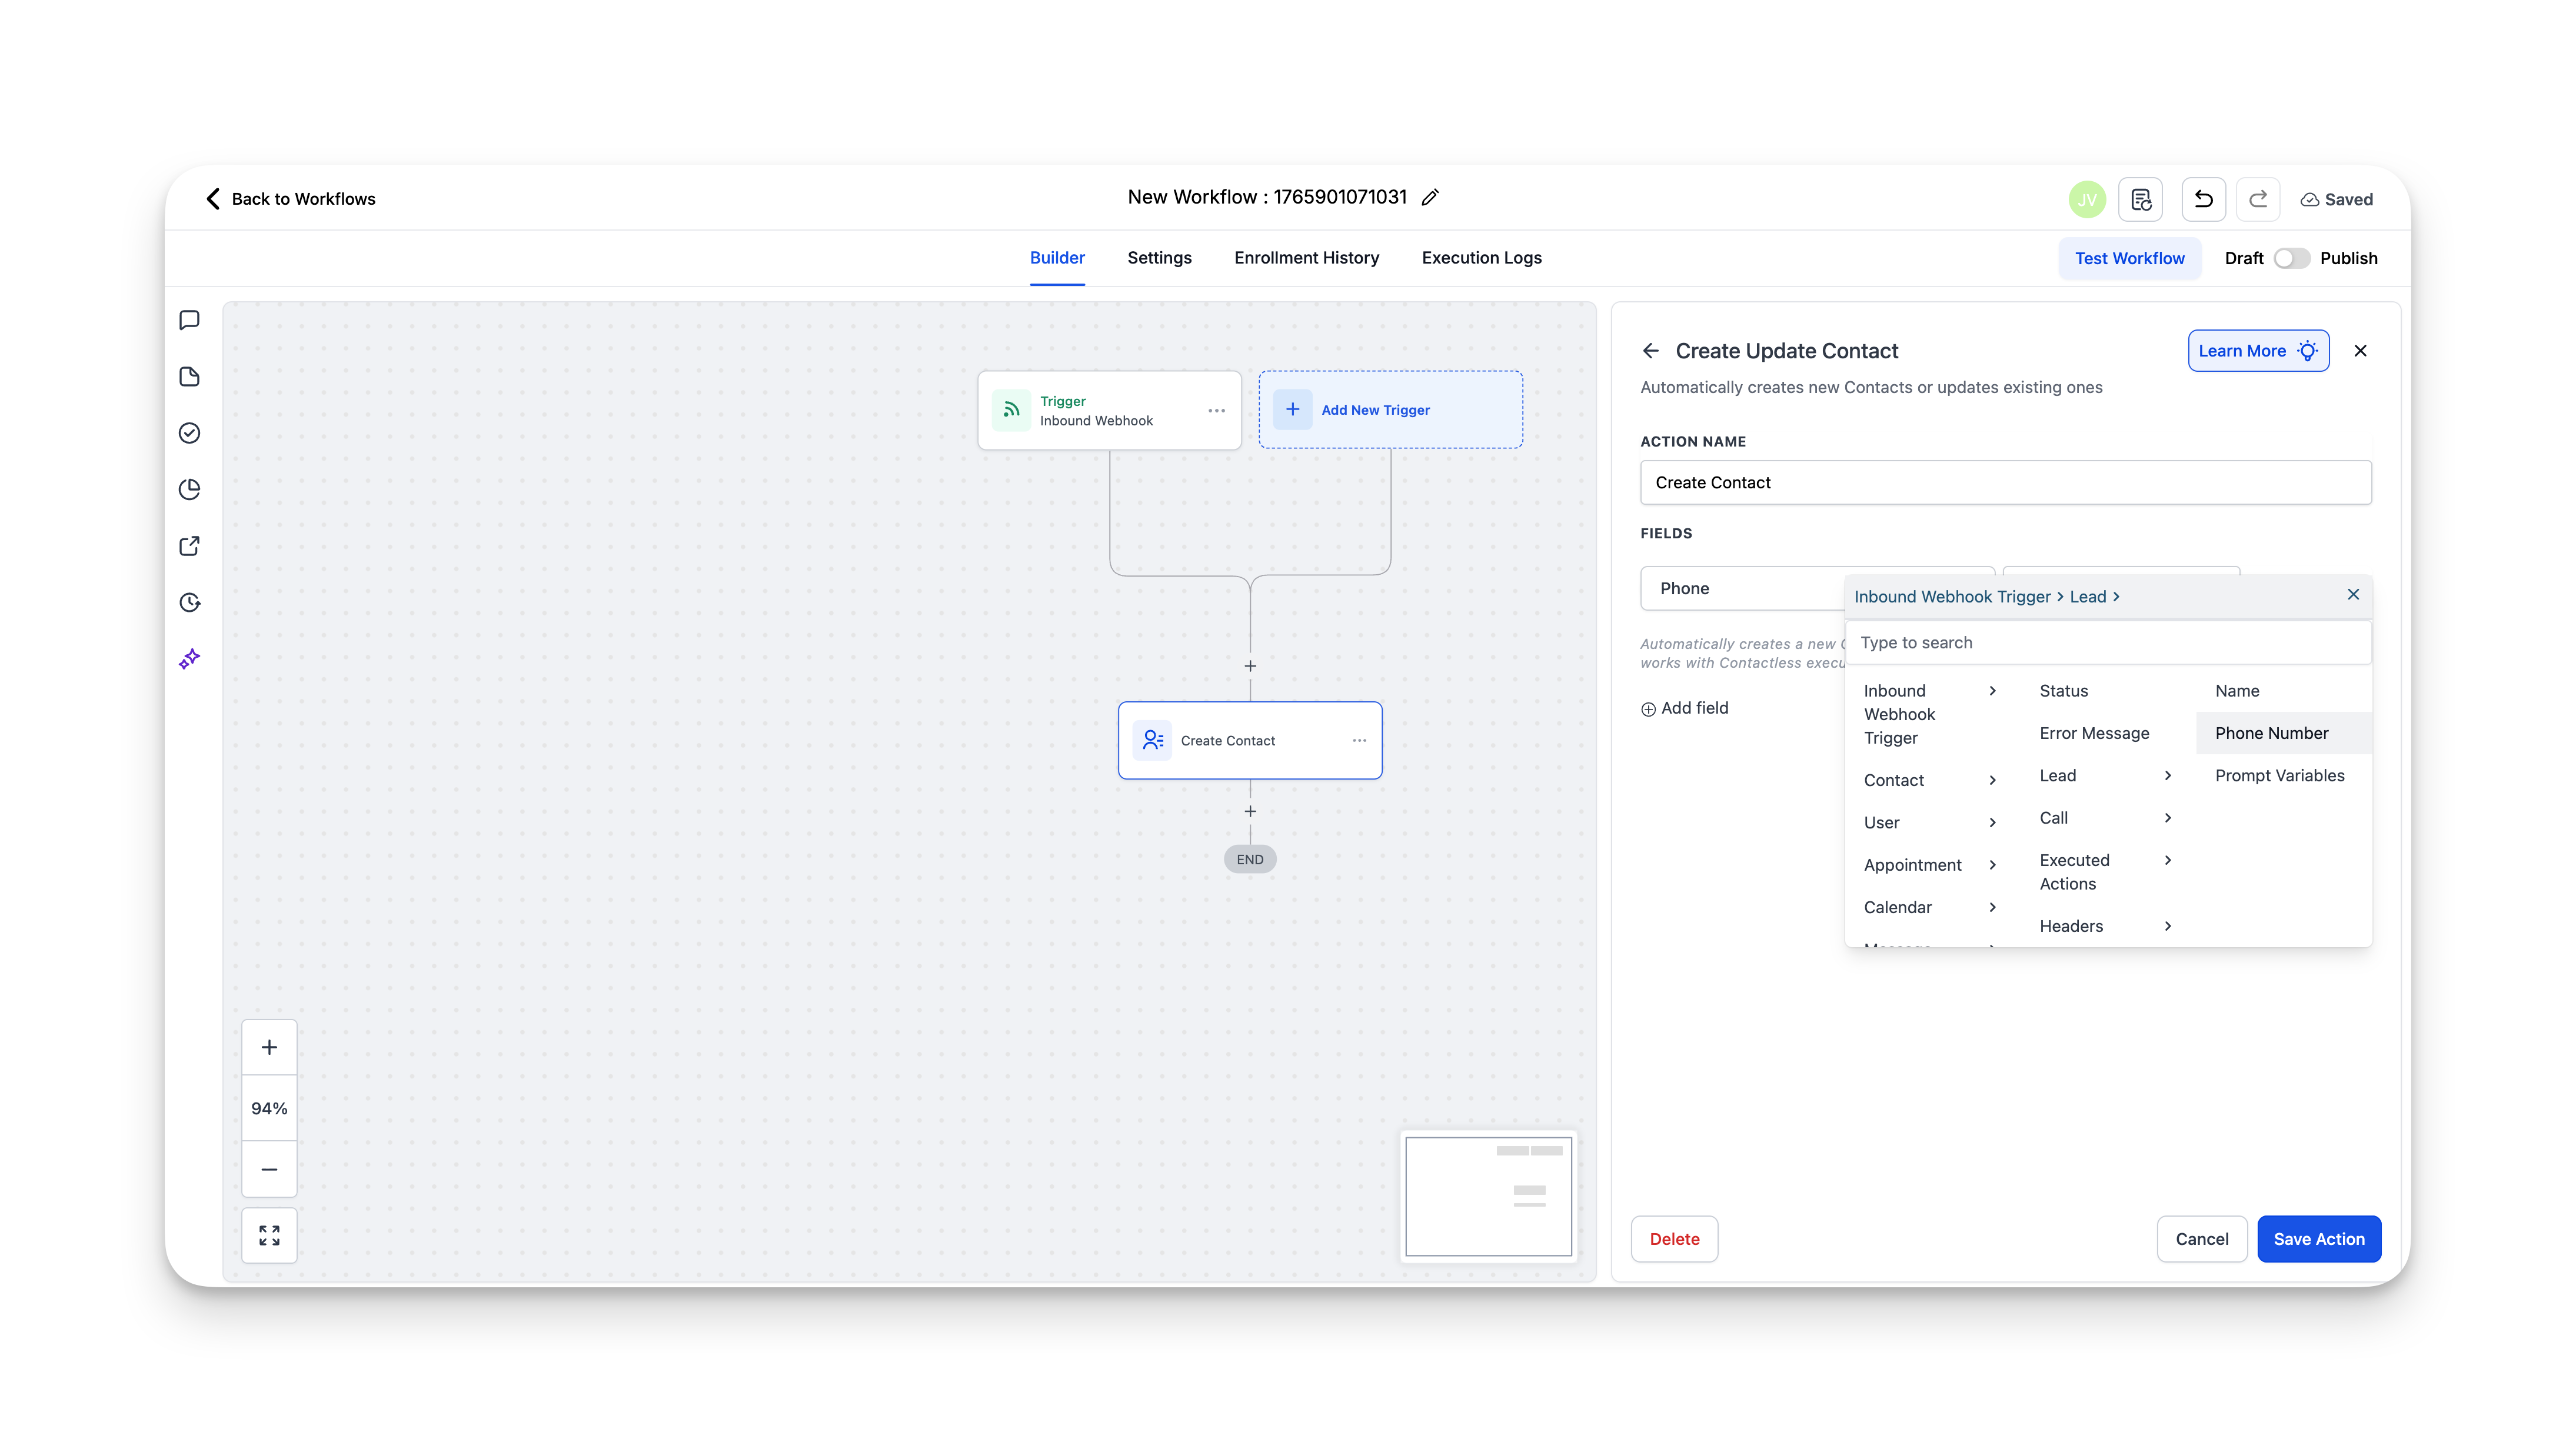
- Map contact fields:
- Phone: Contact → Phone (raw format)
- Name: Contact → Full Name (or first/last as needed)
- Custom variables: create them in Synthflow (e.g.,
dealership_name) and map the value from GoHighLevel.
- Save the action.
- Open Settings for the workflow and enable Allow re-entry, then Save.
- (Optional) To capture call data, create another workflow with trigger Inbound Webhook:
- Copy the provided webhook URL.
- In Synthflow Deployment, paste the webhook and click Initialize.
- Back in GoHighLevel, Fetch Sample Requests, select a reference payload, and Save Trigger.
- Add fields/notes to map call data such as
call → transcript,call → recording_url, andexecuted_actions → action_transfer_call → return_value → status. - Save the action and then Save the workflow.
FAQ
Do I need agency-level access to connect GoHighLevel?
It depends on your usecase. If you want to manage your GoHighLevel subaccounts inside Synthflow, you will need an agency-level account. If you want to connect your normal GoHighLevel account to perform actions such as importing your calendars, then an agency-level account is not required.
Can I manage subaccounts directly in Synthflow?
Yes. You can create and manage subaccounts in Agency > Subaccounts, and import existing ones from GoHighLevel. See managing subaccounts for more details.
How do I enable Real Time Booking for a subaccount?
Import the subaccount’s GoHighLevel calendar when creating a Real Time Booking action (Actions > Real Time Booking > Create Event), then attach that action to the Assistant in its Actions tab.
Why don’t I see my subaccounts after connecting?
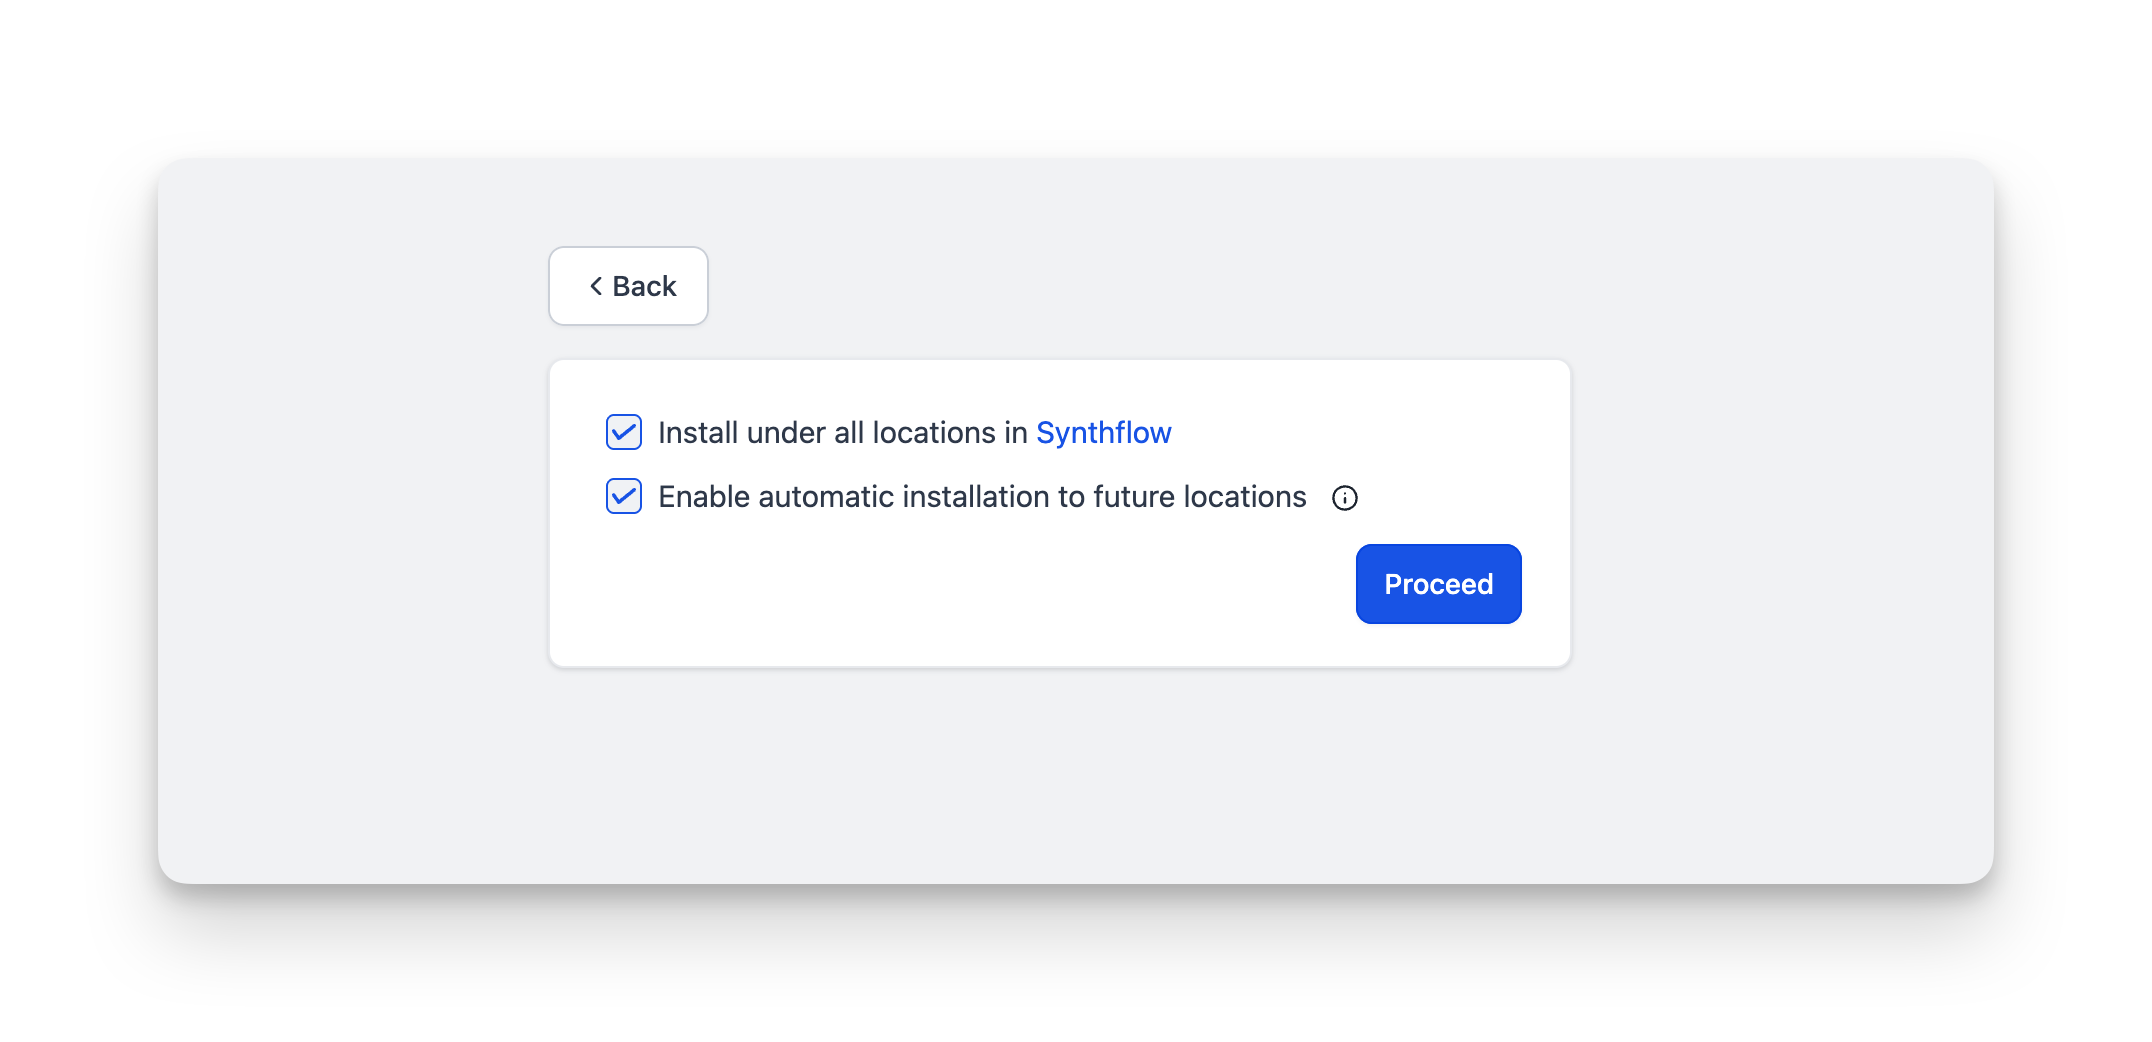
Disconnect GoHighLevel under Agency > Integrations > GoHighLevel, then reconnect with Allow access to all sub-accounts and Enable Automatic Future Installation checked. Confirm you chose the correct agency account. If you see “Invalid Authentication,” retry in an incognito window.