Real-Time Booking
Real-Time Booking
Real-time booking actions let your agent connect to supported calendar systems, check availability while a call is happening, and confirm appointments without handing the caller off to another channel.
Real-time booking integrations allow your AI agent to check calendar availability and schedule appointments during phone conversations. The agent can propose available time slots, confirm bookings instantly, and send confirmation details—all without human intervention.
Overview
Real-time booking actions connect your agent to your calendar system, enabling it to:
- Check real-time availability across multiple calendars
- Propose available time slots to customers
- Create confirmed bookings instantly during calls
- Handle time zone conversions automatically
- Send booking confirmations and reminders
This integration is ideal for businesses that want to automate appointment scheduling while maintaining a conversational, helpful experience for customers.
Supported Platforms
Synthflow supports real-time booking with the following calendar platforms:
Cal.com
GoHighLevel
Prerequisites
- A Cal.com account with at least one published event type.
- Proper availability configured in Cal.com (hosts, time buffers, timezones, and booking windows).
- A Synthflow agent created and accessible to you.
- Access to Synthflow Actions and the Real‑Time Booking action.
Connect your Cal.com account
Navigate to Integrations > Cal.com and provide your Cal.com API key.
Select your Cal.com event
After your Cal.com account is connected, Synthflow fetches your published event types.
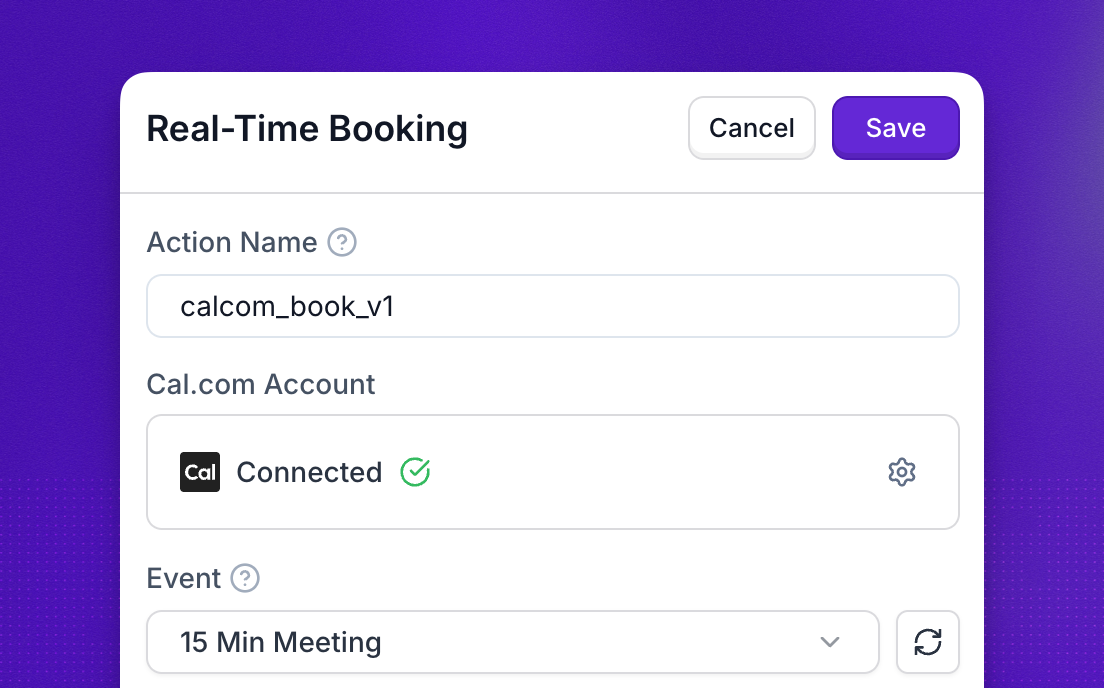
- Create Real-Time Booking action and choose Cal.com as the provider.
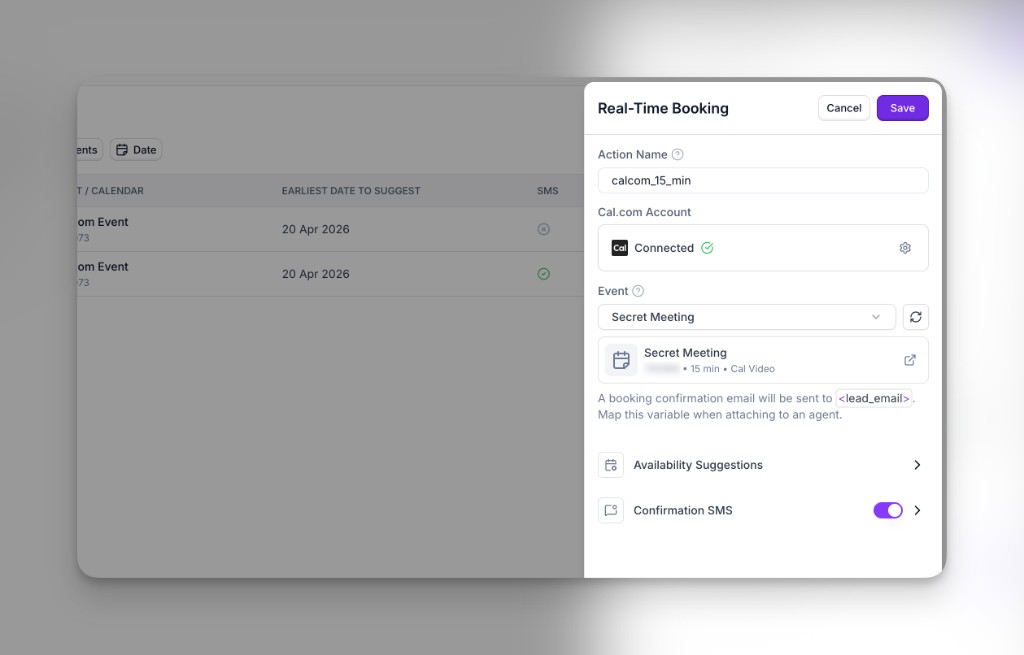
- Open the Event control and pick the event this action should book from the list (synced from your Cal.com account).
- Press Save to finish creating your action.
Use‑case examples
- Real‑time booking during calls: The agent proposes slots, confirms a time, and instantly creates a Cal.com booking.
- 24/7 AI receptionist: Outside business hours, your agent still schedules meetings so you never miss a lead.
- Qualification + scheduling: Ask a few qualifying questions before offering times, then book with the right host or event.
Troubleshooting
- Calendar/event not showing: Verify the Cal.com event is published, that your API key connection is valid, and that you selected the correct event in the action. Make sure the event is visible to the host and not restricted by team settings.
- Booking not created: Confirm the Real‑Time Booking action is attached to the agent and that your prompt contains a clear instruction to schedule. Check call logs for any errors in booking.
- No availability returned: Ensure host calendars are connected in Cal.com and that booking windows/buffers don’t block all times.
- Wrong time zone: Confirm the caller’s time zone detection and your event’s default time zone in Cal.com.
Variables
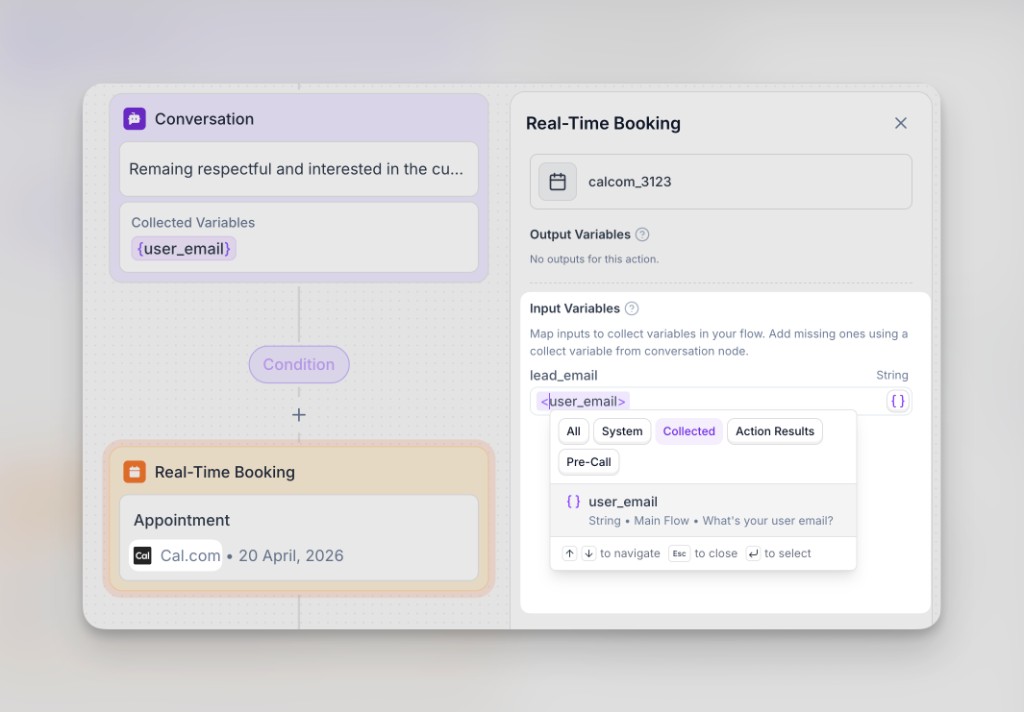
When you attach a real-time booking action to an agent, the action exposes a single input: lead_email. Map it to a fixed email address, or link it to any variable your agent or flow already provides (for example something collected during the call, a system field, pre-call data, or another action’s result).
In the screenshot below, lead_email is mapped to user_email, where user_email was collected earlier in the conversation.
FAQs
What happens if the time becomes double‑booked?
Cal.com checks live availability at booking time. If a slot becomes unavailable, the agent will offer alternative times and attempt a new booking.
How are time zones handled?
The integration uses the caller’s time zone when available; otherwise it falls back to the event/host defaults configured in Cal.com.
Can the caller cancel or reschedule?
Yes. Cal.com’s confirmation emails include manage links. You can also add a follow‑up flow in your agent to retrieve or modify bookings.
Does this work with team/round‑robin events?
Yes—use team or round‑robin events in Cal.com. The agent will book into whichever host Cal.com assigns per your rules.
How do I choose which Cal.com event to use?
When you configure a Real‑Time Booking action with Cal.com, open the Event field and select from the list we load from your connected account. You do not paste an Event ID from the Cal.com URL.
Do I need an API key or OAuth?
You will be asked to provide your API key once upon connection. After that, each Real‑Time Booking action lets you pick an event from the events we fetch from Cal.com.