Vonage
1. Setup Vonage
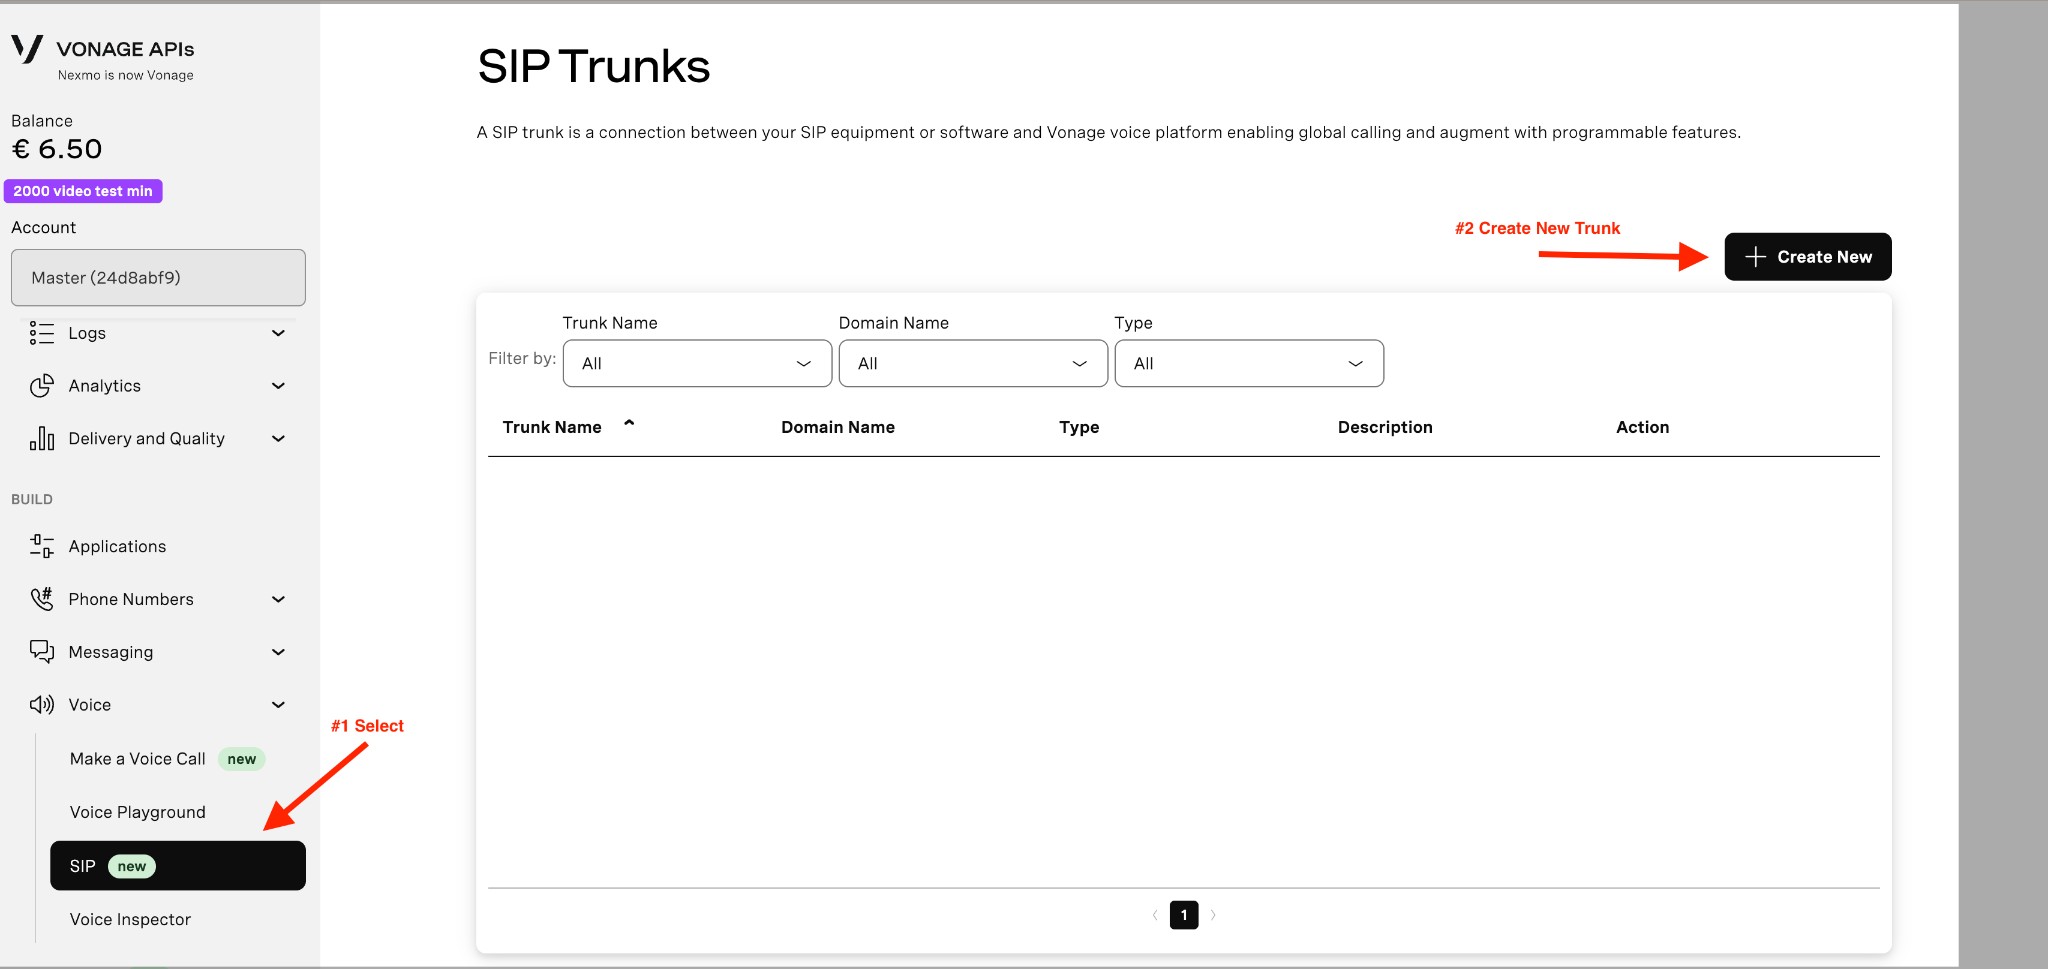
Step #1: Navigate to SIP Trunks and Create a New Trunk
Navigate to the Voice section in the Vonage APIs dashboard, then select SIP from the menu. Click the ”+ Create New” button to create a new SIP trunk.
Step #2: Create the SIP Trunk
Fill in the information to create a SIP trunk. Enter a domain name for your trunk. The domain name can include only letters, digits or dash, and its length must be 5-32 characters.

Step #3: Setup Authentication for Outbound Calls
Navigate to the Authentication section of your SIP trunk. You can add authentication using User Key and Secret or Access Control List (ACL). You must have at least one authentication option enabled.
To configure User Key and Secret:
- Select a User Key (username) - this will be used when importing the number to Synthflow
- Select a Secret (password) that meets the requirements: must be 12-64 characters and include at least 1 digit, 1 lower case, and 1 upper case character (for example, use a strong, unique password generated by a password manager, not a shared example)
After enabling authentication, you will see a success message indicating your trunk is ready for outbound calls. The system will display three regional SIP termination URIs that you will need to use when importing the number to Synthflow:
yourdomain.sip-us.vonage.com (AMER)- For North/South Americayourdomain.sip-eu.vonage.com (EMEA)- For Europe, Middle East, and Africayourdomain.sip-ap.vonage.com (APAC)- For Asia Pacific
Important: You will need to use one of these termination URIs (based on your region) along with the User Key and Secret when importing the number to Synthflow in the next section.
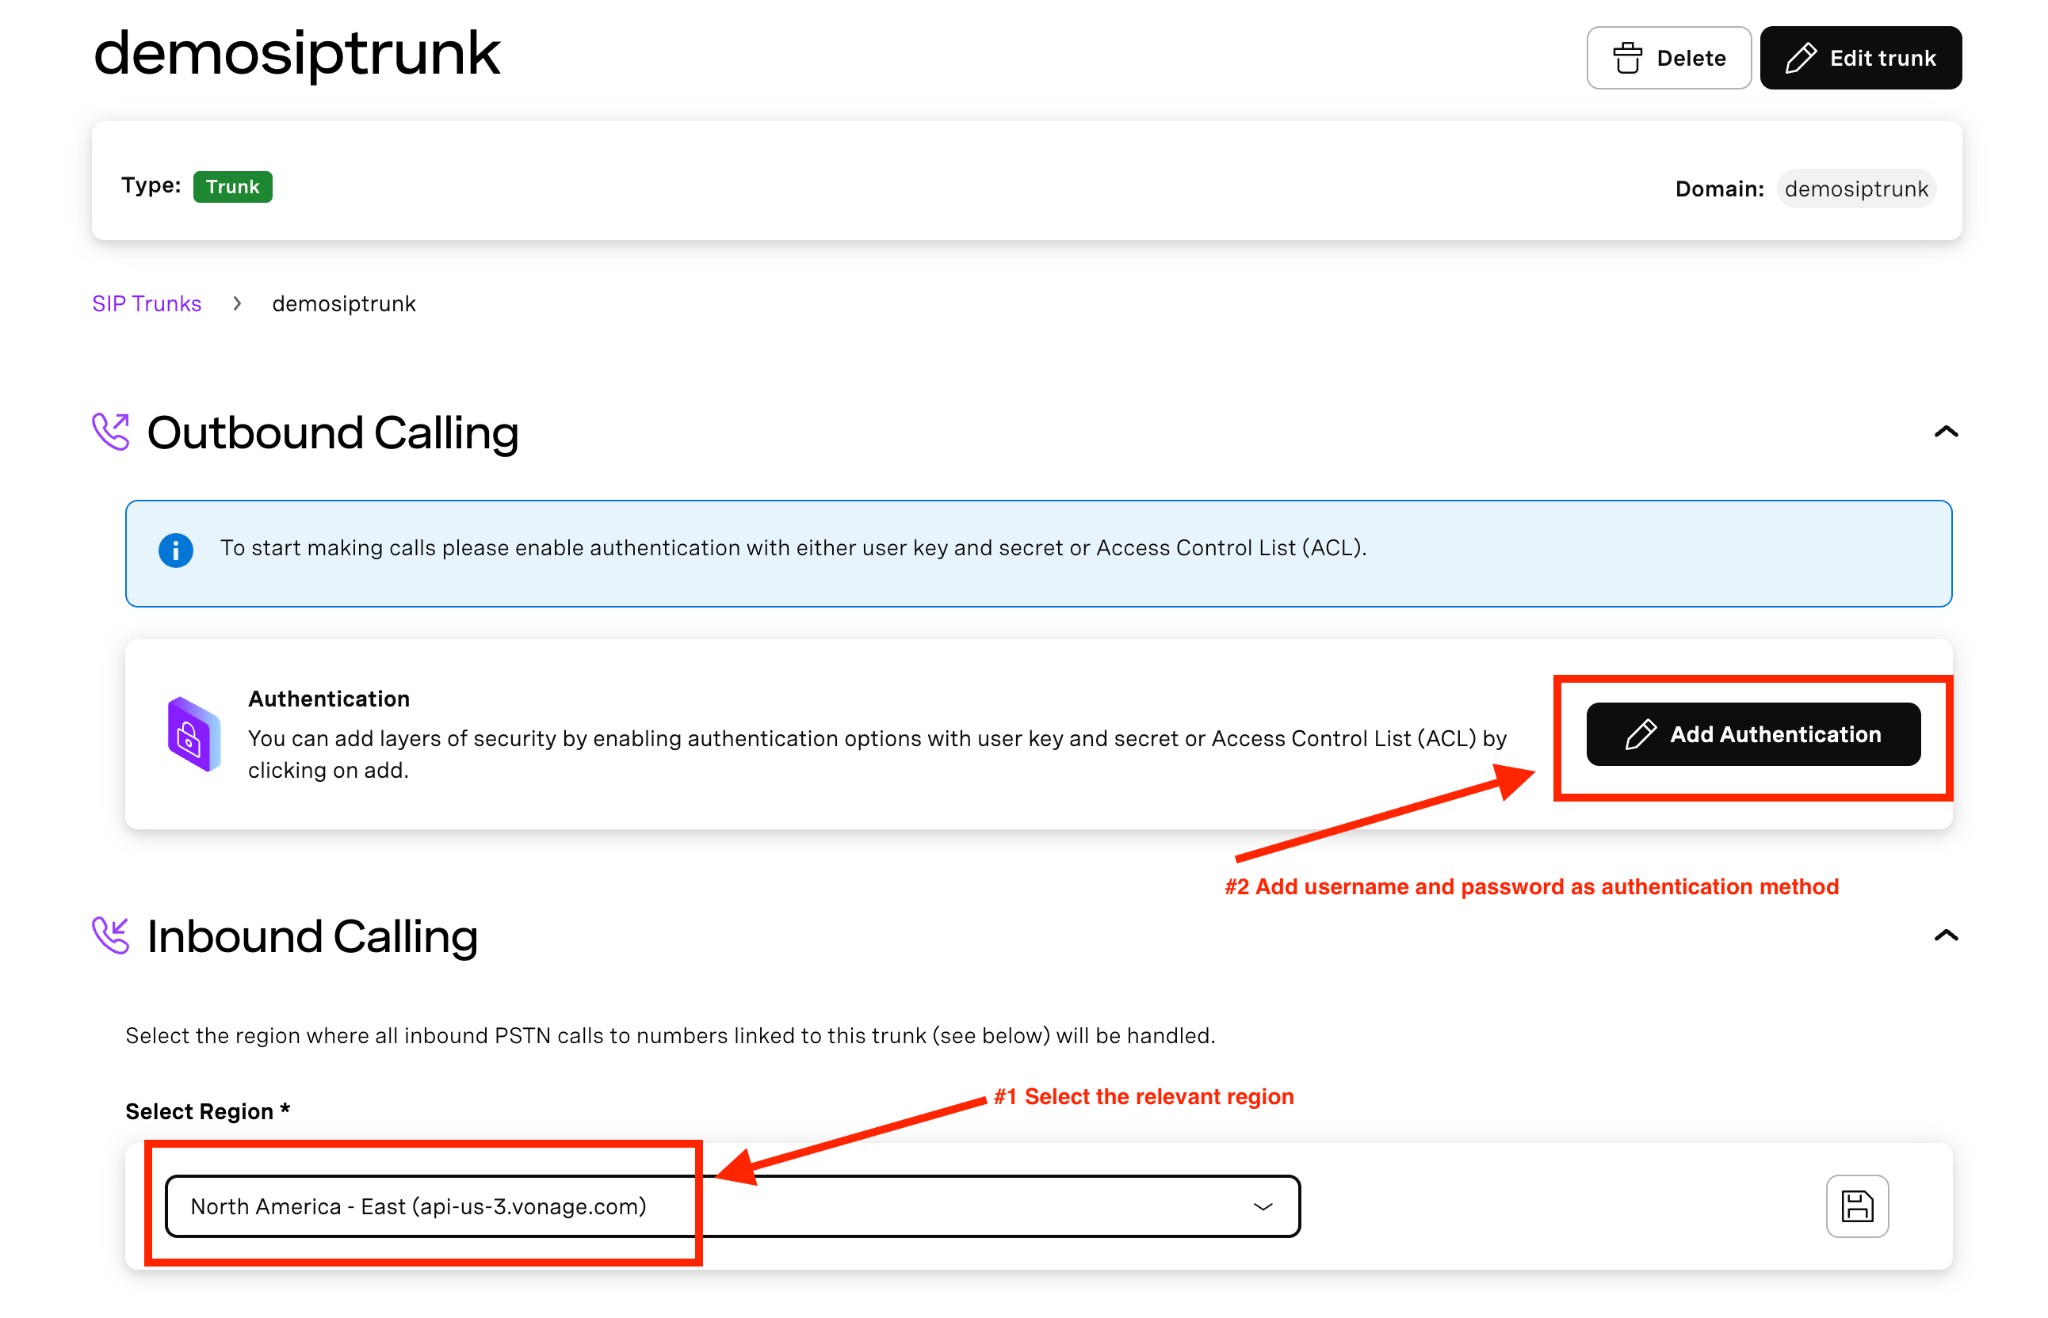
Step #4: Configure Inbound and Outbound Calling Settings
For Inbound Calling:
- Select the region where all inbound PSTN calls to numbers linked to this trunk will be handled (e.g., “North America - East (api-us-3.vonage.com)”)
For Outbound Calling:
- Click “Add Authentication” to enable authentication for outbound calls. You can add authentication with user key and secret or Access Control List (ACL).

Step #5: Add Synthflow’s SIP URI and Link Numbers
Add URI:
- In the *“Add URI ” section, add Synthflow’s SIP server address:
- Priority: 1
- URI:
sip.synthflow.ai:32681 - Transport: UDP (SRTP can be left unchecked)
Link Numbers:
- In the *“Link numbers ” section, link your existing phone numbers to this trunk. You can filter by country, features, and type, then click “Link” for the numbers you want to associate with this trunk.

2. Import Numbers to Synthflow.ai
Now that the number is set up with your SIP trunking, you need to import the number to Synthflow.ai so that we will know how to route the call. In the Synthflow portal, open the “Import Phone Number” form and fill in the following:
- #1 Select Custom number type – Choose “Custom” for SIP trunk integration
- #2 Add the phone number – Enter the number from Vonage’s portal that you linked to your SIP trunk
- #3 Add SIP Domain – Enter the termination SIP URI from Step #3 (e.g.,
yourdomain.sip-us.vonage.comfor US region) - #4 Add username and password – Enter the User Key and Secret you configured in Step #3
- #5 Friendly name (optional) – Give your trunk a distinct name for easy identification

Once the number is imported, you can make and receive calls with this number just like a number you purchased from Synthflow.ai.
If you wish for Synthflow.ai to stop using this number, you can delete it from the dashboard or via the Delete Number API.
SIP REFER limitation: Vonage does not support SIP REFER. Therefore, cold transfers will not work with Vonage SIP trunks. Use warm transfers only. See Vonage’s documentation for details.