

Telnyx
A Telnyx SIP trunk connects your Telnyx numbers to Synthflow, so agents place and receive calls on them. You create the trunk in Telnyx, then import each number into Synthflow.
Telnyx SIP trunk
-
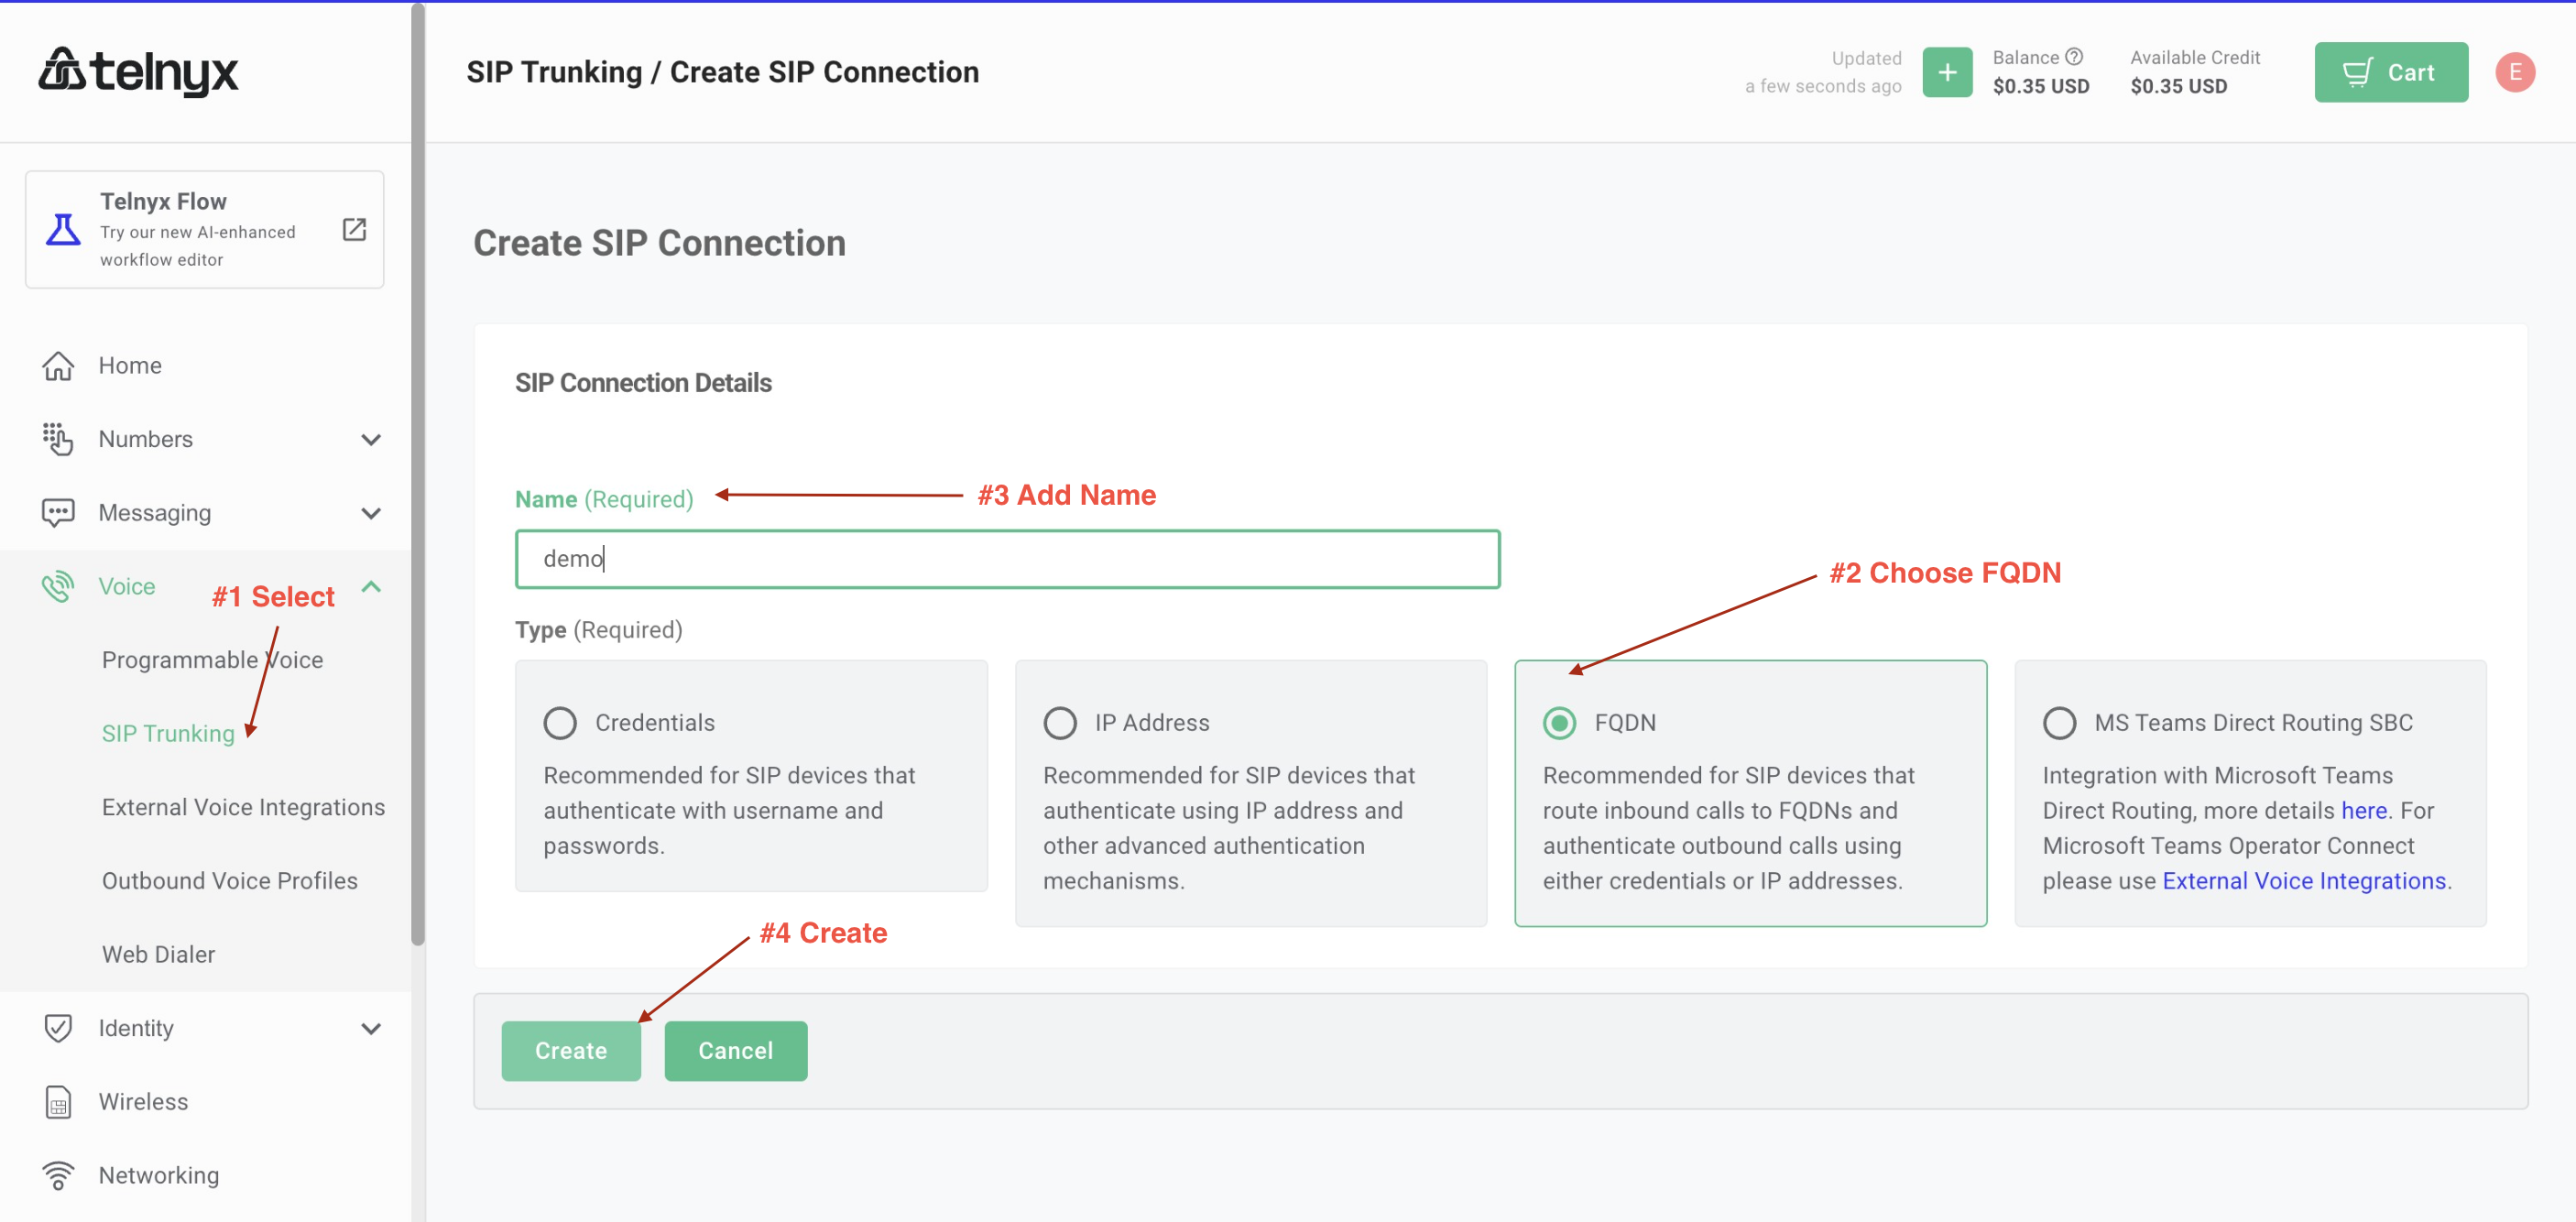
1. Trunk. Create the SIP trunk, select FQDN as the type, and give it a name.
-
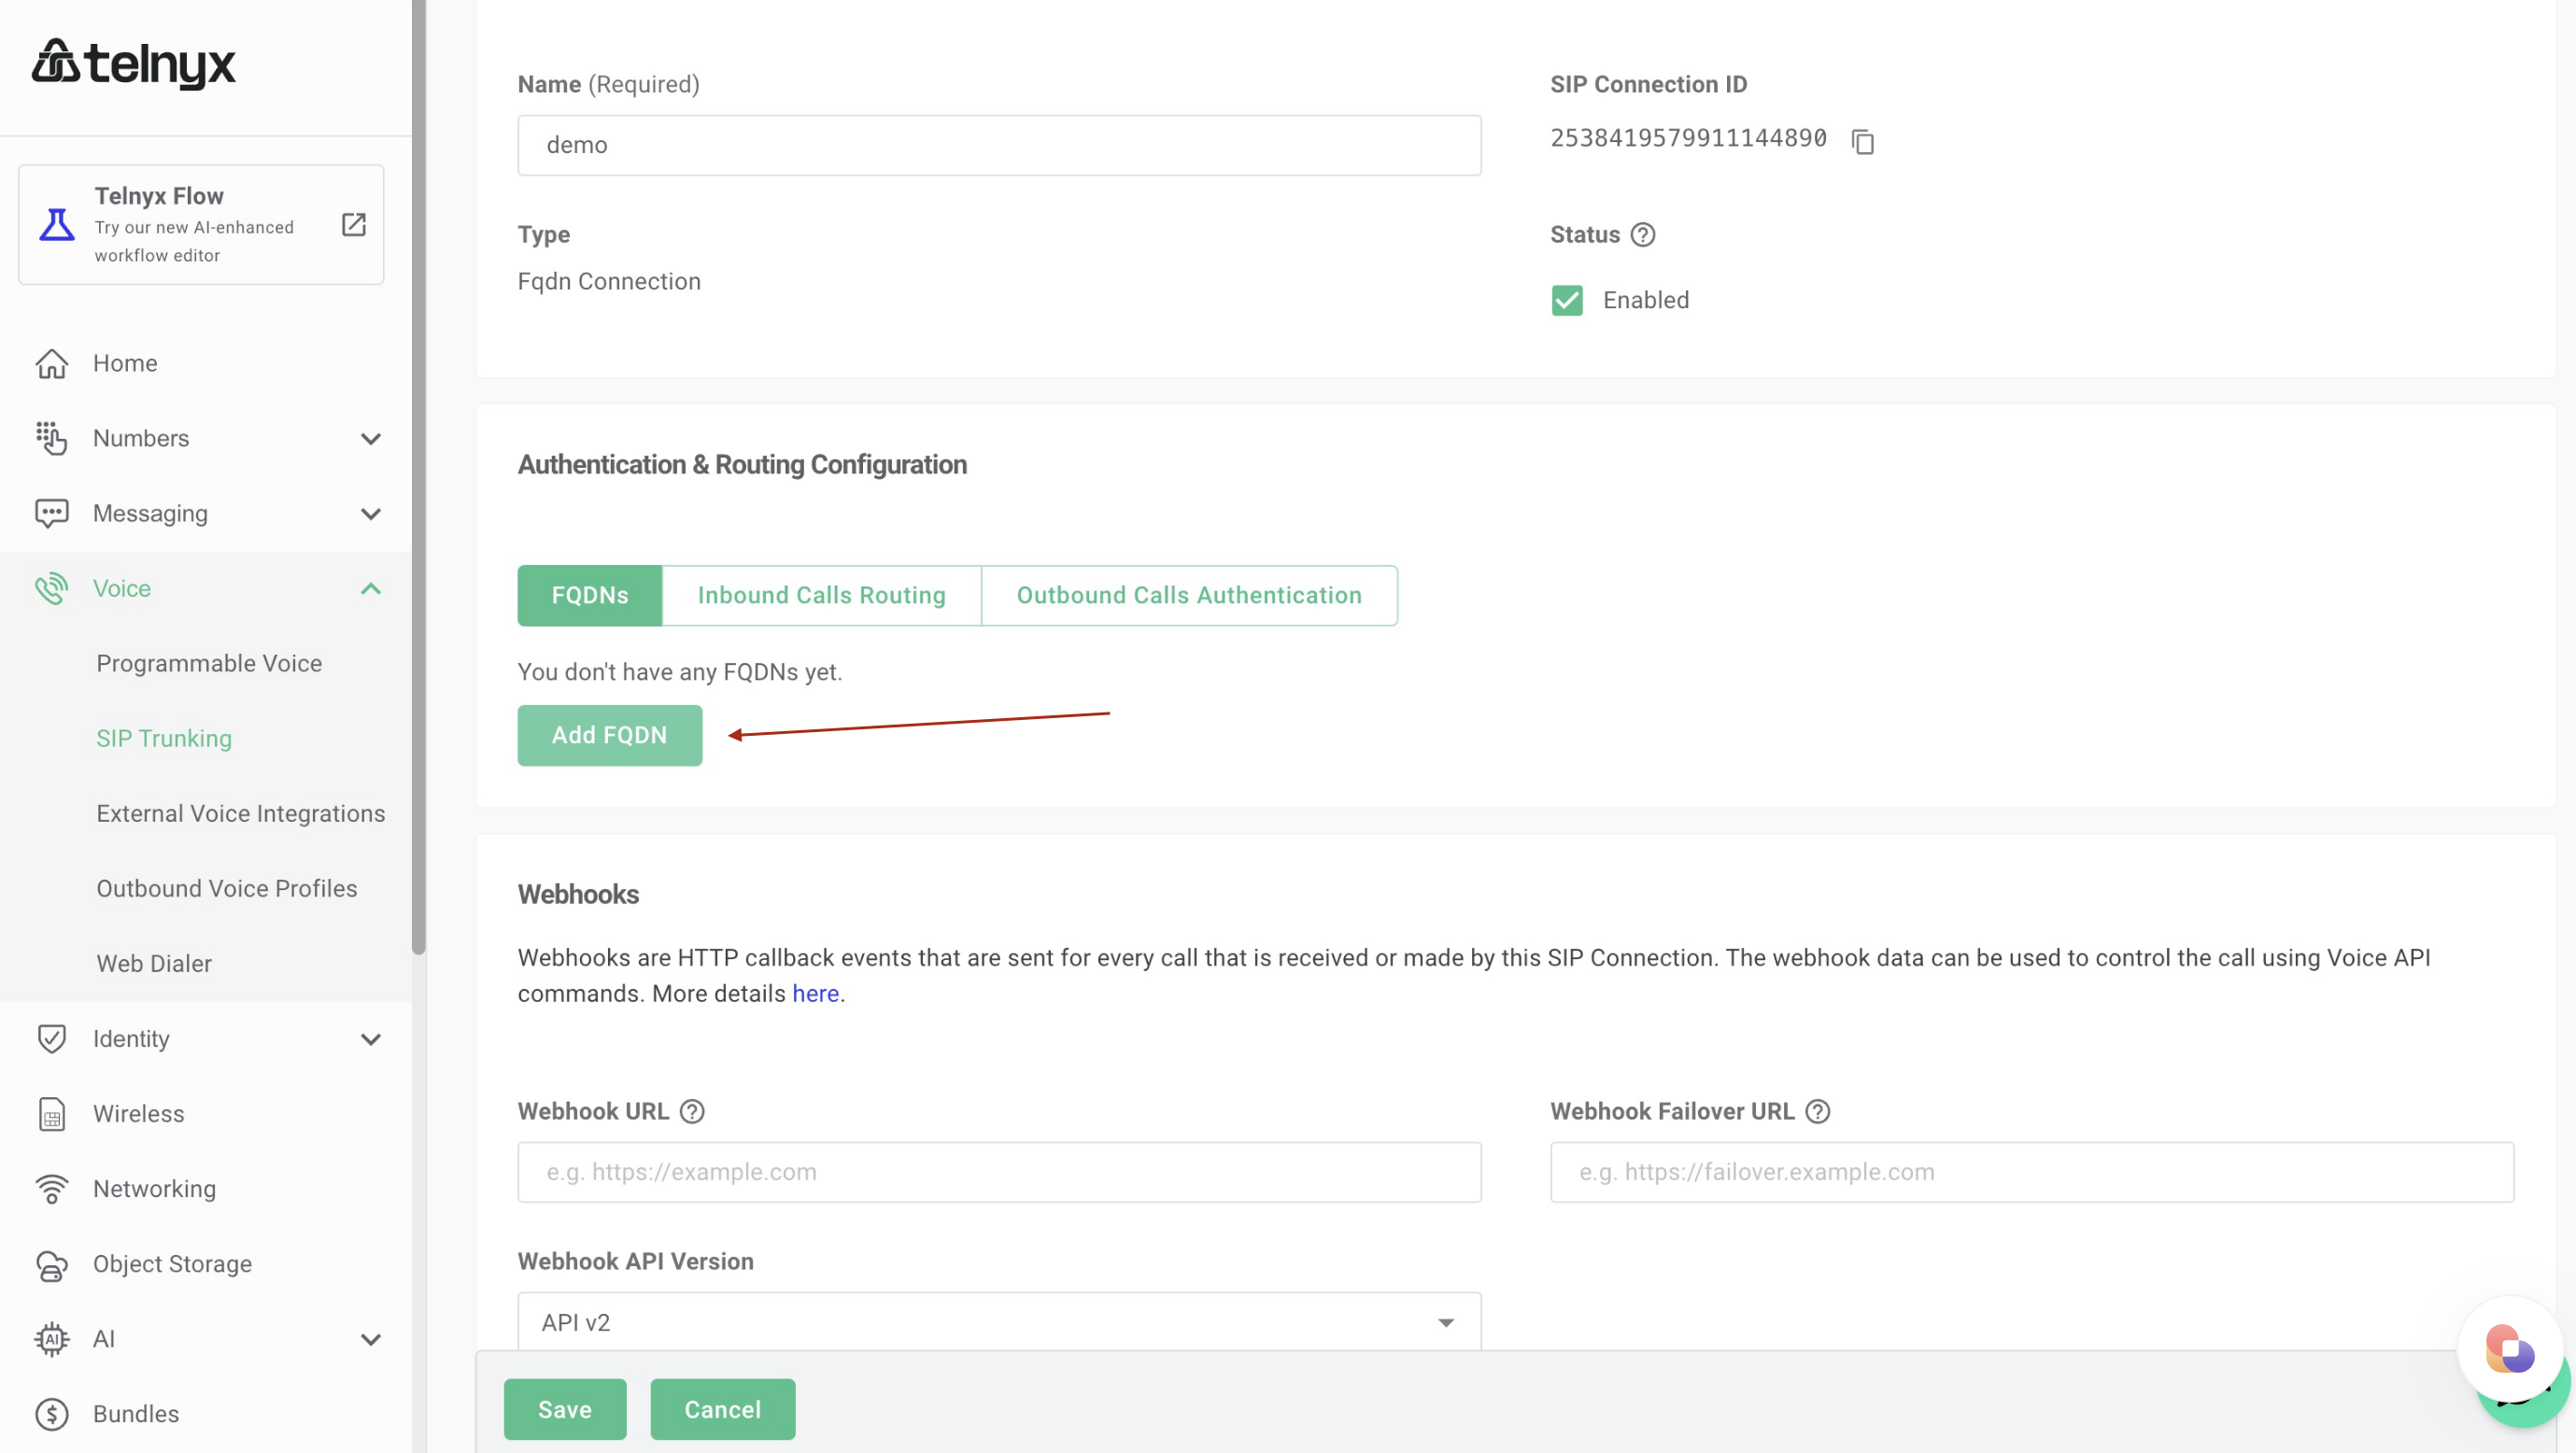
2. Synthflow FQDN. Add the FQDN of Synthflow’s SIP server:
-
Select
Aas the DNS record type. -
Enter
sip.synthflow.aiin the FQDN field. For US or EU workspaces, use your region’s SIP address instead. -
Enter
32681in the Port field. -

-
-
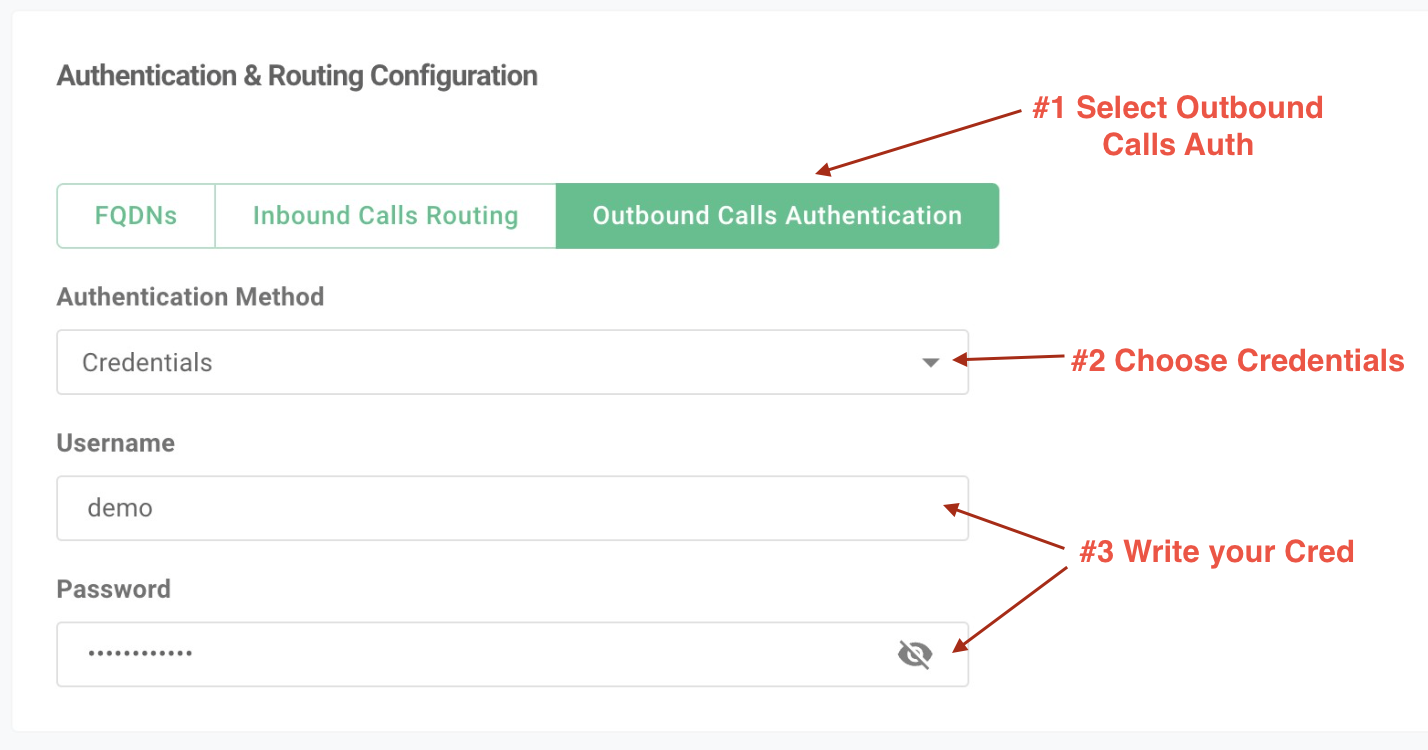
3. Outbound authentication. Select credentials as the authentication method, and add a username and password. You enter the same username and password when you import the number into Synthflow.
-
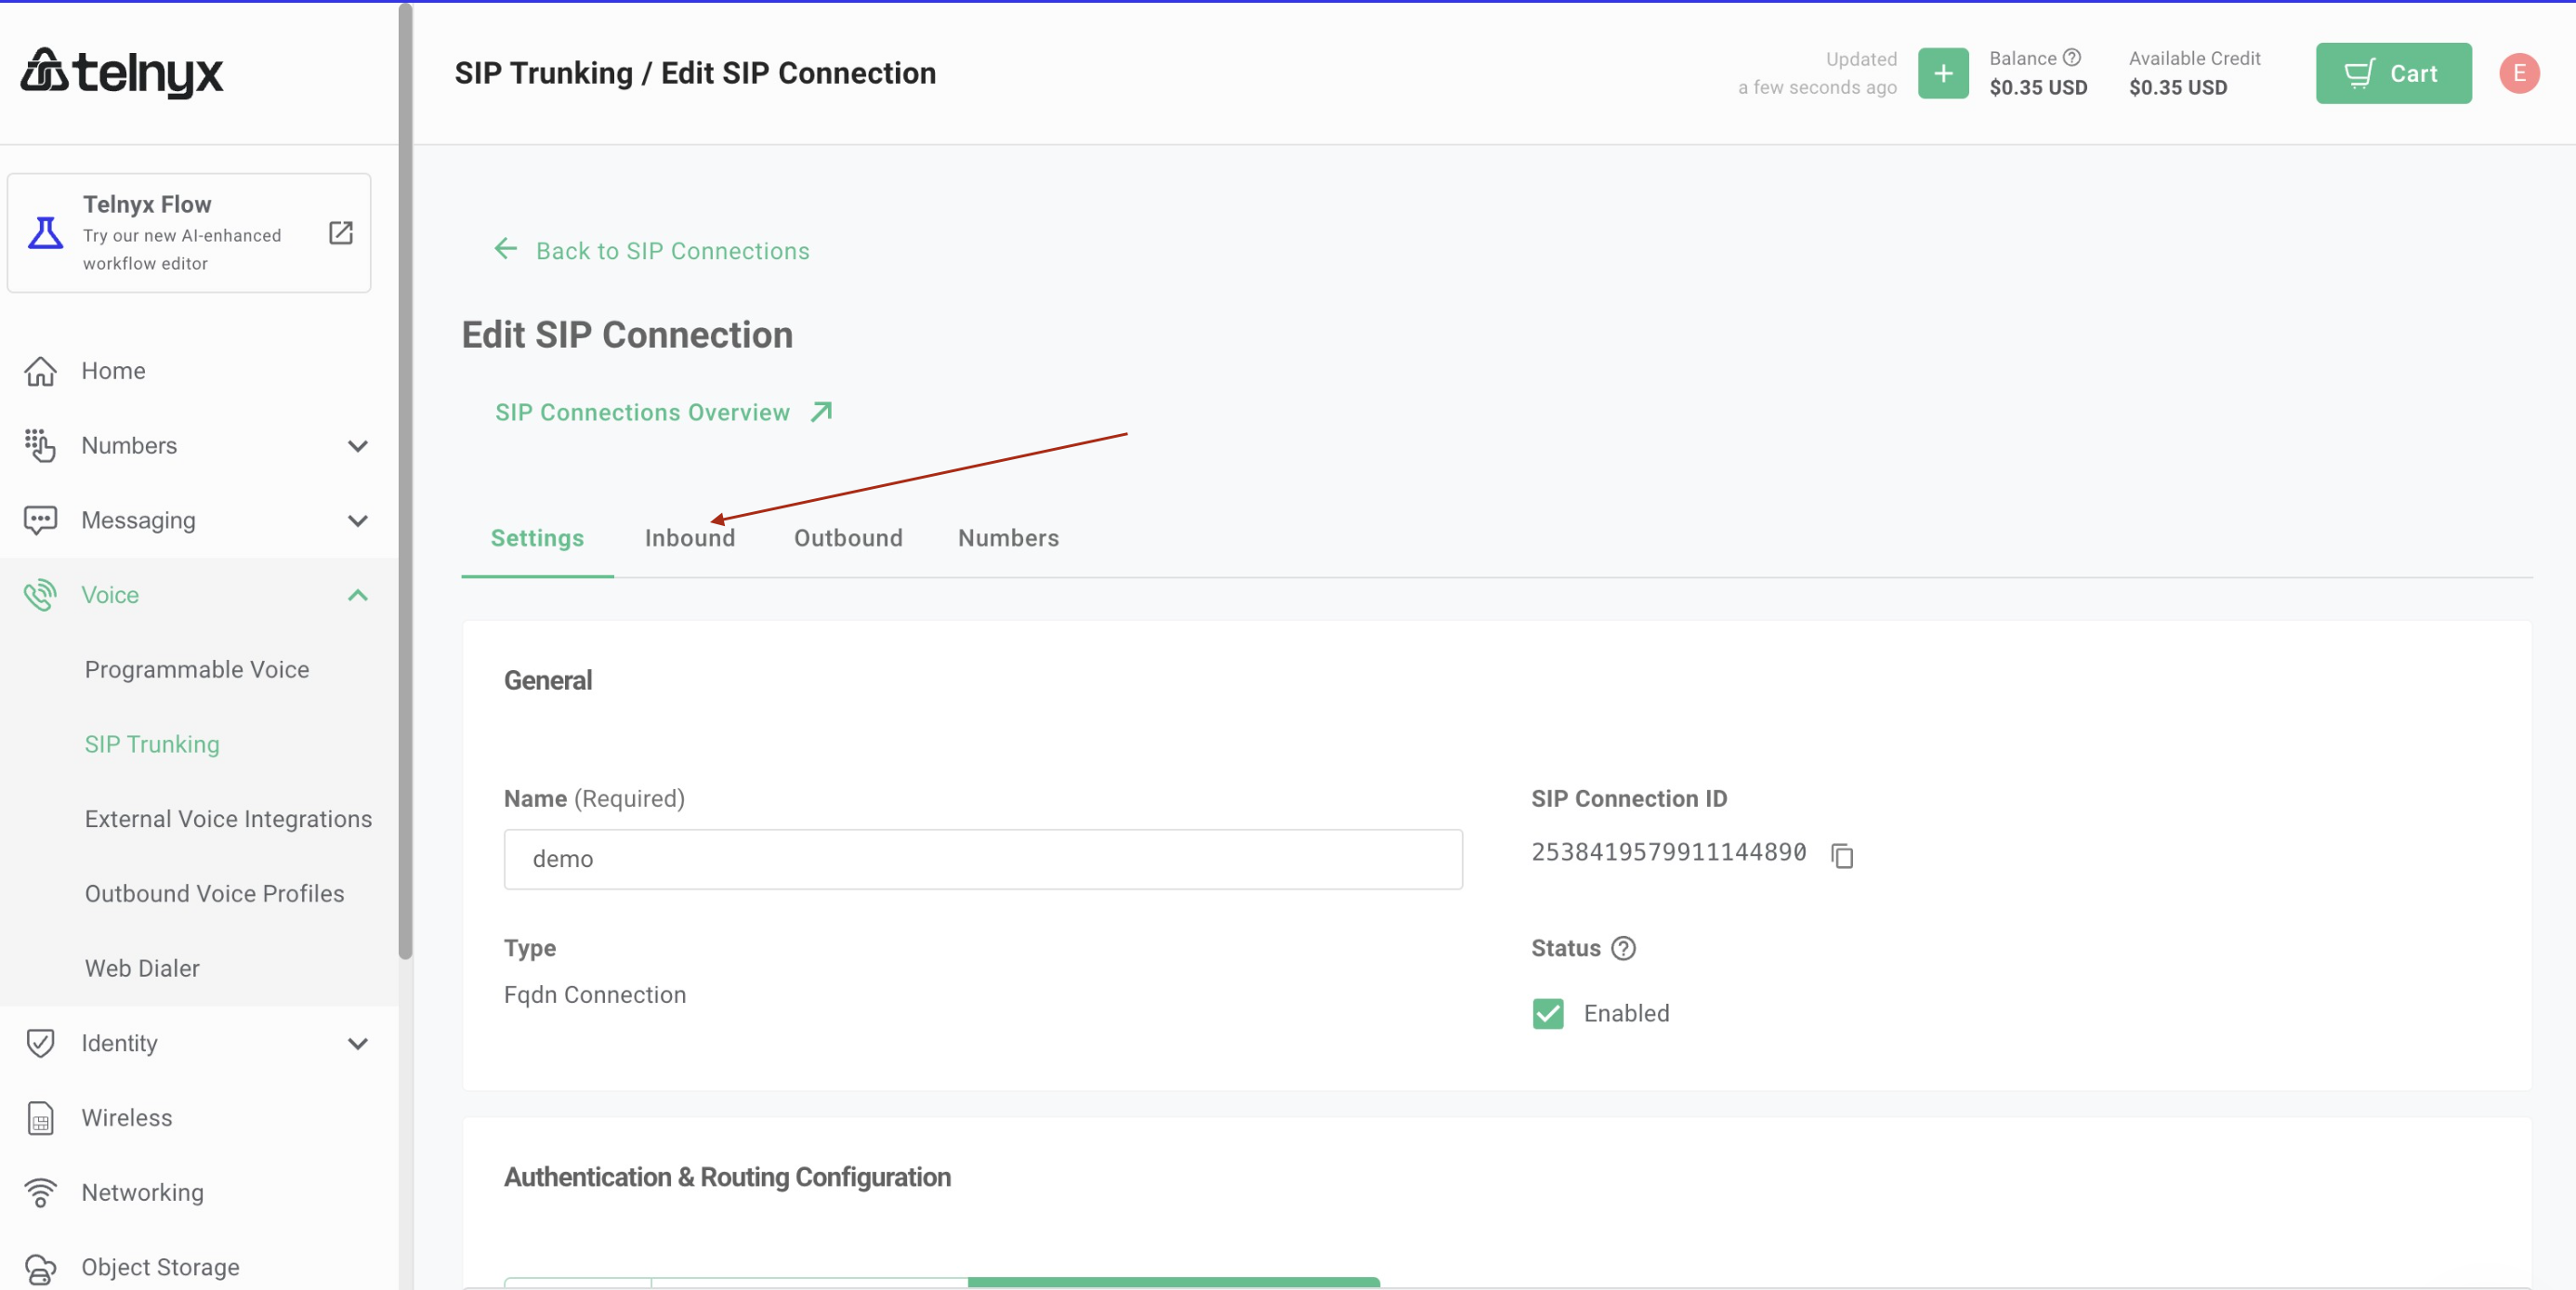
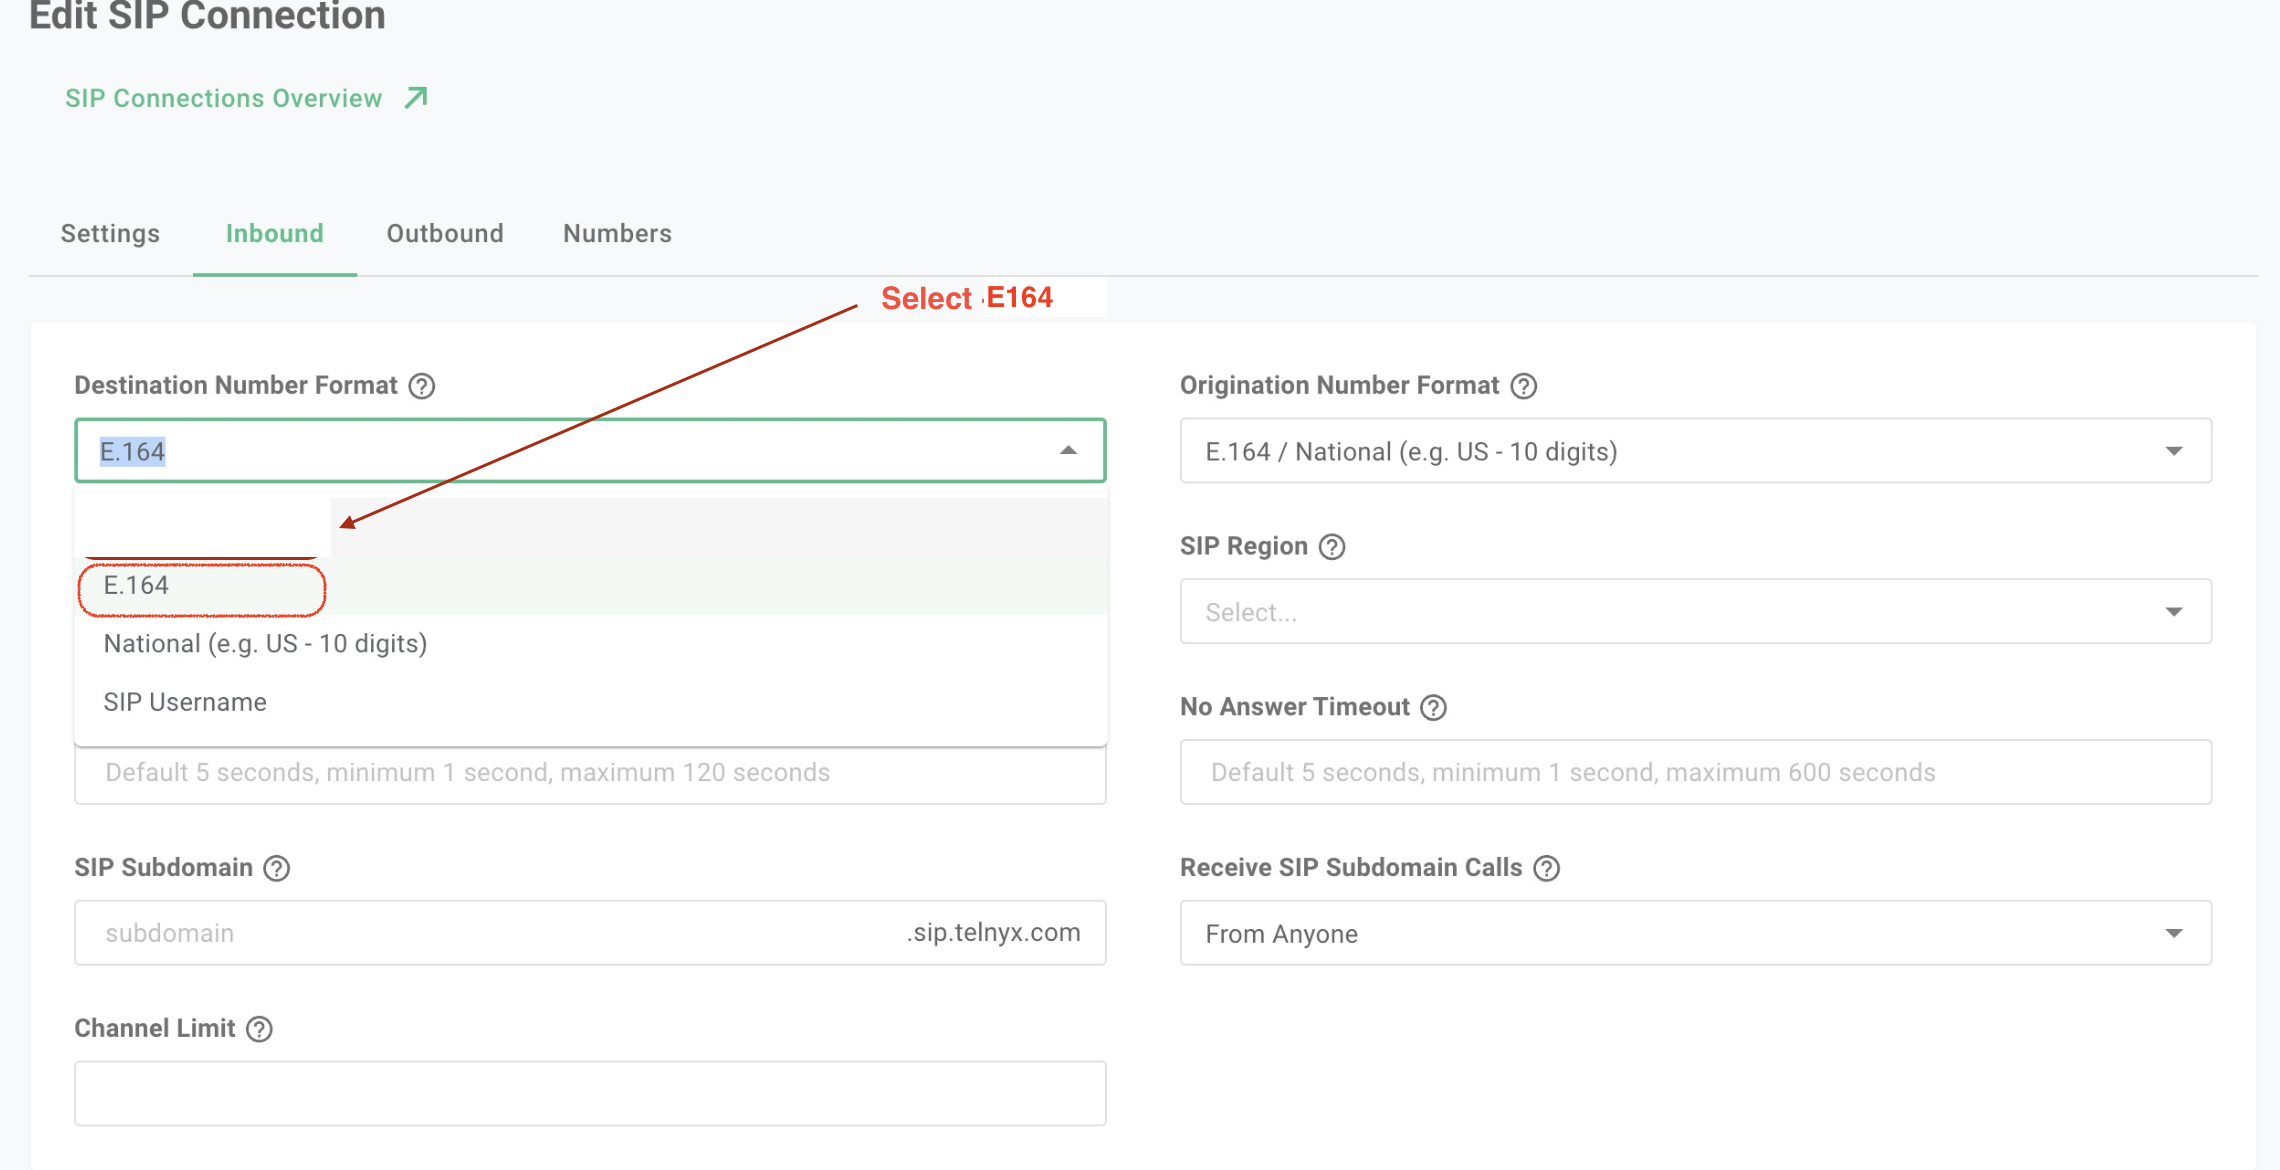
4. Inbound settings. Select
+E164as the number format, andG711andOPUSas the codecs.
-
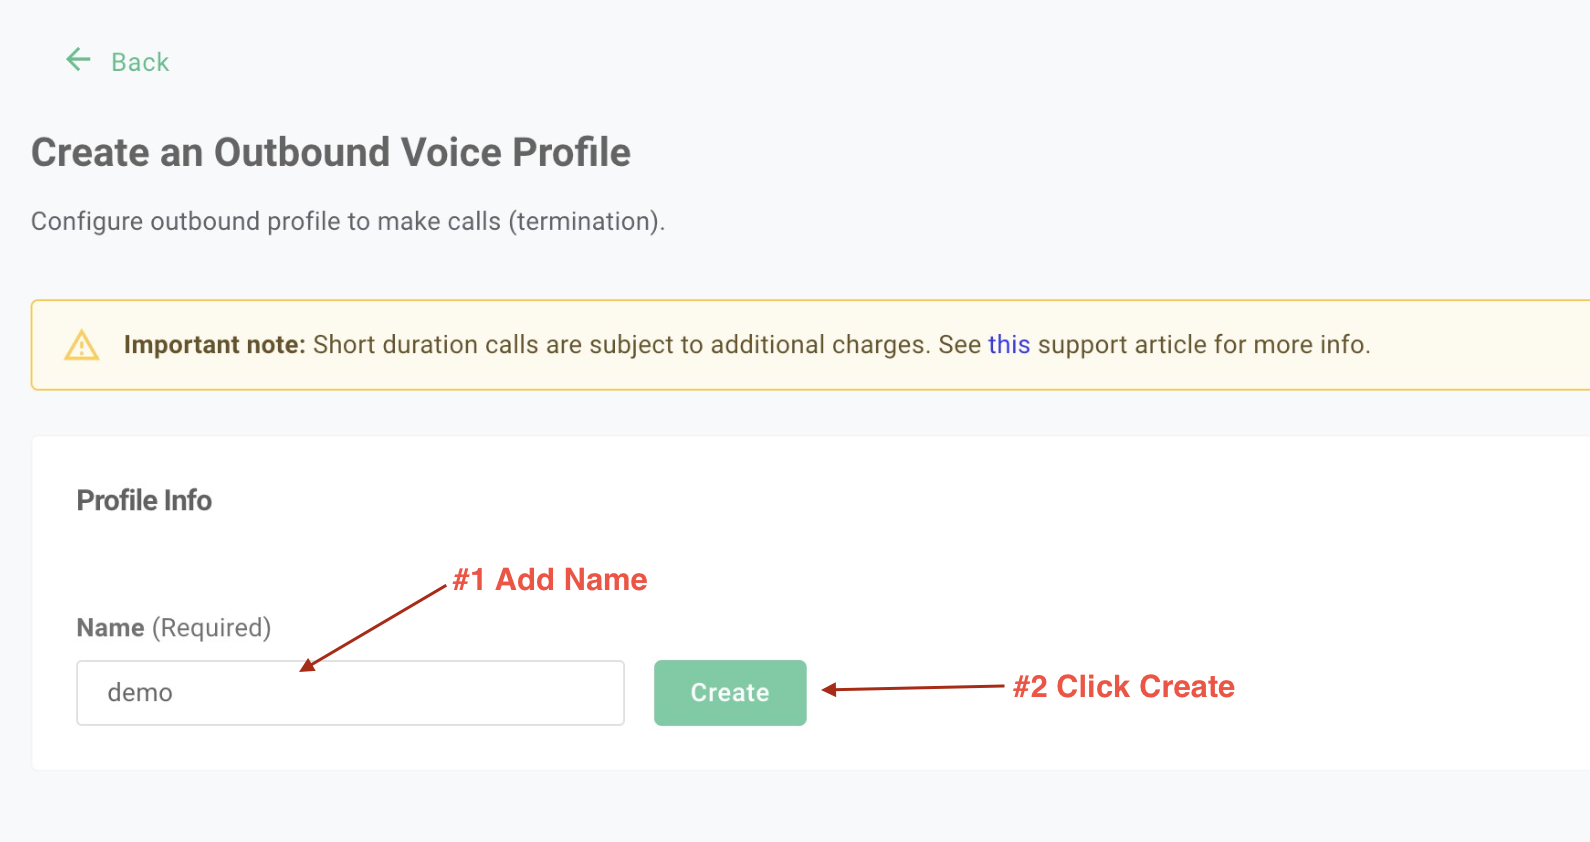
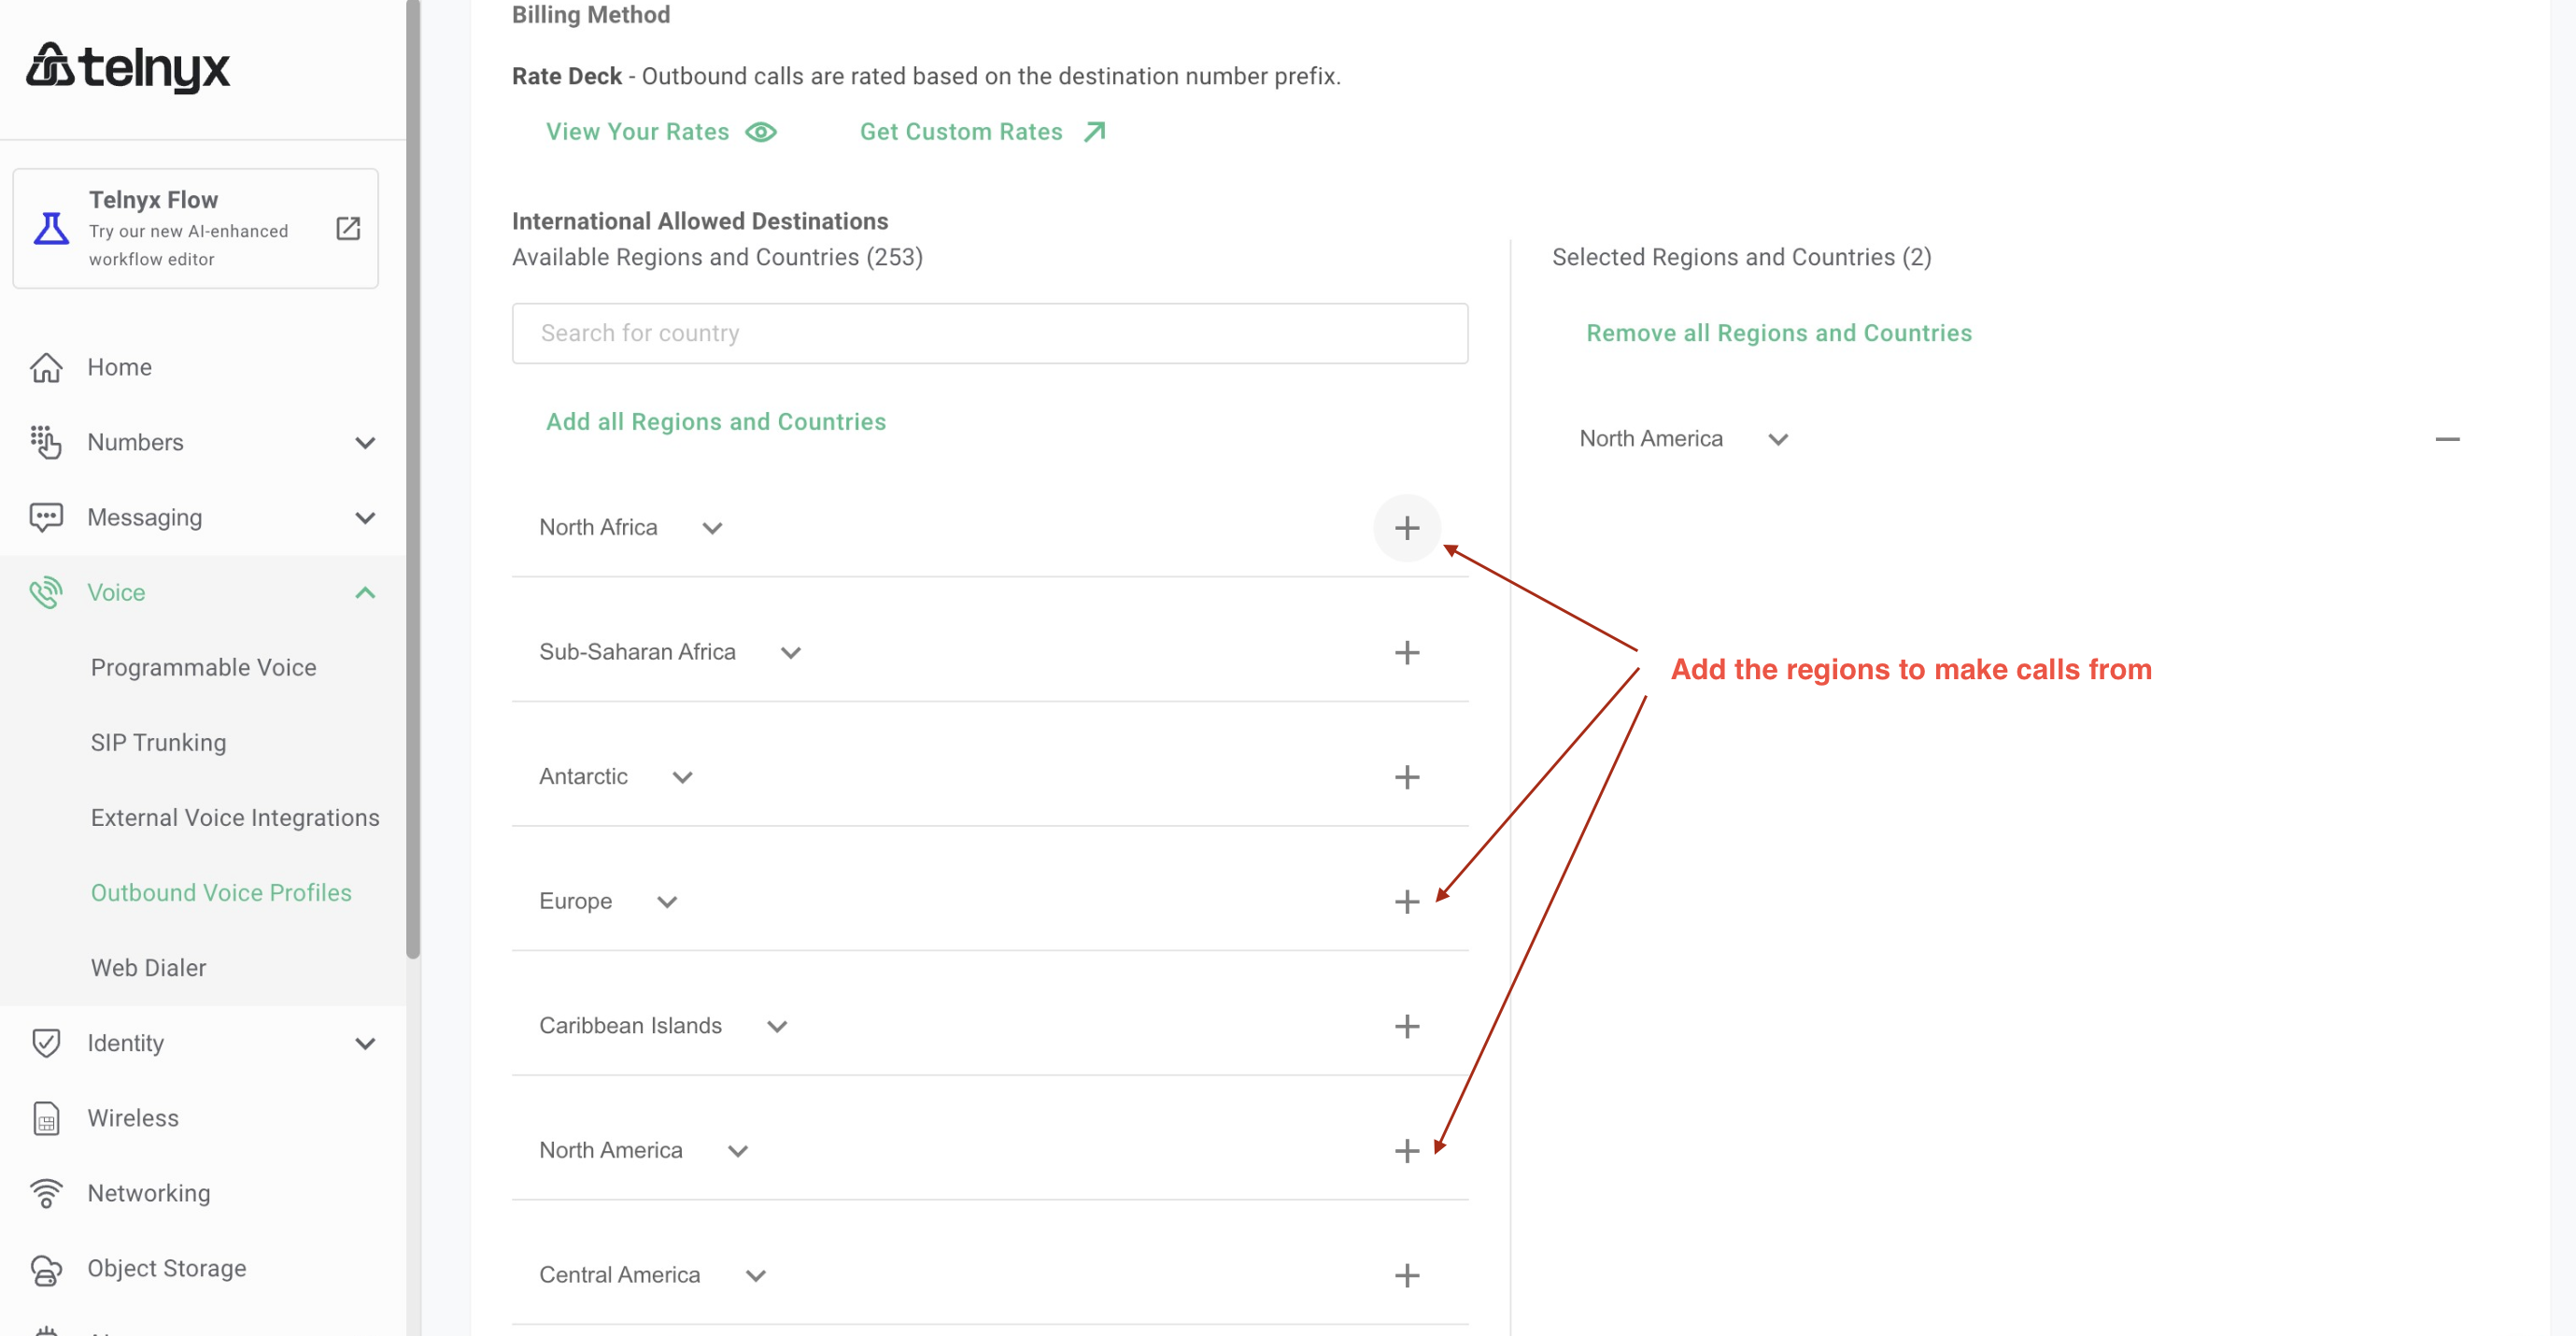
5. Outbound settings. Create an Outbound Voice Profile and select your SIP region.
-
-
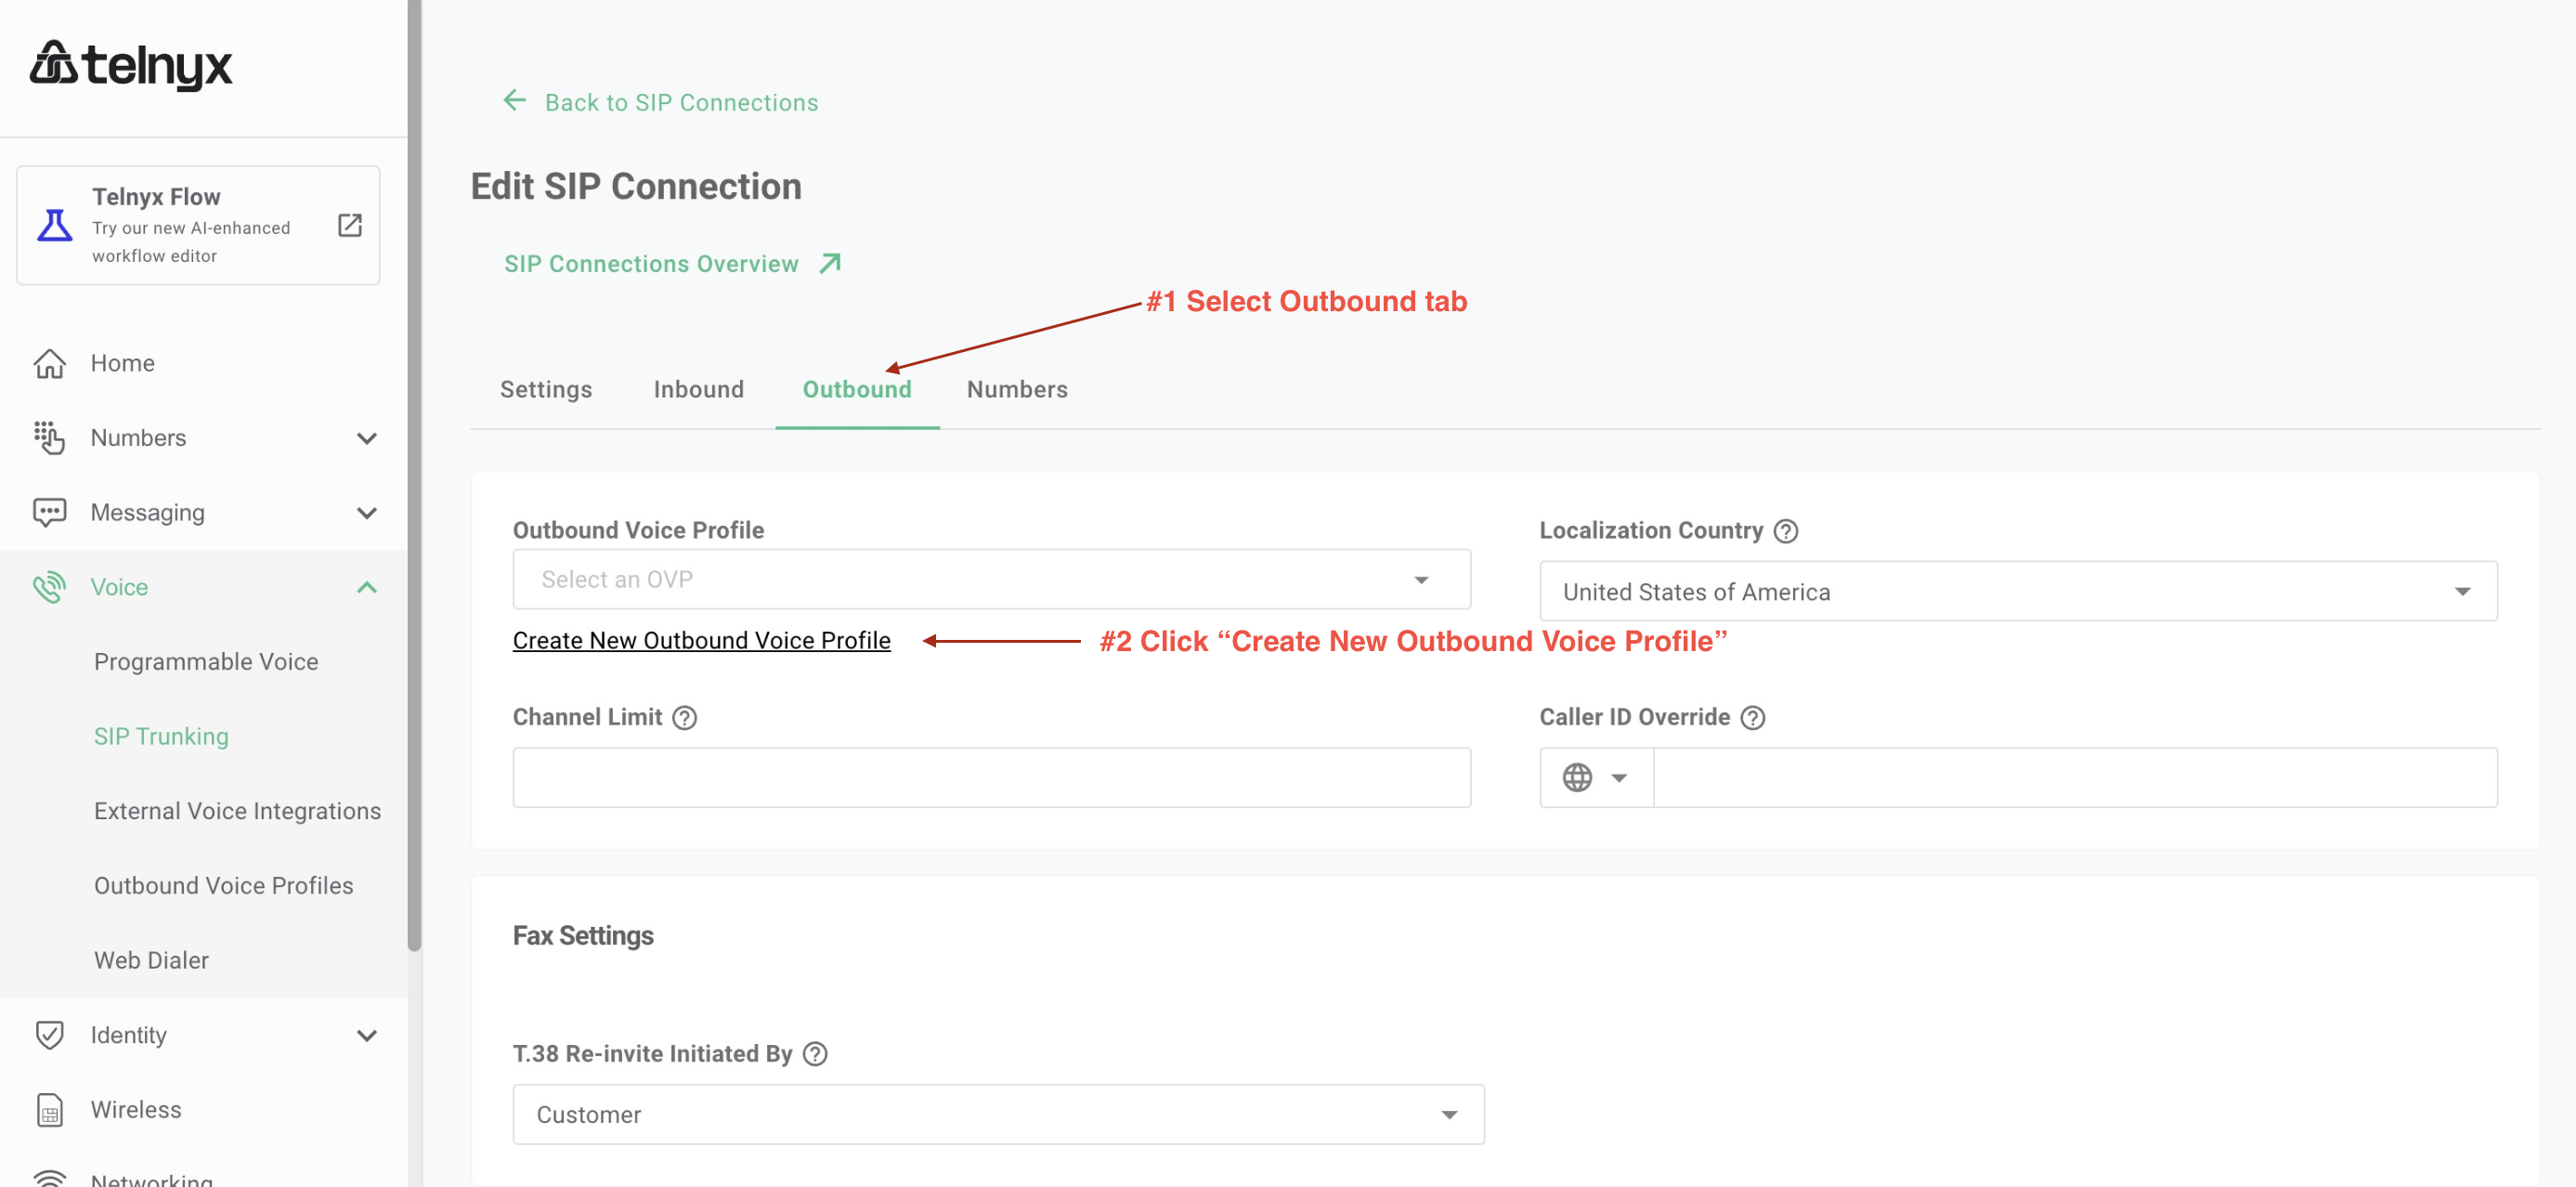
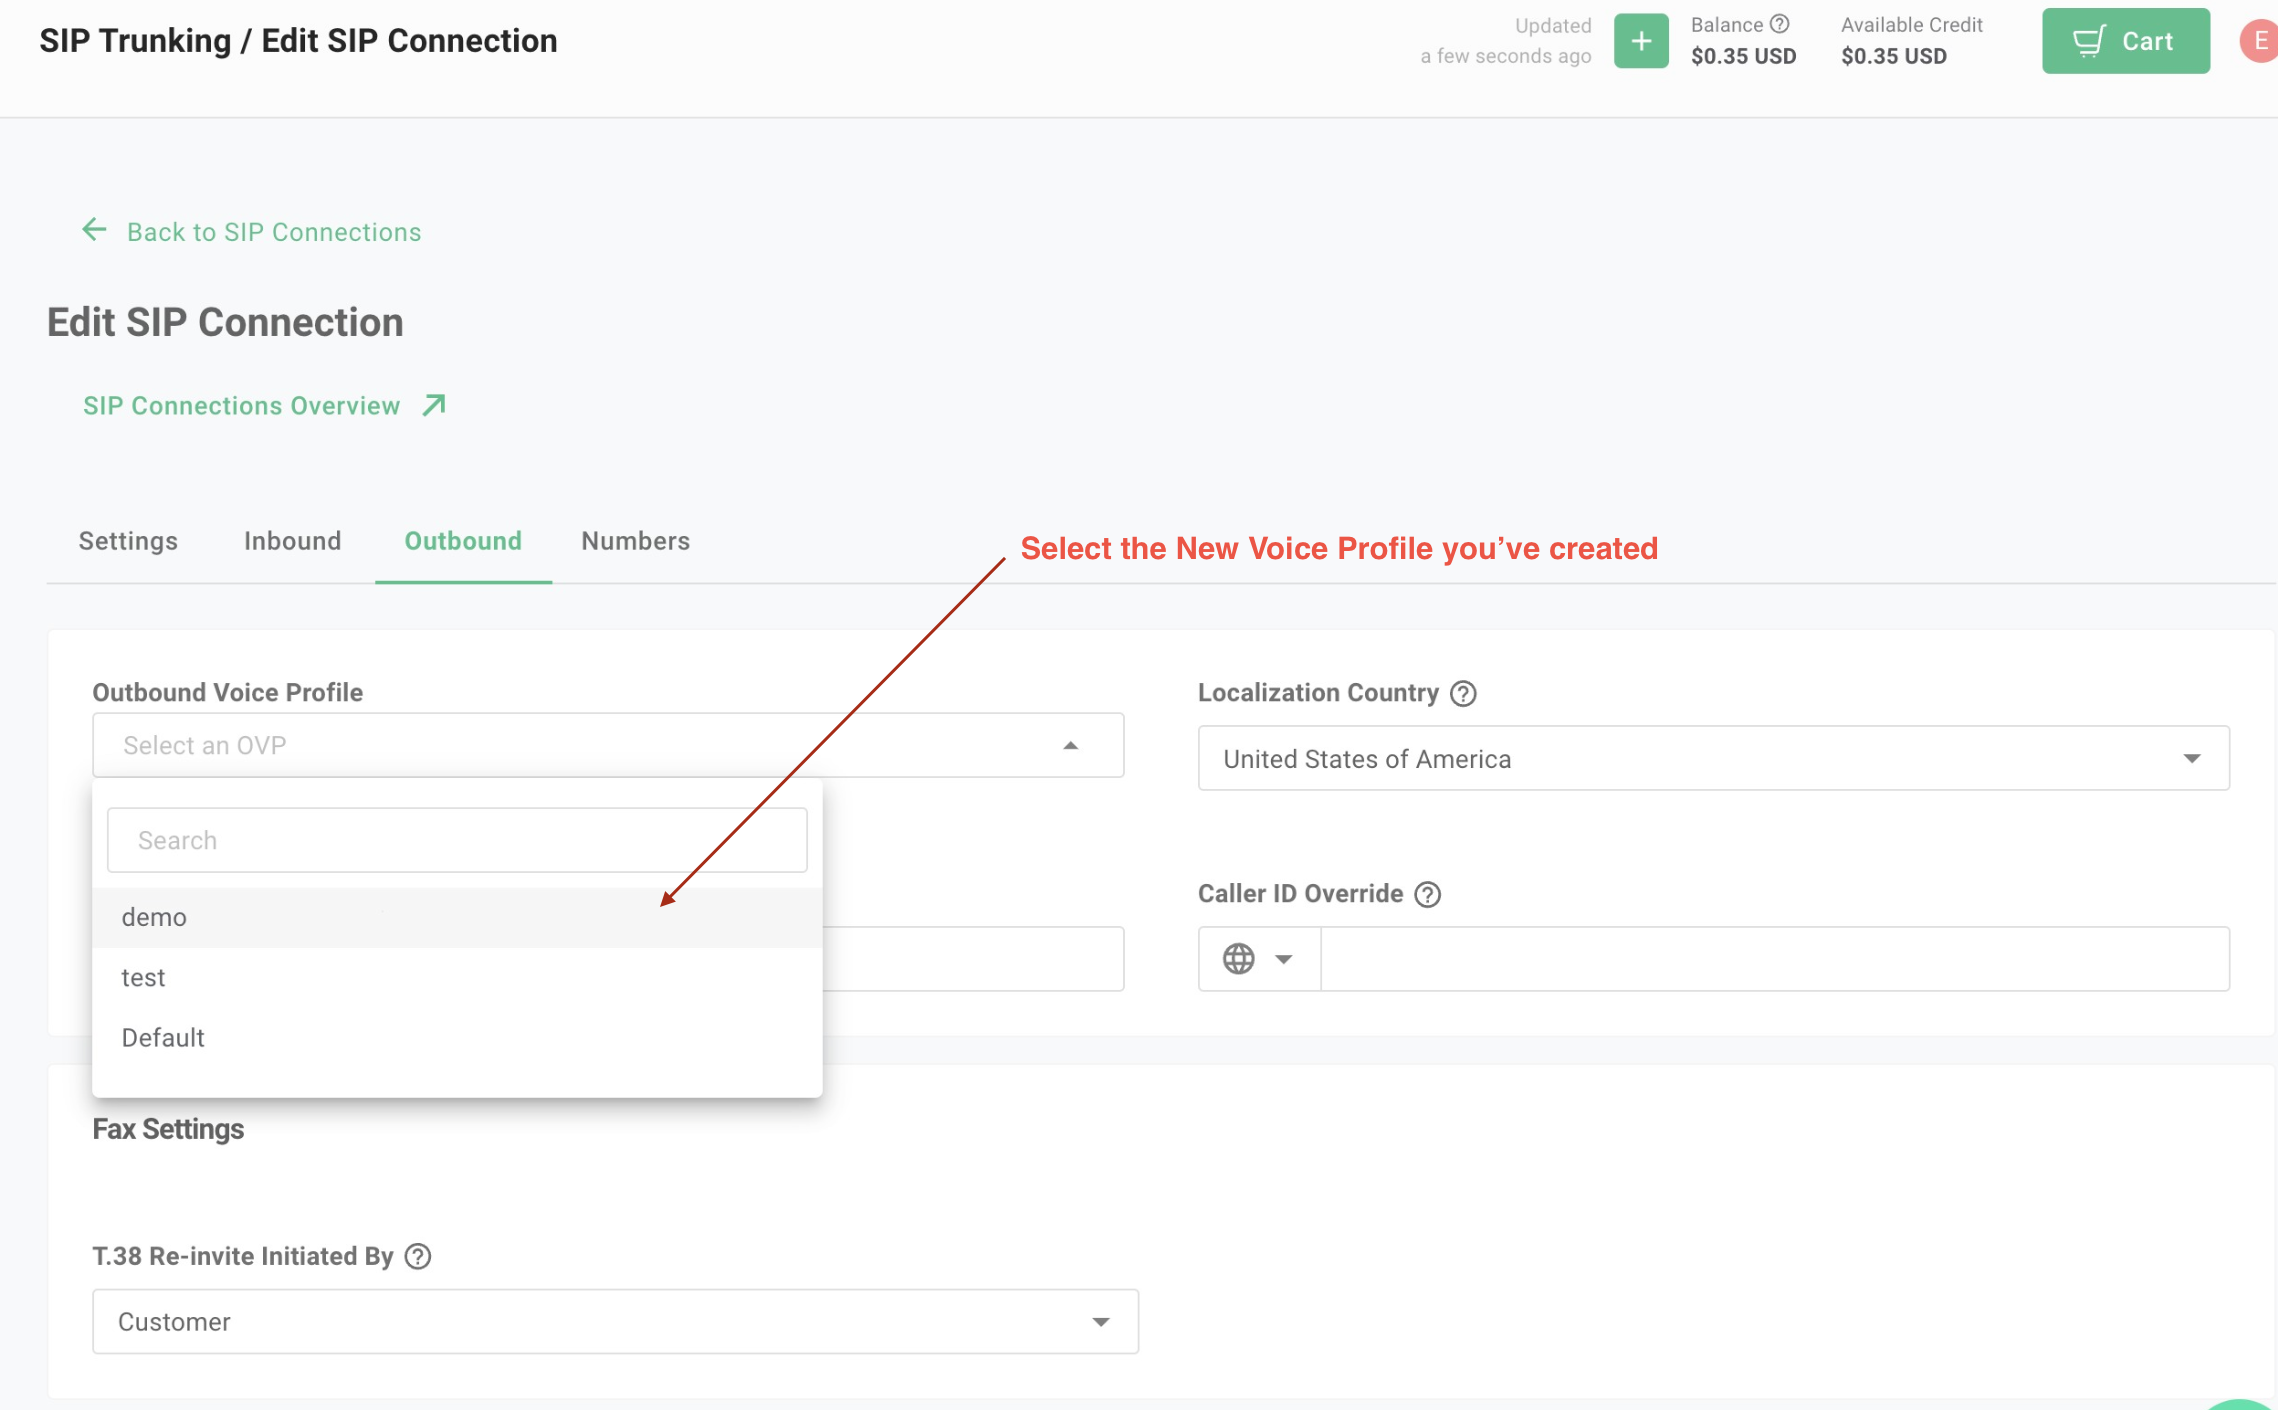
Go back to the SIP trunk, open the Outbound tab, and select the voice profile you created.
-
-
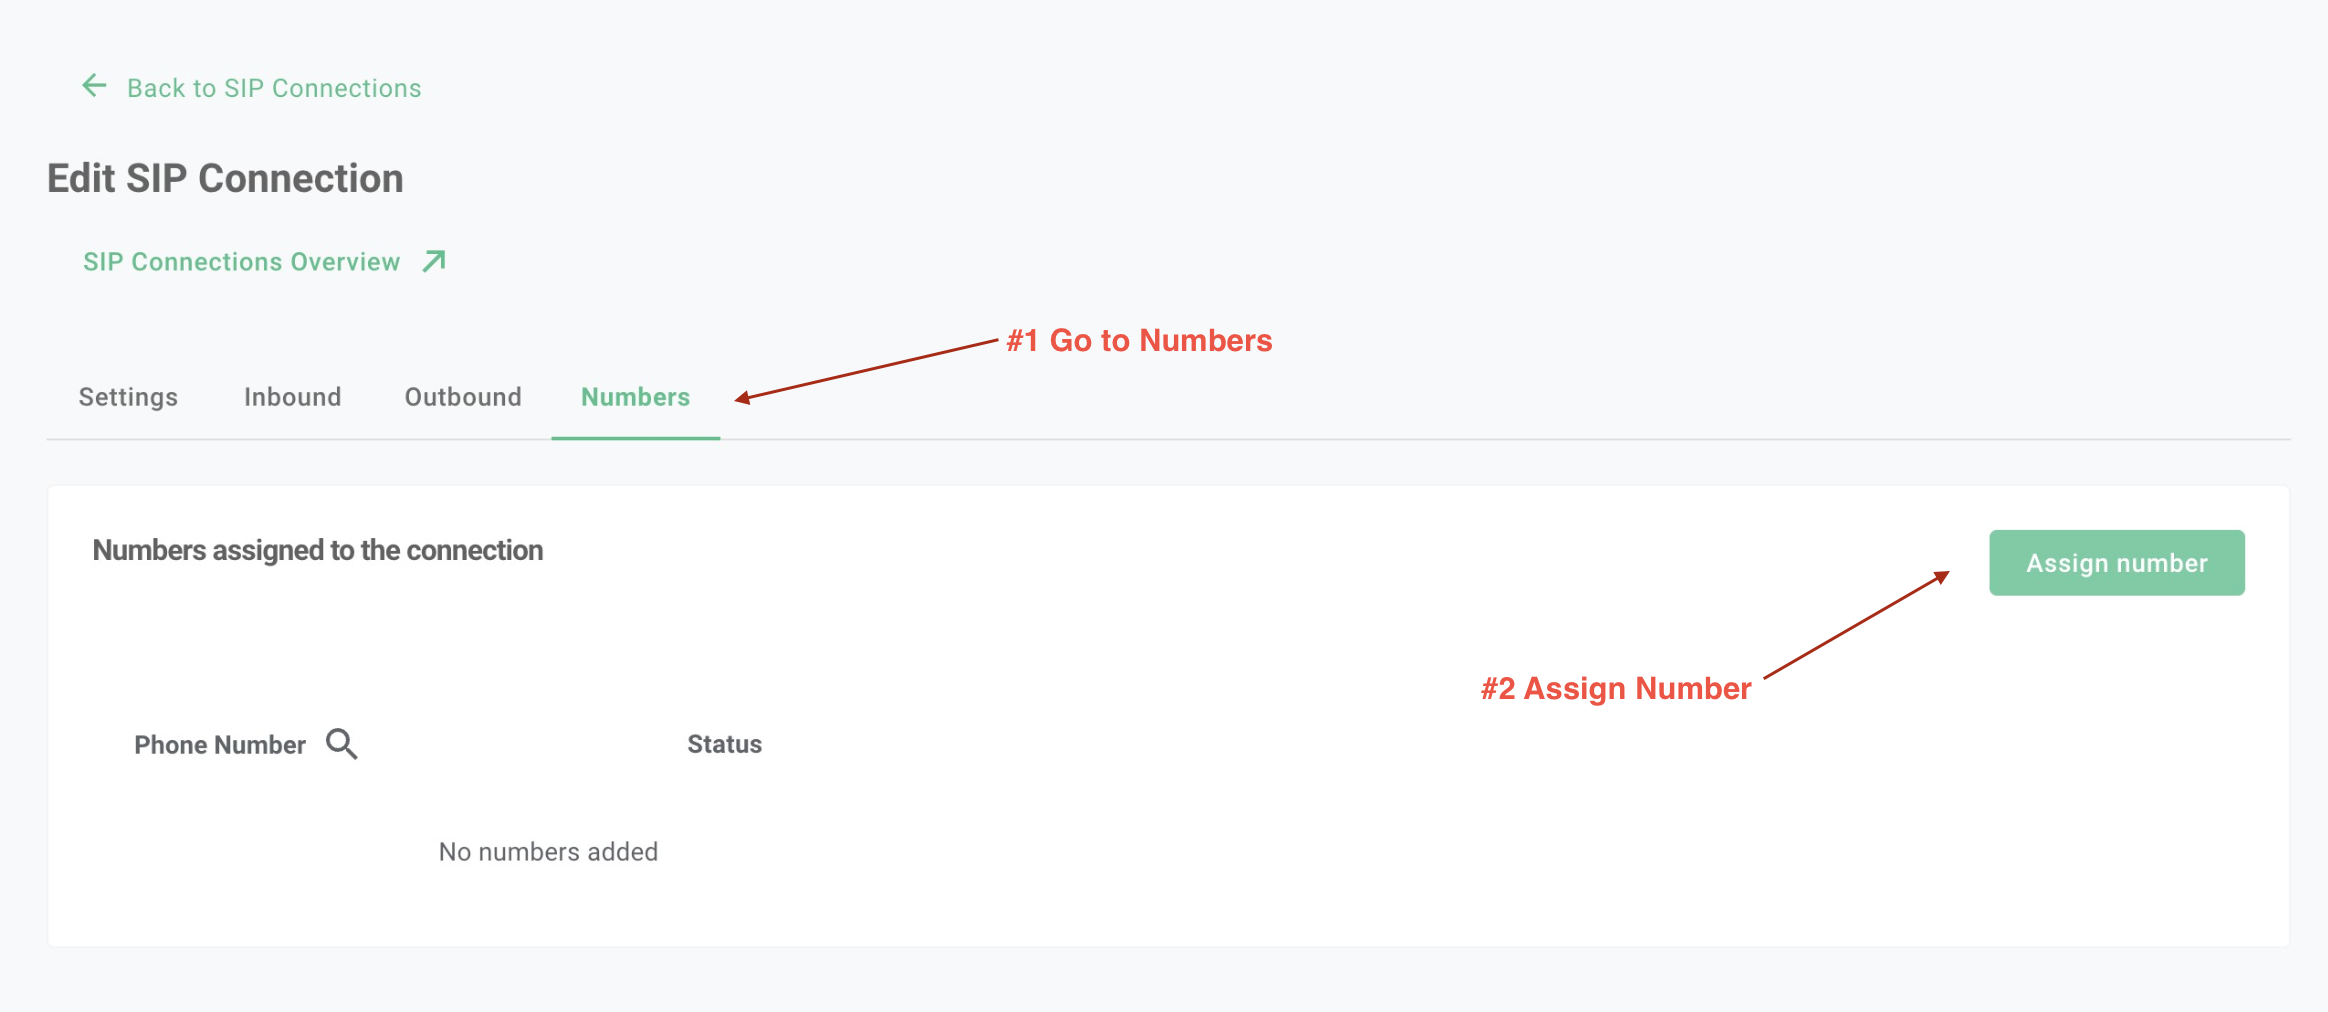
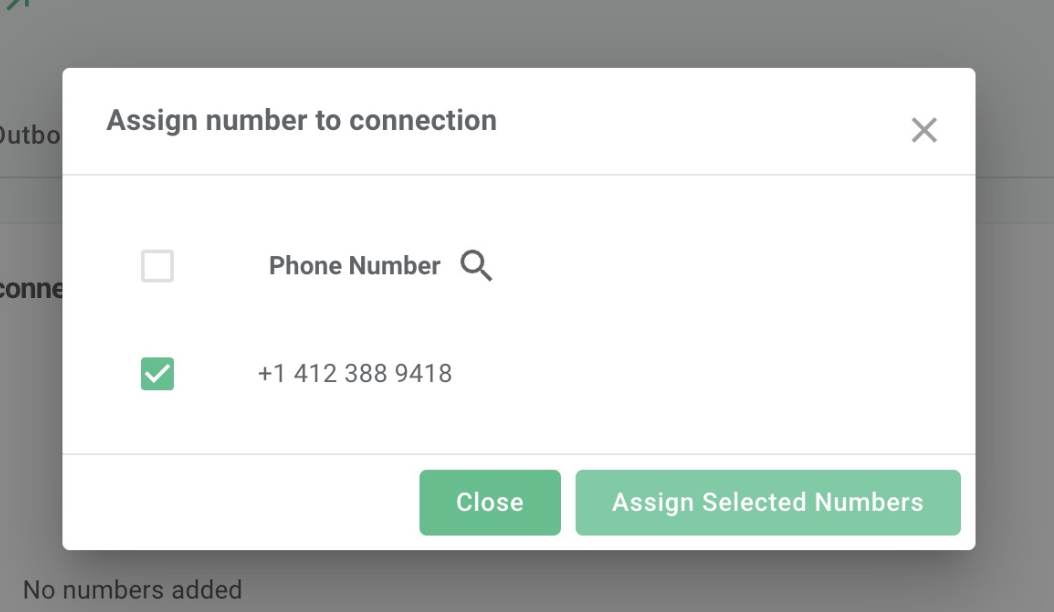
6. Numbers. Buy numbers in Telnyx, or move your existing numbers, and assign them to the trunk.
-
Number import
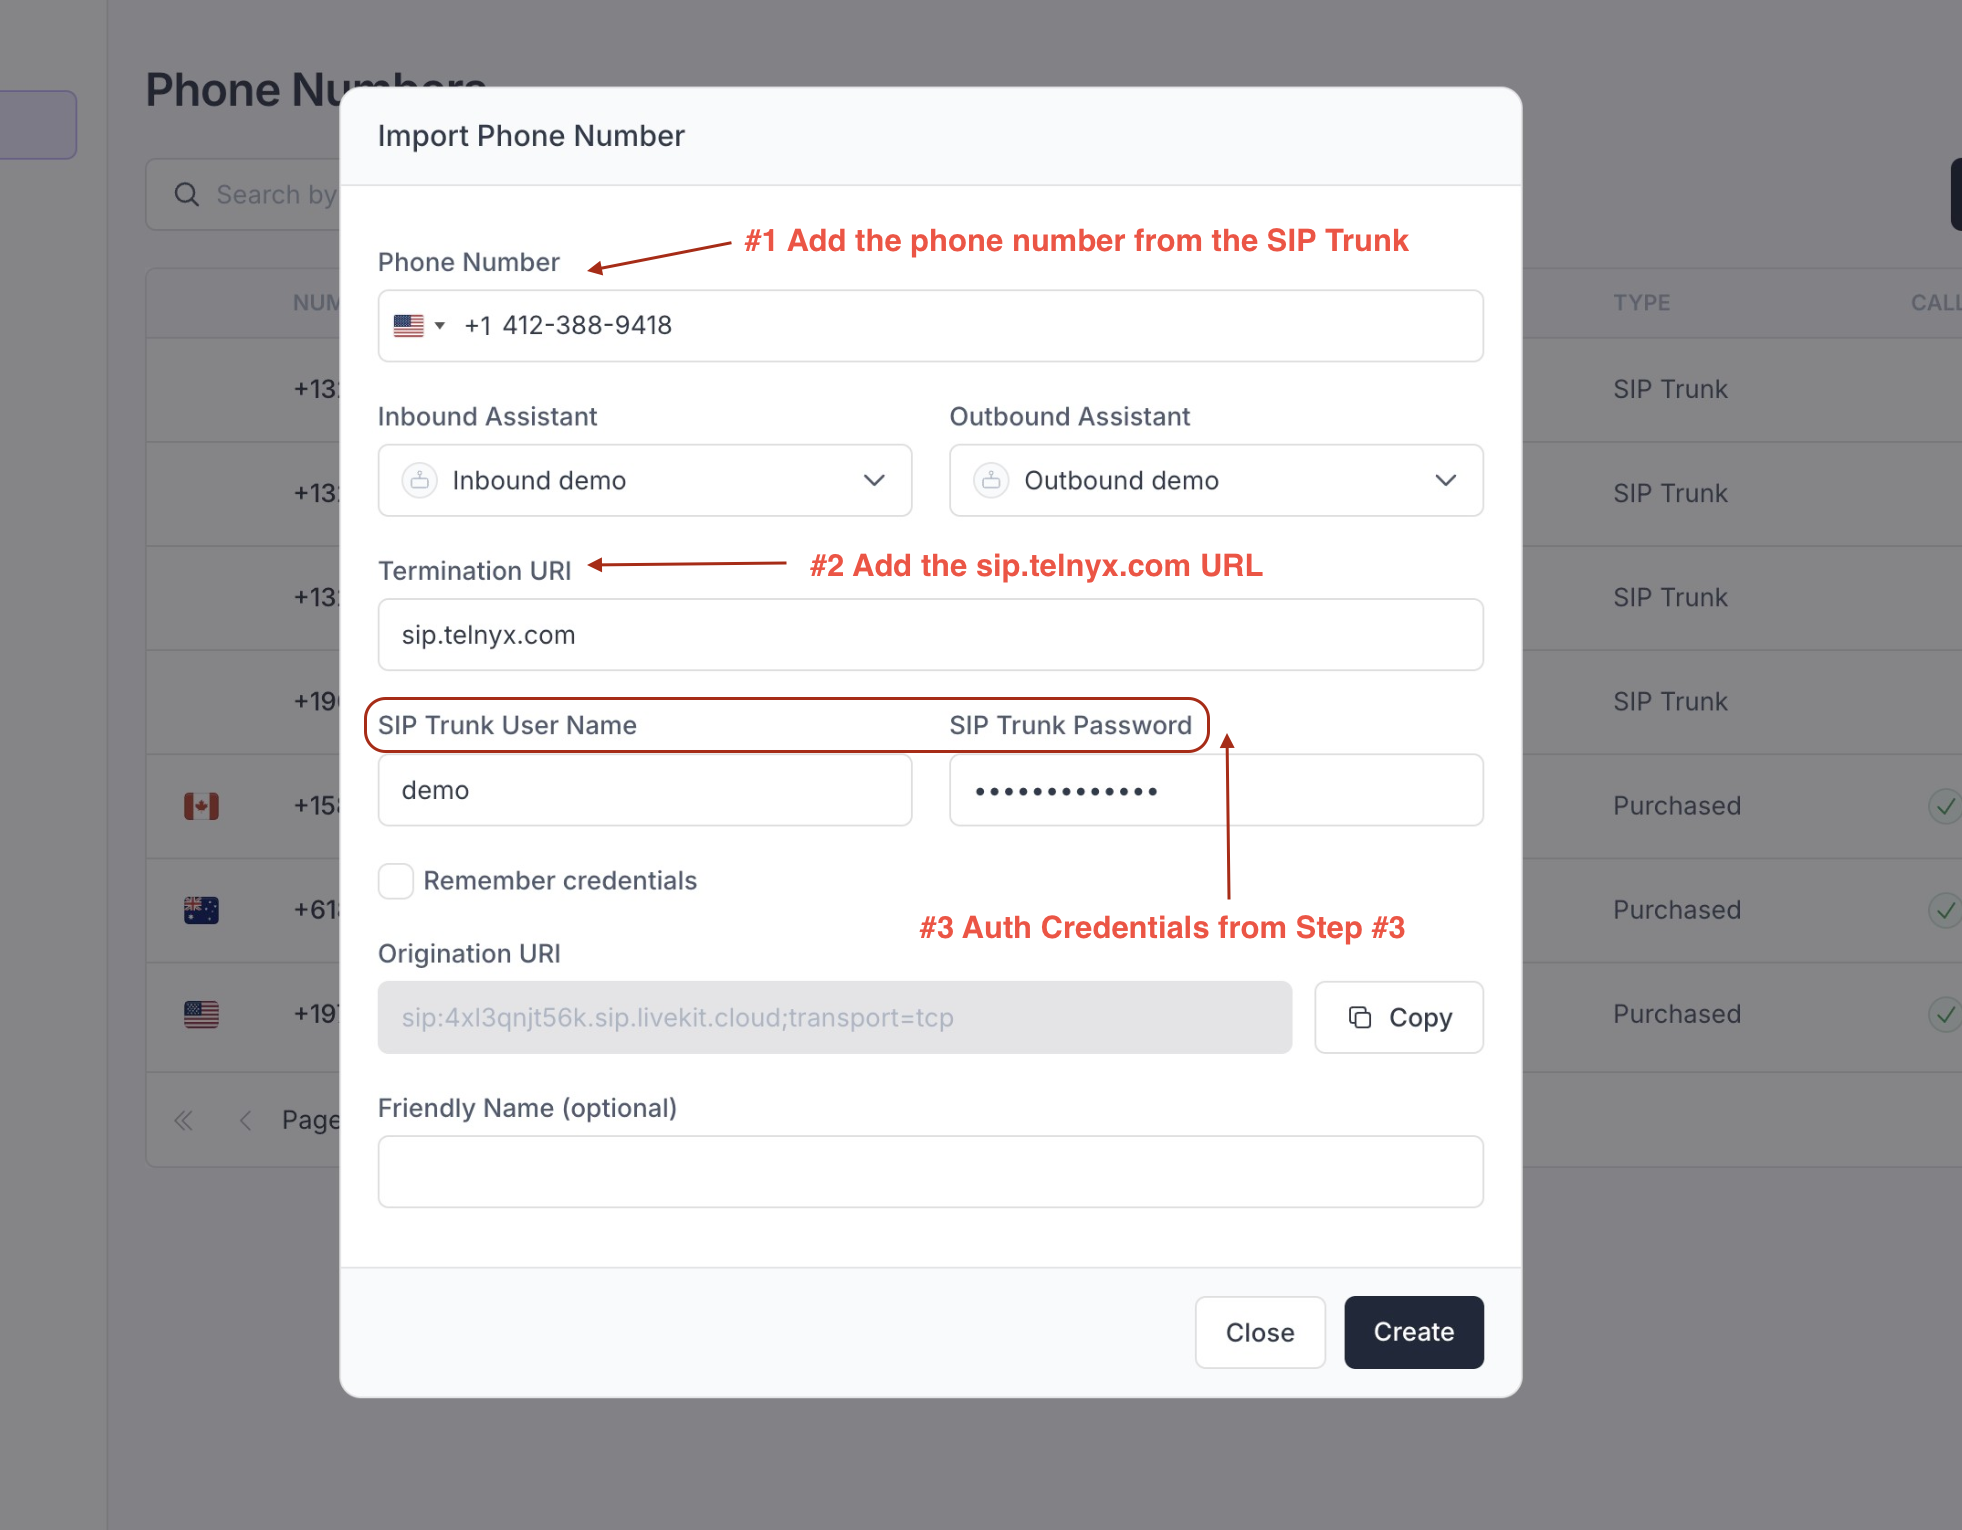
Import each number into Synthflow as a custom number, so Synthflow knows how to route its calls.
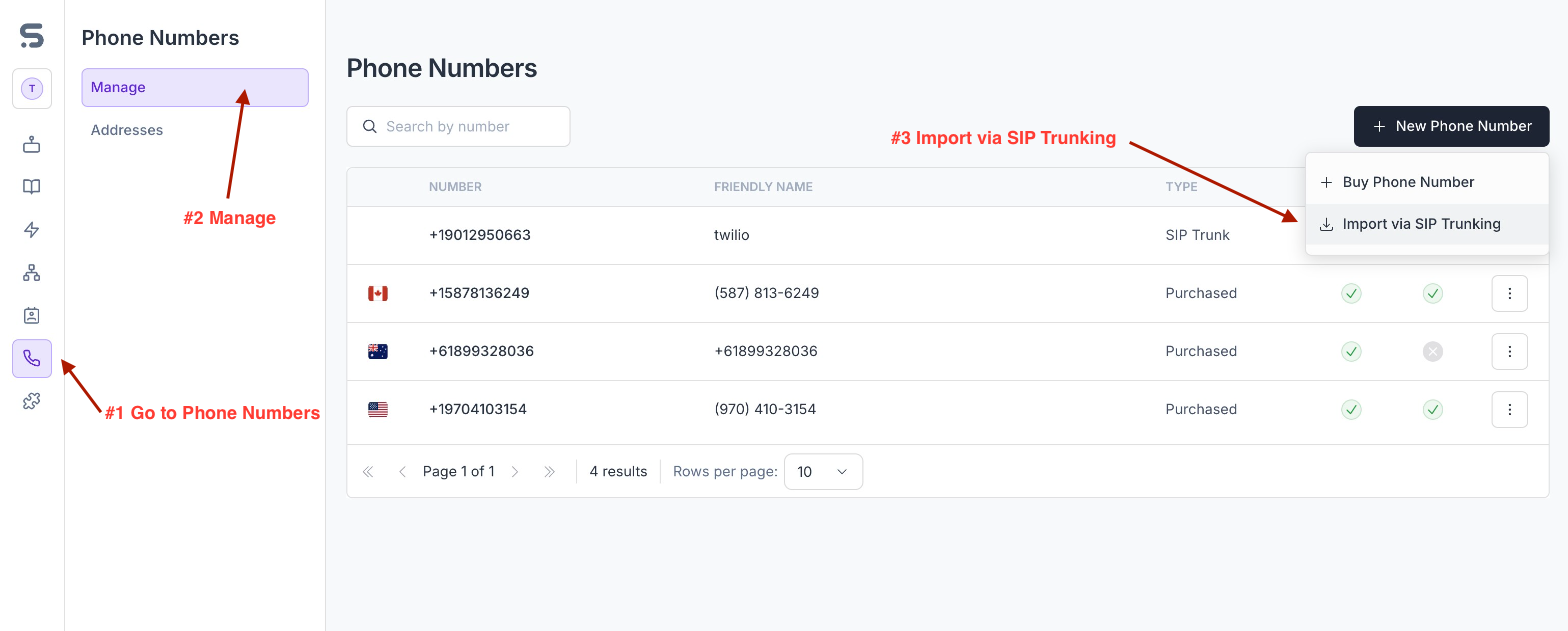
- Enter
sip.telnyx.comas the termination SIP URI. - Enter the username and password from step 3.
The imported number places and receives calls like a number bought in Synthflow. To stop using it, delete it from Phone Numbers, or with the Delete a phone number API.