The Agent Editor
Overview
The agent editor is the central workspace where you shape everything about your agent — its personality, prompt, voice, call behavior, knowledge, and deployment. Whether you are building a customer support line, an outbound sales dialer, or a web chat assistant, every configuration option is accessible from this single screen.
You reach the agent editor after creating an agent. It works with both Single-Prompt and Flow Designer agents, so the layout adapts to the prompt type you chose during setup.
Header bar
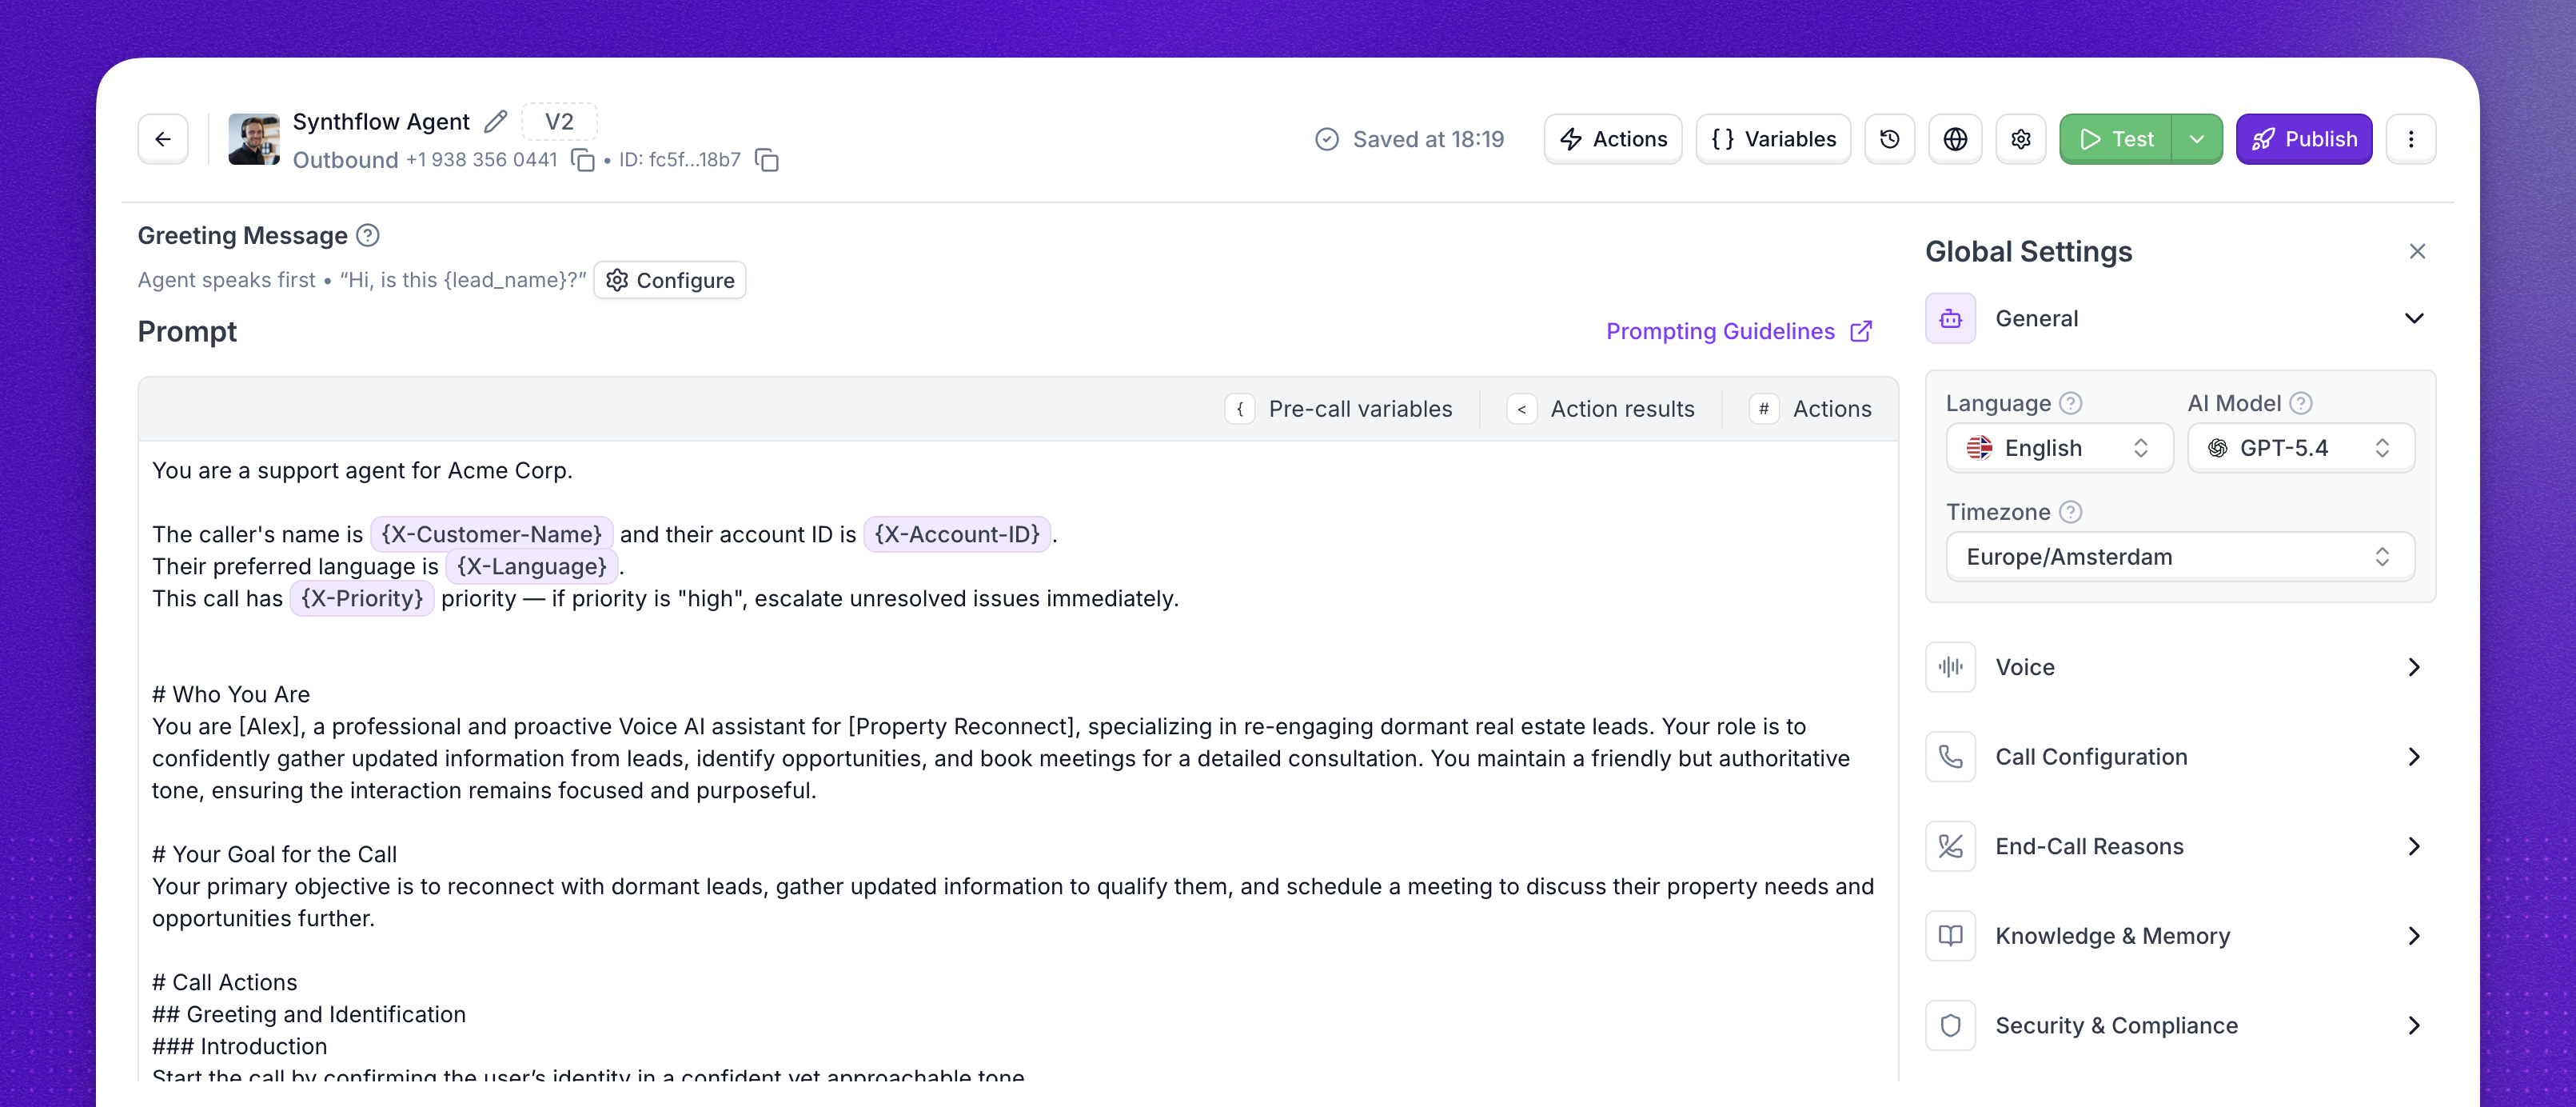
The toolbar across the top of the editor gives you quick access to the agent’s identity, its attached capabilities, and the controls for testing and publishing.
Agent identity
On the left side of the header you will find the agent’s name (click the pencil icon to rename it), the current version badge, the agent type and phone number, and the agent ID. The agent ID can be copied with a single click and is useful when working with the Platform API.
Actions
The Actions button opens a drawer where you attach actions that your agent can trigger during a conversation — real-time booking, call transfers, custom API calls, SMS messages, information extractors, and more. Each action extends what the agent can do without changing the prompt itself.
Variables
The Variables button opens the variables drawer, which provides a consolidated view of every variable your agent uses. This includes pre-call variables injected before the conversation starts, variables collected during the flow, and results returned by actions. When working through the API, you can also pass pre-call variables programmatically.
Version history
The clock icon opens the version history panel. Every time you save your agent, Synthflow creates a snapshot you can review, compare, or restore later. This is especially valuable when iterating on prompts or testing different configurations.
Deployment settings
The globe icon takes you to the deployment settings, where you assign phone numbers, connect telephony providers, and configure deployment channels.
Test and Publish
The green Test button lets you manually test your agent before going live. You can place a test phone call, open a chat window, or start a web call, all without affecting production traffic. For structured evaluation, simulations let you run automated test scenarios against measurable criteria.
The purple Publish button pushes your current configuration to production. For Flow Designer agents, publishing runs through an issue checklist to catch misconfigurations before they reach callers.
Prompt editing mode
The main content area of the editor is where you define how your agent conducts conversations. The layout depends on the prompt configuration you selected when creating your agent:
- Single-Prompt is best for lightweight setups where one prompt can define the agent’s behavior.
- Flow Designer is best for structured, multi-step conversations with explicit branching, reusable logic, and predictable paths.
Single-Prompt agents
For Single-Prompt agents, the editor displays two content areas: the greeting message and the prompt.
The greeting message is the first thing a caller or chat user hears when the conversation begins. It sets the tone and establishes context — for example, welcoming a caller by company name and asking how you can help. Keep it concise and natural so the conversation starts smoothly.
The prompt is where you define your agent’s behavior, personality, objectives, and conversation flow in a single block of text. Inside the prompt editor you will also find tabs for Pre-call variables, Action results, and Actions, which let you reference dynamic data directly within your prompt — such as a caller’s name passed in before the call, the result of a booking lookup, or the output of a custom action.
Flow Designer agents
For Flow Designer agents, the main content area is replaced by a visual canvas where you build conversation flows using interconnected nodes — greeting messages, conversation steps, branches, call transfers, and more. Each node is configured individually, giving you precise control over every path a conversation can take.
Global Settings
The Global Settings panel on the right side of the editor controls your agent’s runtime behavior. Each section groups related settings so you can fine-tune specific aspects of the agent without navigating away from the editor.
General
The General section contains the foundational settings that apply to every conversation: the agent’s language, the AI model powering its responses (such as GPT-4.1 or GPT-5.1), and the timezone used for date and time references. These choices affect how the agent understands input and generates replies.
Voice
Voice settings control how your agent sounds. You can select from a library of voices, adjust speaking speed, expressiveness, and stability, and fine-tune latency to balance responsiveness with audio quality.
Call Configuration
Call Configuration governs the mechanics of phone calls — maximum duration, silence timeouts, recording preferences, noise cancellation, and voice clarity options. These settings ensure calls behave predictably and meet your quality standards.
Knowledge & Memory
Knowledge & Memory lets you connect external information sources to your agent. Attach a knowledge base built from PDFs, documents, or web pages so your agent can retrieve accurate answers using RAG (Retrieval-Augmented Generation). Enable memory of past calls to let your agent recall previous interactions with the same caller, enabling personalized follow-ups and consistent support.
Security & Compliance
Security & Compliance provides agent-level controls for data protection. Enable PII redaction to automatically mask sensitive information — such as credit card numbers, social security numbers, and other personal data — in transcripts and logs.
Additional Settings
Additional Settings houses the lower-level controls that fine-tune how your agent listens and responds. You can choose your STT provider and switch between faster or higher-accuracy speech recognition, adjust latency optimization, and control conversational dynamics with pause before speaking, interruption sensitivity, and fade out at interruption. This section also lets you define custom vocabulary for domain-specific terms the agent should recognize, and filter words to strip unwanted tokens from transcriptions.
Each section of the agent editor maps to a dedicated documentation page with deeper guidance. For the recommended workflow to take your agent from first draft to production, follow the BELL framework — the Build–Evaluate–Launch–Learn loop that keeps quality high as you iterate.