How to: SIP with Vonage (Nexmo)
Setting Up SIP Trunking with Vonage (Nexmo)
This guide details the steps to configure SIP Trunking using Vonage (formerly Nexmo). Follow the instructions below to set up your SIP Trunk and integrate it with your platform.
Note
SIP trunking is only available on the Synthflow Enterprise Plan.
Vonage Set-up
1. Access the SIP Trunking Dashboard
Navigate to the Vonage SIP Dashboard.
2. Create a New SIP Trunk
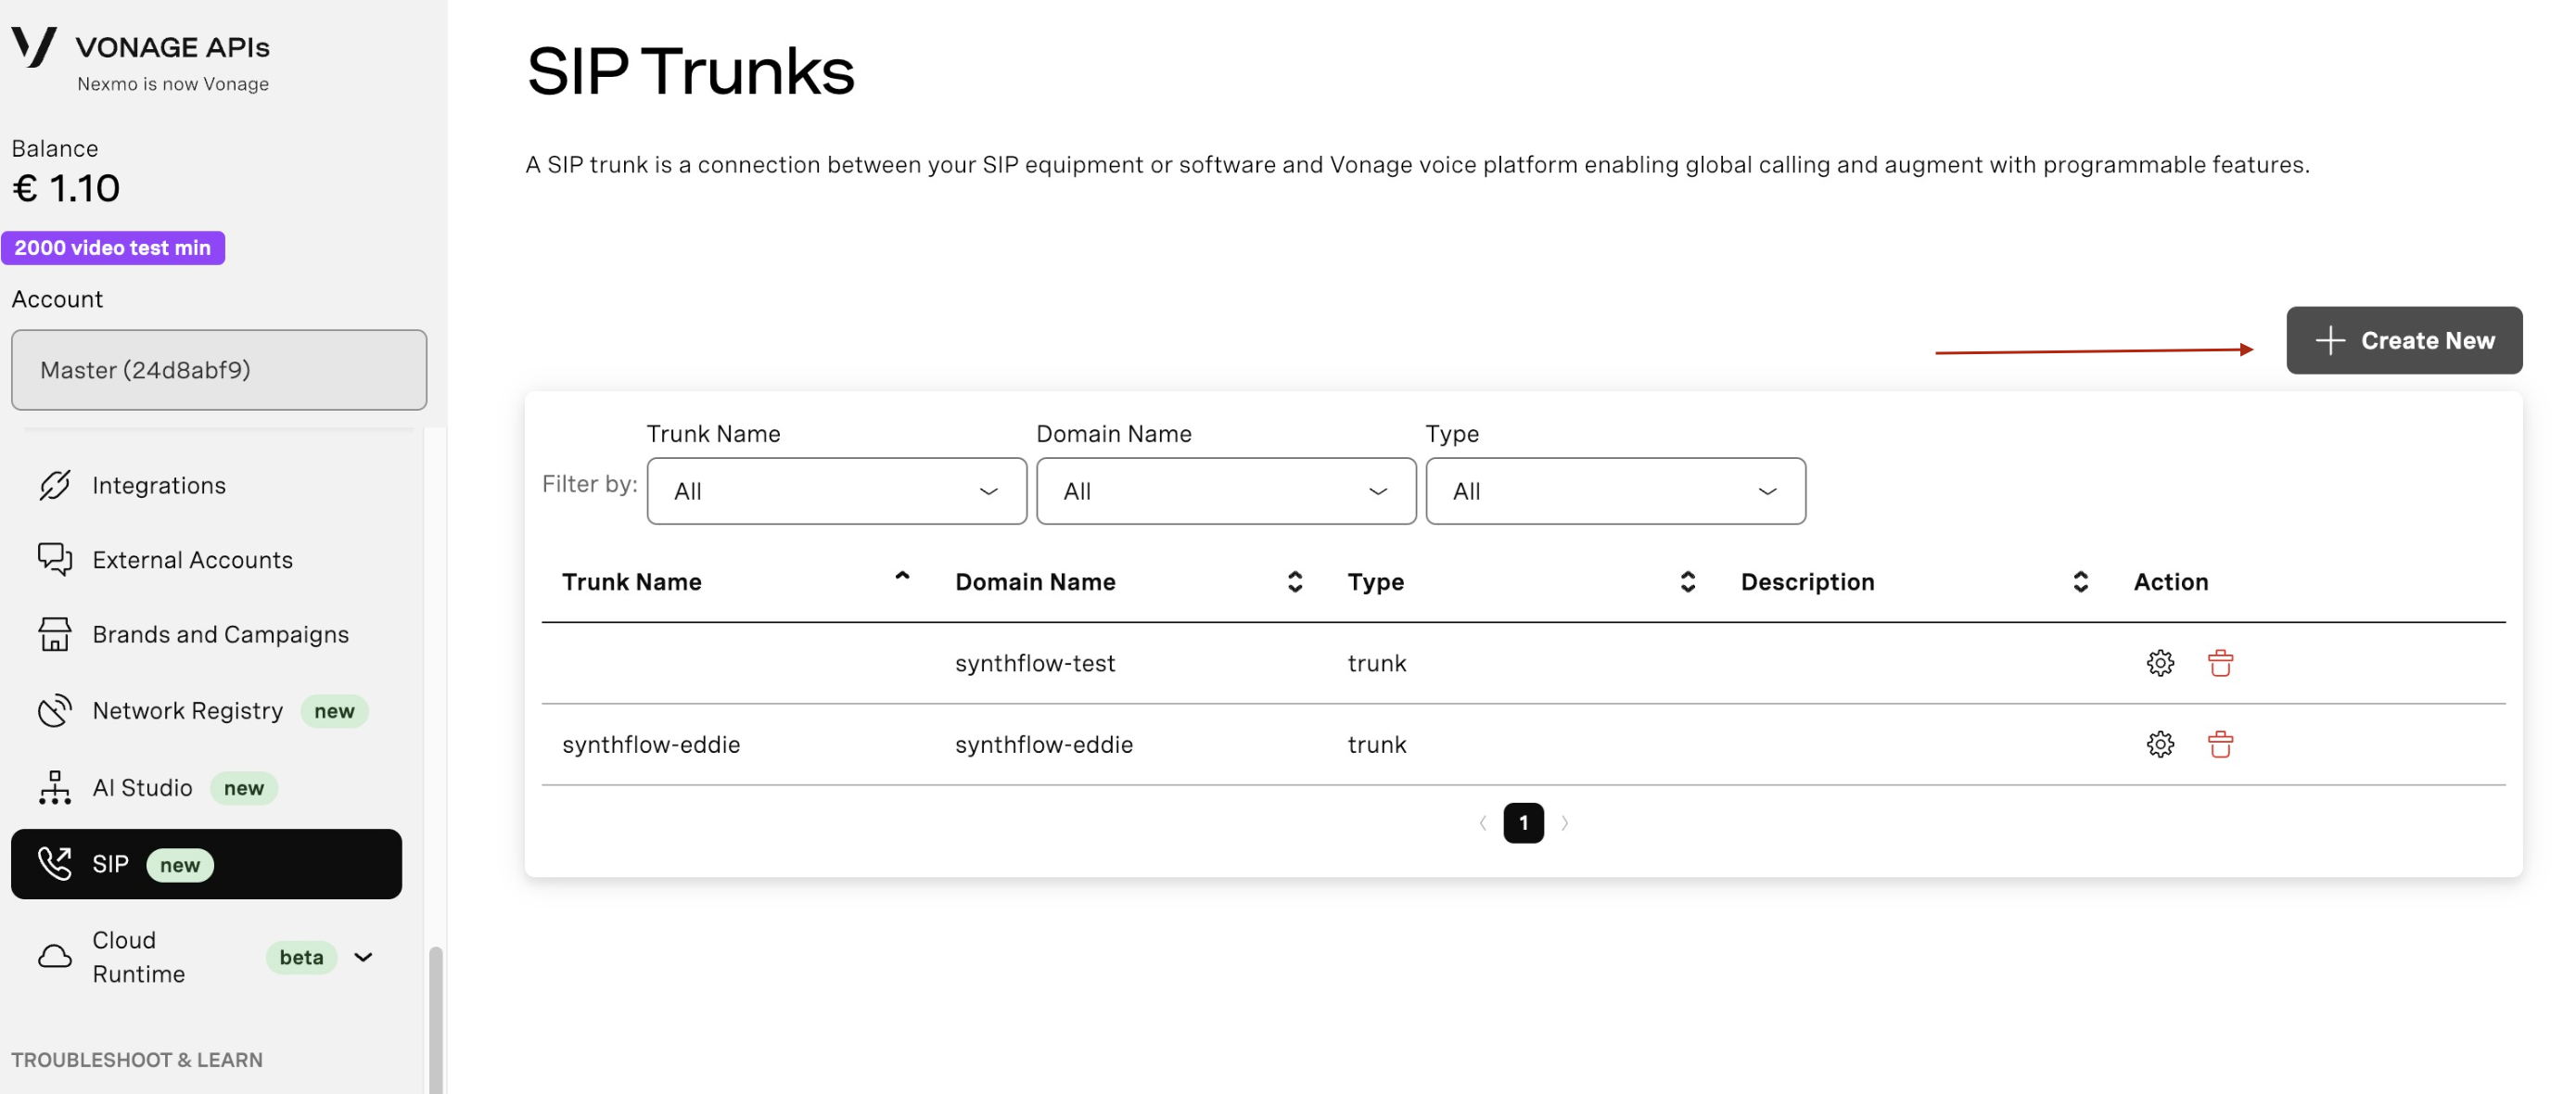
- Click "New SIP Trunk".
- Enter Trunk Name (e.g., "demosip").
- Save and configure the trunk.
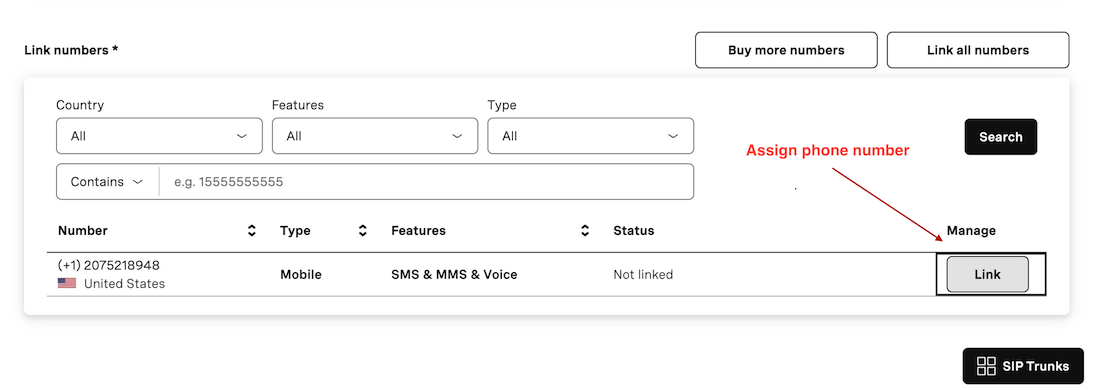
3. Add SIP url in Vonage & Assign Phone no. sip:sipin.synthflow.ai:35681
sip:sipin.synthflow.ai:35681- Select the new Sip Trunk.
- Paste the SIP Url
sip:sipin.synthflow.ai:35681.
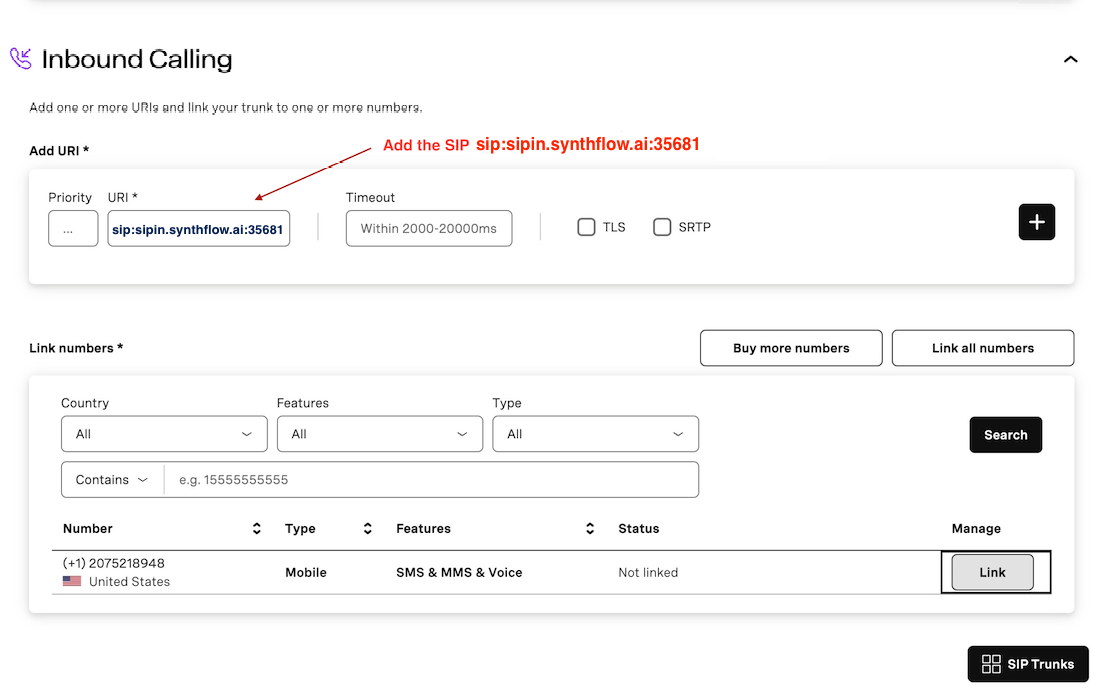
After that Select phone numbers you want to use
4. Configure SIP Authentication Credentials
-
Access the SIP Credentials tab.
-
Click "Add Credentials", then create a username and password for authentication.
-

User key = username; Secret = password; For later use in Synthflow.
Synthflow Set-up
1. Import Numbers to Synthflow.ai
Now that the number is set up with your elastic SIP trunking, you need to import the number to Synthflow.ai so that we will know how to route the call.
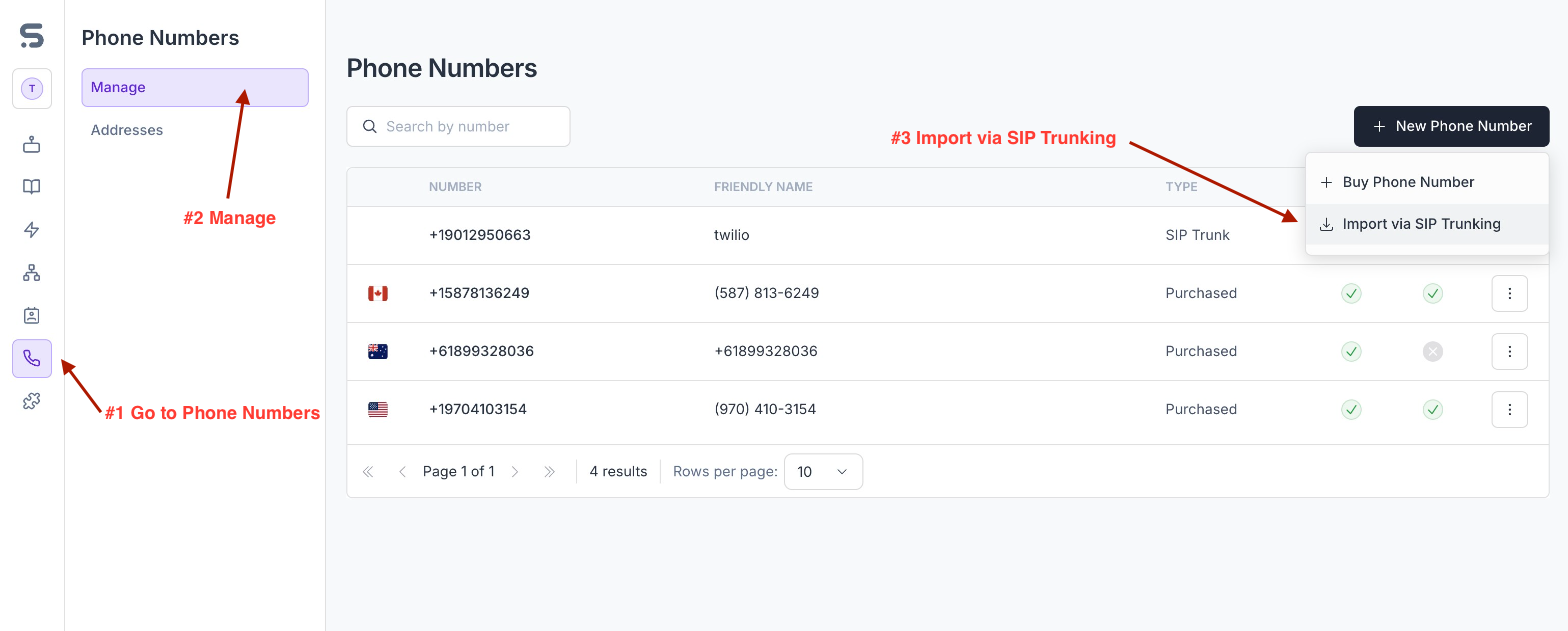
-
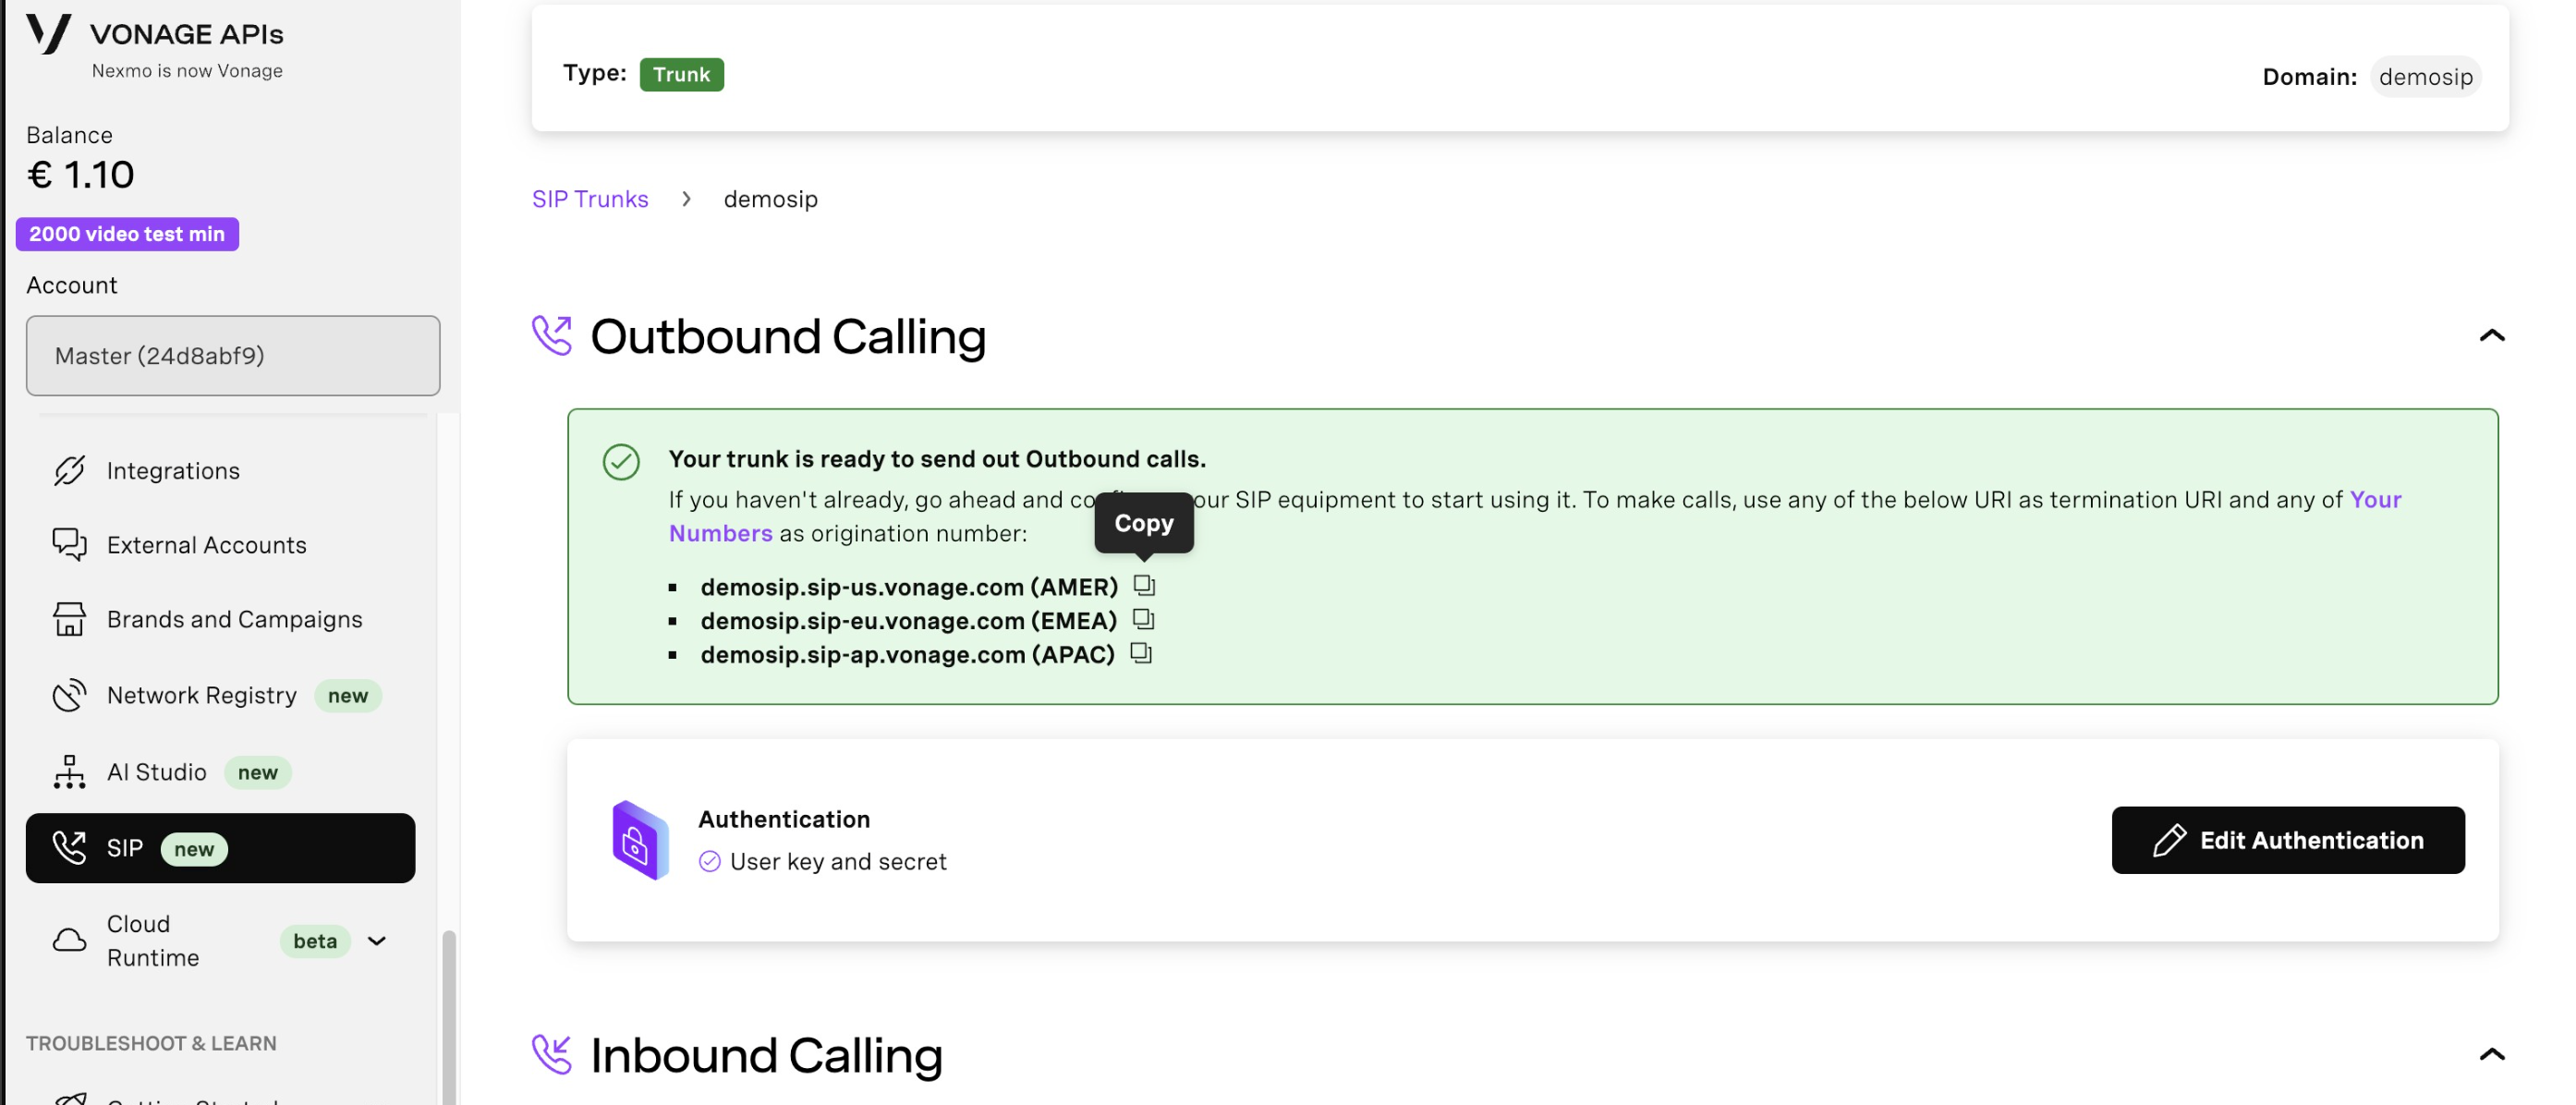
Here, you will supply the termination SIP URIwhich is different depending on the location.
- For AMER: name.sip-us-vonage.com
- For EMEA: name.sip-eu-vonage.com
- For APAC: name.sip-ap-vonage.com
- name is what you've created in step 2. Create a New Sip Trunk, but you can find the correct one under SIP tab inside Vonage App
-
You will need to supply the username and password as well. User key = username; Secret = password;
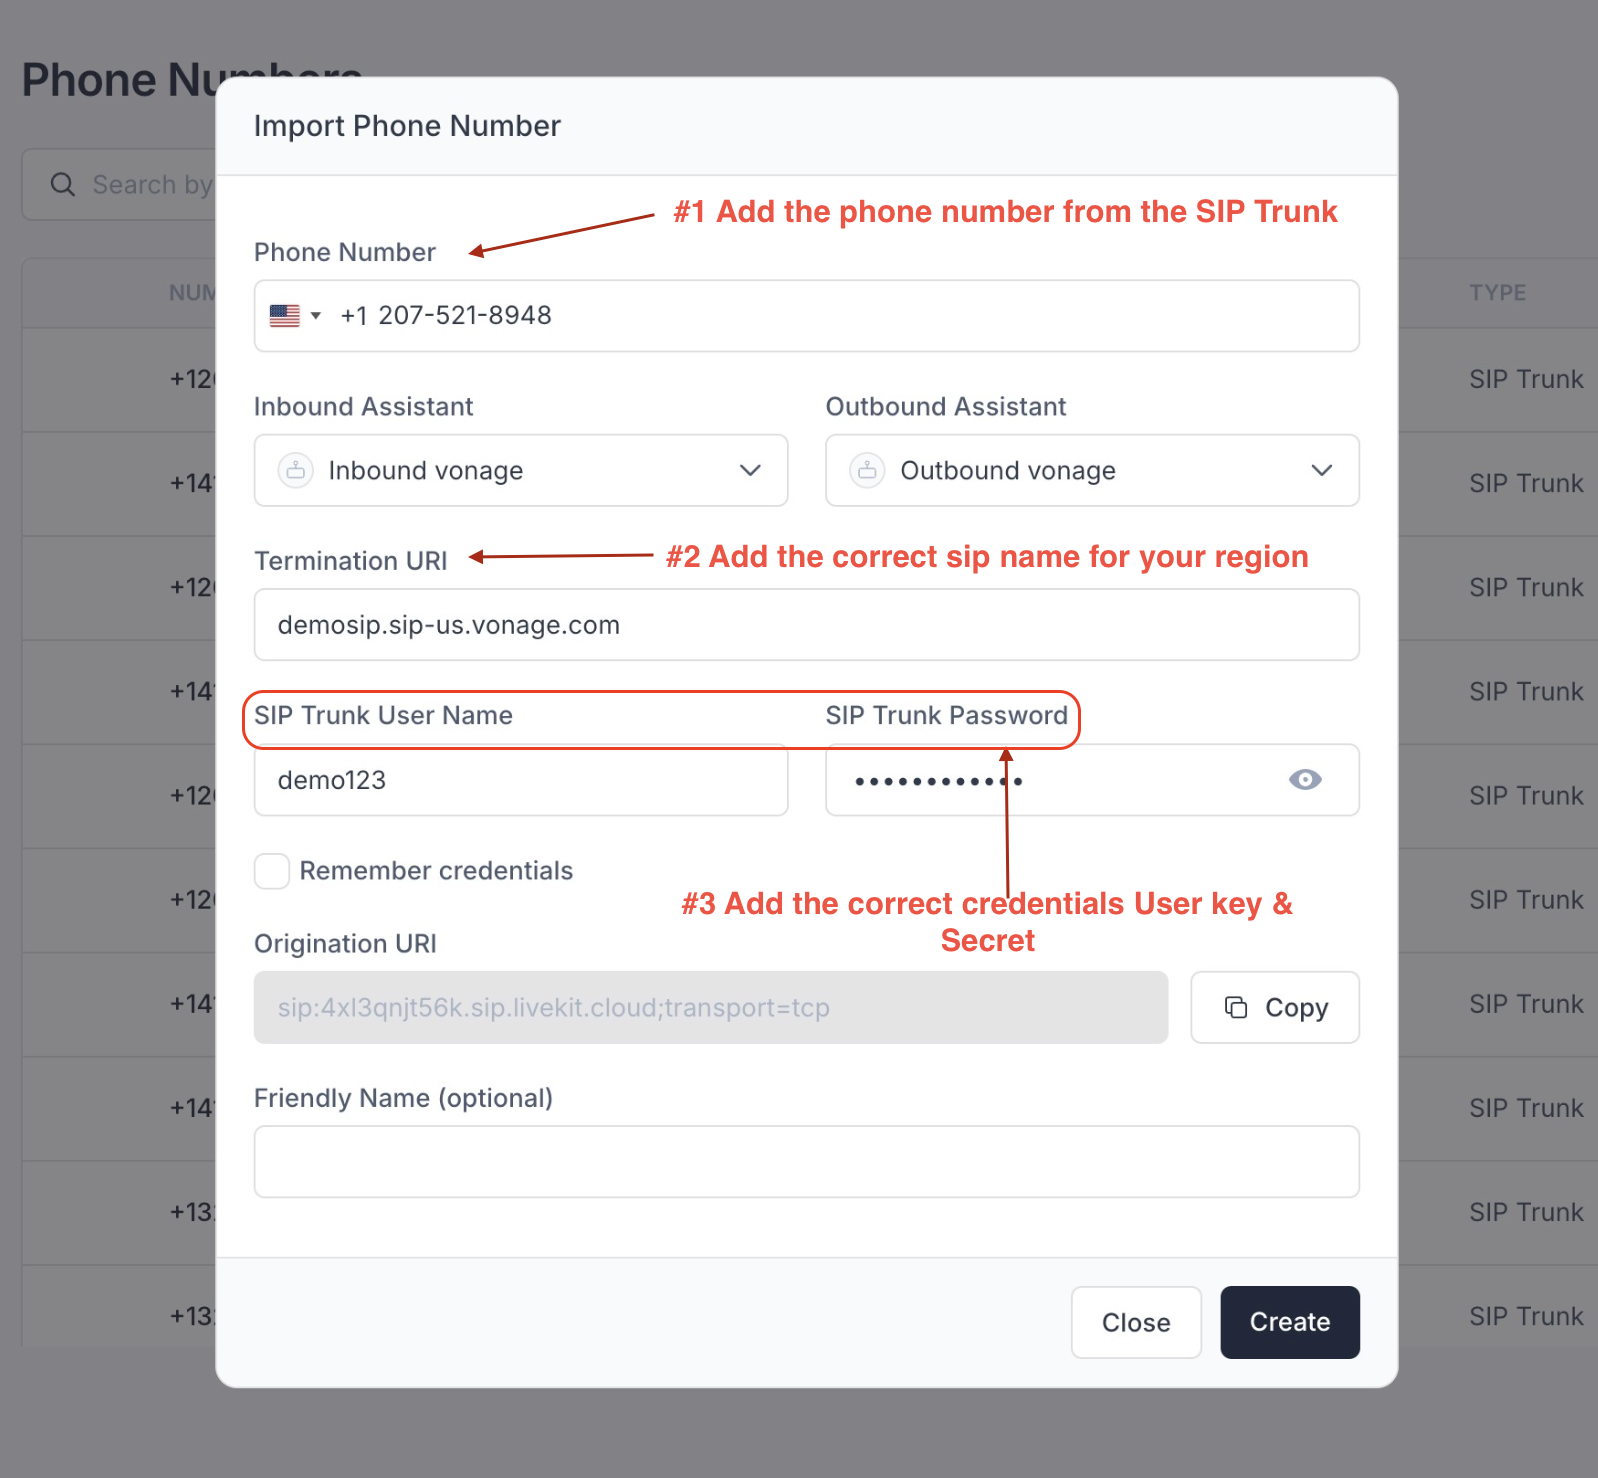
Once the number is imported, you can make and receive calls with this number just like a number you purchased from Synthflow.ai.
If you wish for Synthflow.ai to stop using this number, you can delete it from the dashboard or via the Delete Number API.
Updated 4 months ago

